 |
|
 04-19-2014, 06:46 AM
|
#21
|
Rivet Master 
1973 27' Overlander
Portsmouth
, Virginia
Join Date: Jun 2012
Posts: 776
|
Starting on the new sink and cooktop cabinet
Finally I'm to the point in the project I like the most, constructing the new cabinet that will house the sink and the cooktop. Last year while cruising through one of the local Habitat ReStores I came across a corian countertop with a single sink built in for 90 bucks. It was quite long which was a plus since that would give me extra material to work with. It came home and sat out on the back deck for many months till this last week when I put it on sawhorses and started to cut it down to size.
Using the dish rack to figure out where to make the cuts. I didnt want the oven door to be too close or too far.

Once the top was cut down to about 64" long, I made a cut to decrease the depth down to 28" from its existing 32" dimension. It's not that I wouldn't love to have it that deep, but we are talking Airstreams and they are fairly narrow so I had to make some adjustments for that. I will use the cutoff for part of the backsplash.
This counter had a 3 layer edge, so I took two strips of cutoff corian and glued it up to the raw edge nearest the door. I then cut it straight with the tracksaw and routed a new edge. I also trimmed the front edge about 1/4" and routed that as well as there were some dings from moving it around. If I didn't mention it, corian is pretty heavy and this counter was pretty large before cutting.
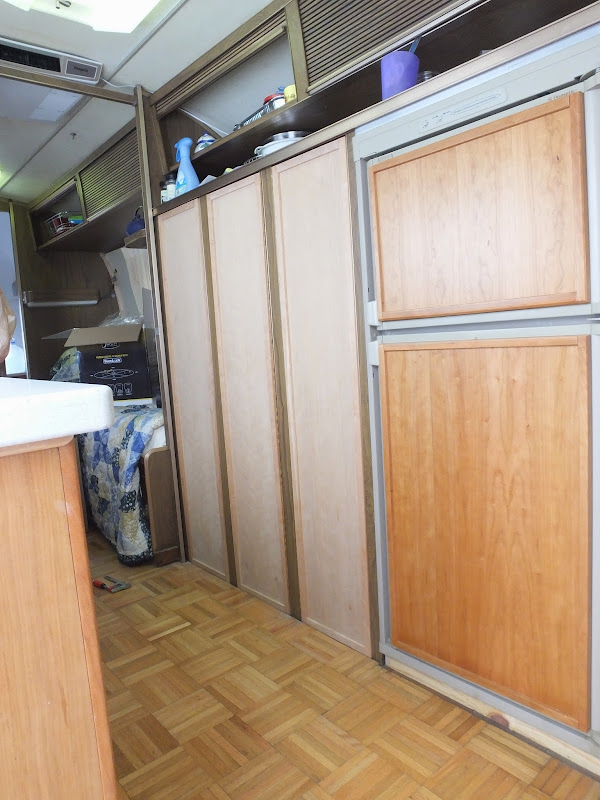
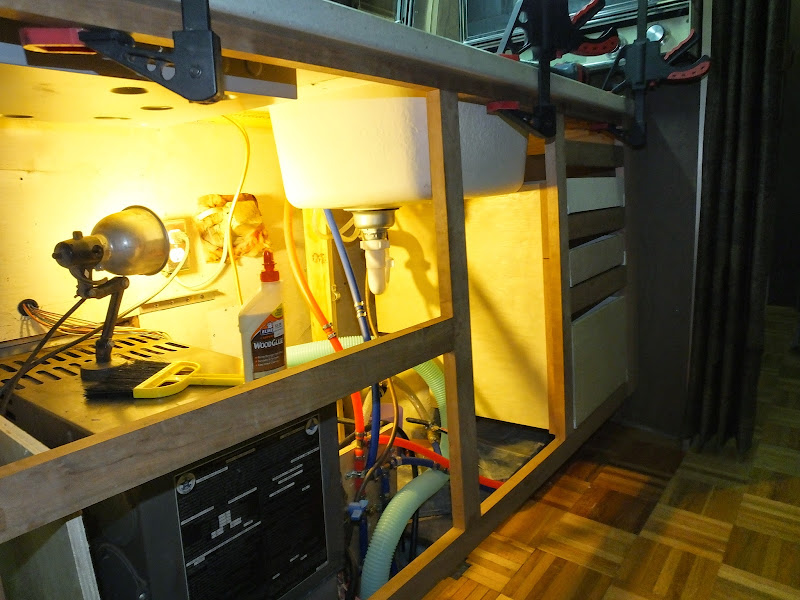
Inside the trailer, I decided to construct a support for the top that would be independent of the cabinet. I learned from working the bathroom last year that you cant build a cabinet whole and then bring it inside and sit it down like you would in a house. Not enough room and nothing is square and too many "things" to build around. In this case, I have to work around the heater, the water connections and the inner wheel fender.
The original counter was at 36" high so that is where this one is as well. I am using some scrap 3/4" ply that is tied to the back wall with aluminum tabs riveted in and screwed to the bottom of the wood. It is also supported with two vertical members screwed down to the subfloor. The existing partition that the oven sits in supports the right side and it will be supported in the front on each corner and in the middle.
See what I mean, lots of "crap" to work around:
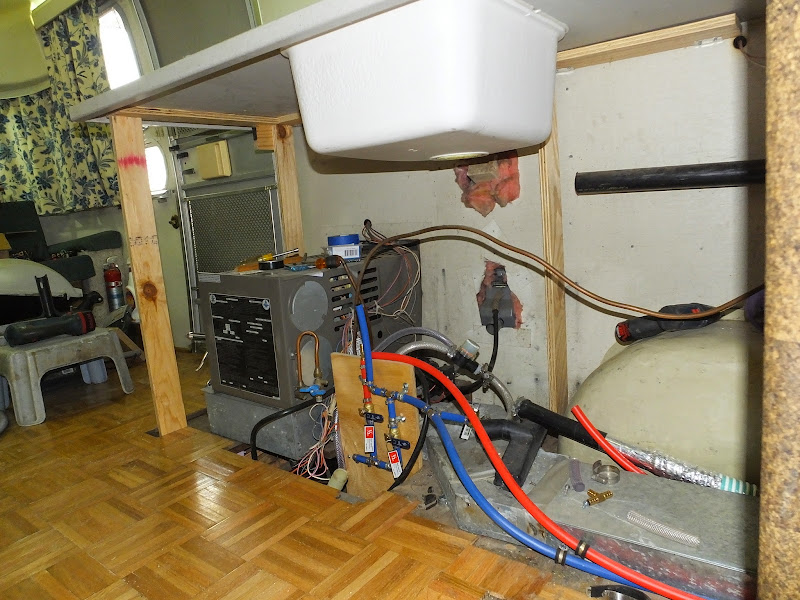

We will be mounting a new microwave underneath the counter, right above the heater and below the cooktop. I understand that heat could be an issue if the furnace is in use, but I doubt that we will be doing much camping in really cold weather and at some point you have to make design considerations due to existing space. In other words, there's no other place to put it and have some storage for pots and pans. So the next step will be to create an inner platform for the oven as well as wire in an outlet under the cabinet. I'll also create a floor above the heating duct on the right side for storage and to keep it all neat.
I wasn't sure what to make the outside of the cabinet with, I had thought of using some sort of birch veneer ply. I'm pretty much over rotary cut red oak which is what you see in most of the big box stores. So last week I went to the local lumber yard, Yukon Lumber in Norfolk to see what they had. As it turns out, they had two sheets of 1/2" straight cut cherry veneer ply sitting in the shed that I fell in love with. For those folks that are unfamiliar with how plywood is made, rotary sliced veneer is similar to how a pencil sharpener cuts, the log is rolled and a thin continuous veneer is sliced off. Unfortunately, the grain doesn't look like solid stock, the grain is exaggerated, it looks like plywood. Plain sawn or straight cut slices are like cutting a piece of cheese, each narrow slice is then glued together to make the veneer. Looks much more natural as if you glued several boards together to make a panel.
Of course the downside to falling in love with something is money. Both sheets set me back about 90 each. But rather than just make the one cabinet the plan is now to remake all the surrounding cabinetry with the cherry panels. And fortunately, I have a good amount of solid cherry lumber sitting in my wood rack collecting dust for a project that never got off the ground several years ago. So I got to work and started planning out how to cut this expensive stock so I would maximize each panel. As it turns out, I was able to download a free cutlist program that allowed me to take my measurements for each part and place them on the board so that they all fit. Again, the track saw is the go to tool here, it makes cuts as nice or better than a table saw so that very little finish cutting is needed if you plan well.
First board laid out ready to cut:
 Gotta have some place to put the cutting diagram:
 Probably the worst pollen day of the year to be outside:
 Making the long cuts. Hard to see, but this wood is really pretty stuff.

The rest of the day was spent planing down the rough cherry stock and starting to cut out parts for a face frame as well as rails and stiles for the doors. I also ordered a faucet off amazon as well as a new cooktop in stainless. I had tried to resurrect the old 4 burner cooktop, but it became apparent that it would never look all that great and I hated the thought of doing all this work just to put back an old appliance that would look shabby in comparison. Here is a shot of the new parts posing for a picture on the counter top:
Next week I will be cutting the side panel and making the face frame for the front once the inner cabinet work is done. I am also planning on using a single piece of .032 aluminum for the backsplash, so that should help neaten things up as well. This is a plan as you go project, which means its very easy for mistakes to be made, but there is really no other way to do it.
Again, thanks for looking and I hope to have this rig back on the road sometime in May, about a month longer that initial estimates. 
|

|

|


|
04-19-2014, 08:41 AM
|
#22
|
Rivet Master 
1972 31' Sovereign
Lexington
, Minnesota
Join Date: Feb 2009
Posts: 3,991
|
Bob, we put a full RV range and oven on top of our furnace. The key is to make sure you keep the recommended airspace around it and on top. We think our recommended airspace on top was an inch or something like that. We have used our furnace while camping rather a lot without difficulties.
Nice find on the corian counter! Set up looks nice so far! And yes, we built the bathroom and bedroom area in place. Bathroom is about half and half for building in and out of the trailer.
Just so you know, we think planning is over-rated. Nothing ever comes out quite like we thought but still works and looks good to us. 
Kay
|
|
|
|
|
04-20-2014, 08:41 AM
|
#23
|
Rivet Master
1973 27' Overlander
Portsmouth
, Virginia
Join Date: Jun 2012
Posts: 776
|
Quote:
Originally Posted by Wabbiteer

..
While you have the galley out take a close look at the water inlet - it's not sanitary by any means, water sloughing down the shell tries to enter the FW tank. Inspect it for hairline cracks AND BE GENTLE with it, after years of relaxing it wants to jump away from the shell, shattering to hang free.
That FW inlet cover assembly with its double-cut key (that is hard to pick) has value to folks that Joe Somewhen broke into years back, I patched over the entire outside area and sent my cover to Texas, and will use a Marine quality filler inlet when the time comes...
|
I took a closer look at the inlet and seeing it was plastic, it also had some cracking at the top. But what is really problematic is that it doesnt seem to be a standard 1.5" size, so my new hose wouldnt fit on it. And yes, its not sanitary by any means, there is nothing to stop rainwater or anything else from getting in and going into the tank. My guess is that with all the mildew that was in the tank, that was exactly what was happening for years.
So I ordered a stainless Atwood marine fill today off Amazon Warehouse deals (gotta love the deals they have) for 17 bucks with prime shipping. I'll remove the old door assembly and make a plate to cover it over and secure it with Olympic rivets. This will be my first go around with Olympics so that will be a good small scale test. I'll relocate the tank vent somewhere under the sink, that should be sufficient as long as I mount it higher than the water fill.

|
|
|
|
|
04-25-2014, 05:22 PM
|
#24
|
Rivet Master
1973 27' Overlander
Portsmouth
, Virginia
Join Date: Jun 2012
Posts: 776
|
|
|
|
|
|
04-25-2014, 05:52 PM
|
#25
|
Rivet Master
Currently Looking...
_
, _
Join Date: Mar 2008
Posts: 2,385
|
I really like your new water fill. I have the same original filler on my '82 motorhome. Its brittle and I have "plastered" it with epoxy, but I still have some rain water trickling in. Your solution is what I should do!
|
|
|
|
|
04-26-2014, 07:45 AM
|
#26
|
Rivet Master
1973 27' Overlander
Currently Looking...
Jupiter
, Florida
Join Date: Apr 2006
Posts: 2,062
|
Quote:
|
I'll relocate the tank vent somewhere under the sink, that should be sufficient as long as I mount it higher than the water fill.
|
On the vent - inattentive & well meaning folks have overfilled the FW tank, even to the point of bulging up floor when the stars were aligned... I cringe at the thought of a FW tank vent terminating inside the trailer in a blind location.
If you're familiar with a kitchen dishwasher drain that routes up to under countertop level and back down again to eliminate chances of siphoning standing sink water backwards into the unit... then how about routing the tank vent up to inlet height then back down & through floor to dump onto the person doing the fillings' feet?
Not quite sure how to keep the vent tube opening 110% sanitary, or if such a thing exists for the marine world - thinking maybe a large hose aquarium strainer and/or check valve... ended in a cup penetrating the banana wraps with a screened opening?
__________________
The days are short and the night is long and the stars go tumbling by.. . ~Airstream~
|
|
|
|
|
04-26-2014, 03:46 PM
|
#27
|
Rivet Master
1973 27' Overlander
Portsmouth
, Virginia
Join Date: Jun 2012
Posts: 776
|
Yeah, I can understand the worry of that hose just sitting there, In theory, if the end is higher than the fill, excess water has to come out of the fill since it would be lower. I can look into some sort of fitting to put on the end of it. Truthfully though, I doubt we will be using the tank all that much, but I will see if there is any sort of check valve or something that would let air out but stop water.
|
|
|
|
|
05-07-2014, 08:12 PM
|
#28
|
Rivet Master
1973 27' Overlander
Portsmouth
, Virginia
Join Date: Jun 2012
Posts: 776
|
|
|
|
|
|
05-08-2014, 07:49 AM
|
#29
|
Rivet Master
1978 31' Sovereign
Texas Airstream Harbor
, Zavalla, in the Deep East Texas Piney Woods on Lake Sam Rayburn
Join Date: Jan 2003
Posts: 2,435
|
Thumbs Up
Great documentation and great handiwork.
Blessings to you for your motivation to others.
This is a great thread to follow for those thinking about personalizing an Airstream. The time, effort and money certainly worked out for me on the '78 Sovereign. The Sovereign has been used for traveling, living, and as a guest house. In the very near future Mary and I will be concentrating on the "traveling" portion big time.
Might I suggest, as a guide to those who will follow your impetus, some indication of an order of magnitude for the time and monies you have invested so far? Your documentation is great, and I think that a basic idea of the total investment (especially time) would benefit those who will be following your e ncouraging example.
Hope to meet up with you at a campground or rally.
Inspirational thread!
__________________
Dennis
"Suck it up, spend the bucks, do it right the first time."
WBCCI # 1113
AirForums #1737
Trailer '78 31' Sovereign
Living Large at an Airstream Park on the Largest Lake Totally Contained in Texas
Texas Airstream Harbor, Inc.
|
|
|
|
|
05-08-2014, 10:07 AM
|
#30
|
Rivet Master
1973 27' Overlander
Portsmouth
, Virginia
Join Date: Jun 2012
Posts: 776
|
Quote:
Originally Posted by 87MH
Great documentation and great handiwork.
Blessings to you for your motivation to others.
This is a great thread to follow for those thinking about personalizing an Airstream. The time, effort and money certainly worked out for me on the '78 Sovereign. The Sovereign has been used for traveling, living, and as a guest house. In the very near future Mary and I will be concentrating on the "traveling" portion big time. |
Thanks for the very kind words. I do hope the pictures give folks an idea of what is involved, I know I get more out of seeing what people have done than by reading descriptions.
Quote:
Originally Posted by 87MH
Might I suggest, as a guide to those who will follow your impetus, some indication of an order of magnitude for the time and monies you have invested so far? Your documentation is great, and I think that a basic idea of the total investment (especially time) would benefit those who will be following your encouraging example.
Inspirational thread!
|
I can do better with some of the costs than I can with the time. I really don't try to track how many hours I have put in but it is quite a bit, probably well over 100 just on this phase, maybe even more than 150, really am not sure. I get about 2-3 days during the week that I can work on it, and that equates to about 6 hours actual work time per day. There is also lots of time spent running around for parts and supplies. Hard to judge exactly what you need till you need it. And of course, nothing ever goes according to plan and there is lots of trial and error which slows progress down too.
On this phase, I started around January and here we are in May and I still have I hope a couple more weeks to get the main cabinet back together and get her on the road. Weather didn't cooperate as much during the Winter, so progress was slower. I get very envious when I see folks that have an inside space to work on their trailers, to me that would make it so much easier.
On the parts and supplies, I can give a partial rundown on some of what I bought, but I doubt it is complete, there are lots of incidentals you just tend to forget about. On this phase:
Fridge: 325
Corian top: 90
Faucet: 25
Atwood stove: 140
Copper tubing for gas: 25
Flaring tool and bending tools: 60
Cherry plywood 2 sheets: 185
1/2 "blond" plywood: 30
Cherry lumber: had it around, usually goes for around 6 a bd ft.
Drawer slides: 30
Microwave: 100
TV with DVD: 190
TV wall mount: 35
Jack digital roof antenna: 105
Aluminum for backsplash and mounting plate for water fill: 75
Marine water fill tube 16, marine vent 12, fill hose 11
Rivet shaver 80, shaver bits 8 Sealant 8
Aluminum for underbelly: 70
Four aluminum wheels with tires: 200 gas to get them and tolls: 85, lug nuts: 50
Paint and varnish: maybe 100
Various screws and bolts: 50
Probably more I cant remember, but hope this gives you an idea
|
|
|
|
|
05-22-2014, 04:28 PM
|
#31
|
Rivet Master
1973 27' Overlander
Portsmouth
, Virginia
Join Date: Jun 2012
Posts: 776
|
Work has continued on the kitchen base cabinet as well as the panels for the New(er) fridge. I also replaced the end bulkhead panel with a piece of the 1/2" cherry ply and trimmed it out. Here are some more pix to tell the story.
Fitting all the pieces together.

With the finish coat of poly. I still need to get a piece of aluminum cut to fit to act as the back of the toe kick. I'm also going to do something with the original walnut finish on the oven bulkhead, but haven't quite figured that one out yet. I may pick up some cherry veneer and try to apply it or it may just get painted.
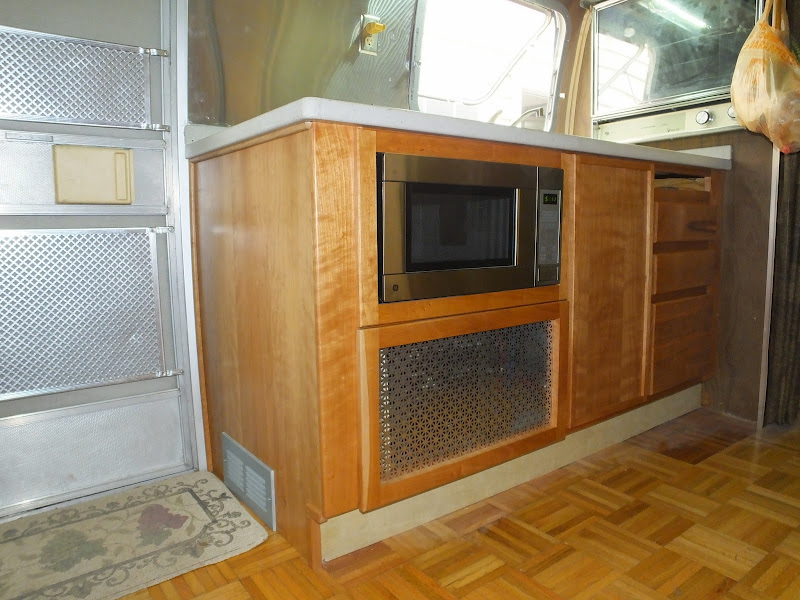
End panel with vent. You probably cant see it, but there is 1/2 " cherry quarter round molding that took me a good two hours to make. I tried to get it to bend around the bulkhead by the tv and fridge, but it kept on breaking. I'll have to find something else that is much more flexible to fit the curve of the ceiling.

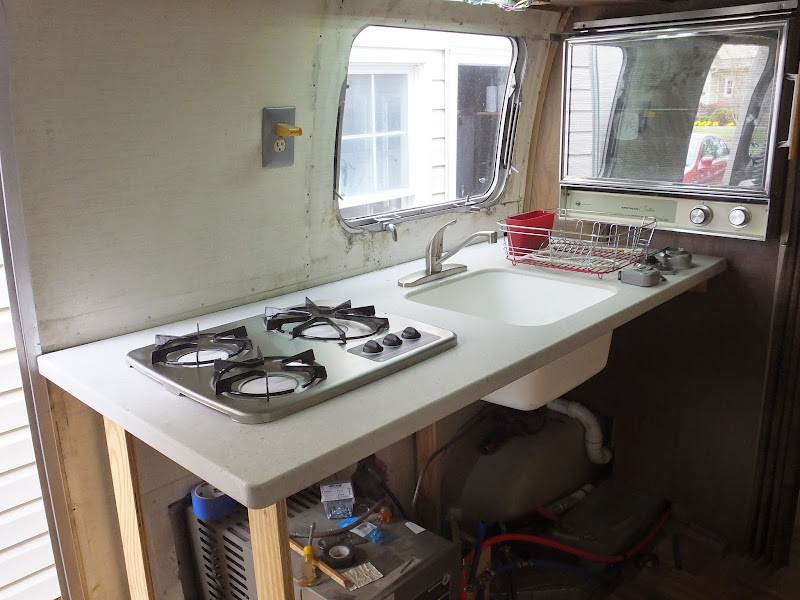
Corian top, still needs some sanding to clean it up:

New Atwood cooktop:

GE microwave now permanently mounted below the stove and above the furnace. The panel below the furnace has an aluminum grate to allow heat to dissipate if the furnace is running and can snap in and out without any tools for access.

Three drawers done. The top most one was meant to be a pullout cutting board but the undermount slide is giving me fits and I dont want to pull everything apart to get it out. I may just use the end drawer cover permanently fixed over the opening.

Undercounter access to pluming.

New panels for the fridge:
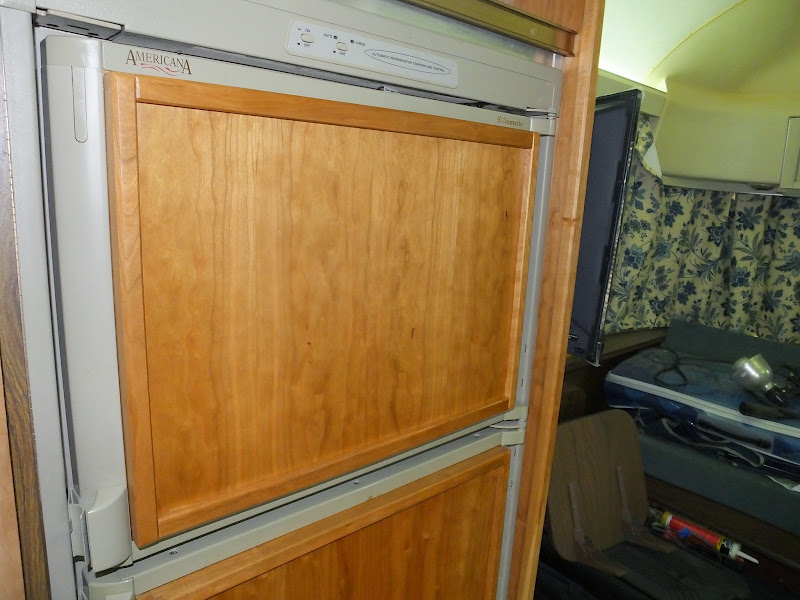
Fridge and the new flatscreen on its swing mount:


New mount for the thermostat for the AC and the new Jack antenna terminal:

I put a new JACK rotating antenna up on the roof and ran the antenna wire back down through the fridge vent and into the back of this antenna terminal. There is also 12v access that allows power to the base of the antenna to power the signal strength meter.

And the little wing antenna up on the roof. The antenna can rotate about 350 degrees and the signal meter will show the strongest level of signal. This antenna is designed solely for digital signals, analog need not apply. When I first powered up the flatscreen on the antenna it found about 20 channels, many of which I didn't even know existed.


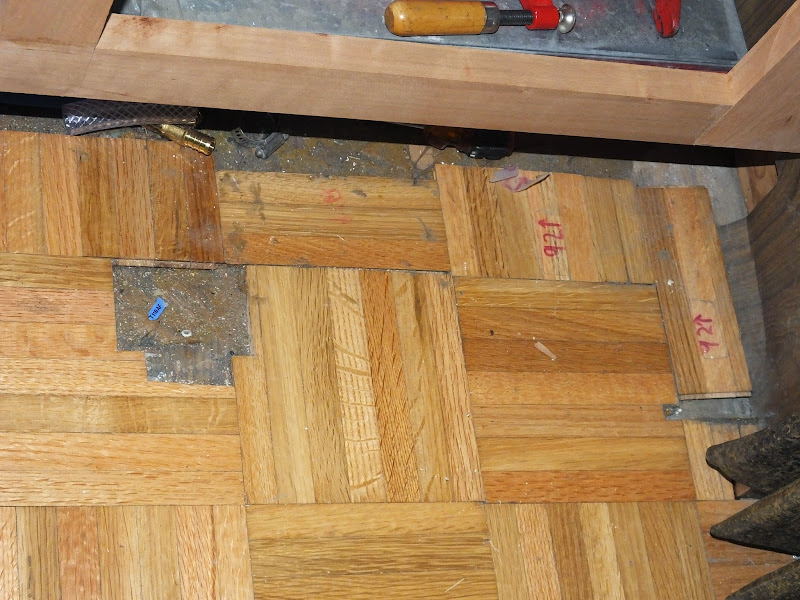
Still left to do on the base cabinet are the drawer and door handles and the aluminum toe kick. I may have to figure out something to keep the drawers from flying open when we are driving. I've also got the cherry ply to remake all the cabinet doors on the cabinets by the fridge as well as new doors to replace the tambour on both sides of the upper cabinets. I am going to trim out the aluminum with solid cherry stock as well but keep all the original structure of those aluminum cabinets for weight. I also want to sand down the parquet flooring and refinish that too. I just dont know if I will start on that right away or wait till we've had a chance to do come camping first.
|
|
|
|
|
05-22-2014, 06:00 PM
|
#32
|
|
retired USA/USAF
2001 30' Excella
Somerset
, New Jersey
Join Date: Jan 2009
Posts: 2,418
|
I can't make out the 1/4 round moldings you mentioned having trouble with. Just in case you were not aware cherry will bend nicely if you steam it. You can also dunk it in boiling water to get it hot. I do like your cabinet work. Keep it up and you'll really have something special when done.
__________________
Roger in NJ
" Democracy is the worst form of government. Except for all the rest"
Winston Churchill 1948
TAC - NJ 18

|
|
|
|
|
05-22-2014, 06:08 PM
|
#33
|
Rivet Master
1973 27' Overlander
Portsmouth
, Virginia
Join Date: Jun 2012
Posts: 776
|
Quote:
Originally Posted by polarlyse
I can't make out the 1/4 round moldings you mentioned having trouble with. Just in case you were not aware cherry will bend nicely if you steam it. You can also dunk it in boiling water to get it hot. I do like your cabinet work. Keep it up and you'll really have something special when done.
|
Yeah, they don't show up well in the photo of the end panel but they are there. Problem with steaming them is that I want them finished before they go on the wall and the steam or water will raise the grain. I may go with some sort of thin woodgrain molding from a big box store or maybe go for some contrast and paint it a silver color.
Thanks again for the kind words, its been a lot of work but I like seeing it start to come all together.
|
|
|
|
|
05-23-2014, 07:48 AM
|
#34
|
Rivet Master
1972 31' Sovereign
Lexington
, Minnesota
Join Date: Feb 2009
Posts: 3,991
|
We borrowed an idea from HiHoAG to use magnets at the back of some of our drawers to keep them in place while traveling. Works like a charm!
You might want to look at what we did with our backsplash in the kitchen for your oven wall: it's a PVC product we saw on "I hate my kitchen" DIY series. Goes up with powergrab and is easy to cut with scissors. Been up a year with no problems. Lots of color choices and looks. I'll look up the info on where to order it online.
Looking very good!
Kay
|
|
|
|
|
05-23-2014, 05:36 PM
|
#35
|
Rivet Master
1973 27' Overlander
Portsmouth
, Virginia
Join Date: Jun 2012
Posts: 776
|
Quote:
Originally Posted by Minno
We borrowed an idea from HiHoAG to use magnets at the back of some of our drawers to keep them in place while traveling. Works like a charm!
|
Where would you put the magnets? The drawers are wood and there is nothing metallic next to them except the slides themselves.
Quote:
Originally Posted by Minno
You might want to look at what we did with our backsplash in the kitchen for your oven wall: it's a PVC product we saw on "I hate my kitchen" DIY series. Goes up with powergrab and is easy to cut with scissors. Been up a year with no problems. Lots of color choices and looks. I'll look up the info on where to order it online.
Looking very good!
Kay
|
I did find your post on the backsplash, I'll have to show it to my better half and see what she thinks. This is the link: PVC Back Splash Some of those rolls are not that cheap. Do you think any type of vinyl type of wallpaper would stick to the fake brown panel? I really just want to lighten it up and provide some contrast.
|
|
|
|
|
05-23-2014, 06:43 PM
|
#36
|
Rivet Master
1996 34' Excella
Elberta
, Alabama
Join Date: Oct 2006
Posts: 837
|
Great job!
|
|
|
|
|
05-24-2014, 03:25 PM
|
#37
|
Rivet Master
1973 27' Overlander
Portsmouth
, Virginia
Join Date: Jun 2012
Posts: 776
|
Quote:
Originally Posted by Larry C
Great job!
|
Thanks Larry.
|
|
|
|
|
05-26-2014, 09:17 AM
|
#38
|
Rivet Master
1972 31' Sovereign
Lexington
, Minnesota
Join Date: Feb 2009
Posts: 3,991
|
Quote:
Originally Posted by aquinob
Where would you put the magnets? The drawers are wood and there is nothing metallic next to them except the slides themselves.
|
I attached the magnet to the back of the drawer, and the plain metal part to the wall. I cut a piece of wood to act as a shim for the metal catch. See pictures below.
Chris


|
|
|
|
|
05-26-2014, 09:25 AM
|
#39
|
Rivet Master
1972 31' Sovereign
Lexington
, Minnesota
Join Date: Feb 2009
Posts: 3,991
|
Quote:
Originally Posted by aquinob
I did find your post on the backsplash, I'll have to show it to my better half and see what she thinks. This is the link: PVC Back Splash Some of those rolls are not that cheap. Do you think any type of vinyl type of wallpaper would stick to the fake brown panel? I really just want to lighten it up and provide some contrast. |
That's the correct web site. Looks like they changed how they sell stuff from when we bought it 2 years ago. We're both pretty sure we bought it by the foot, not by a 10 foot roll.
With the proper prep, I think vinyl wallpaper would stick ok. Clean the wall really, really well, perhaps even giving it a light sanding.
Kay
|
|
|
|
|
05-26-2014, 10:58 AM
|
#40
|
Rivet Master
1973 27' Overlander
Portsmouth
, Virginia
Join Date: Jun 2012
Posts: 776
|
Quote:
Originally Posted by Minno
I attached the magnet to the back of the drawer, and the plain metal part to the wall. I cut a piece of wood to act as a shim for the metal catch. See pictures below.
Chris
|
OK, that makes a bit more sense. Was thinking maybe get a magnetic catch and position it at the bottom of the opening of the face frame and put the other part on the drawer face on the inside. There is a bit of space there to play with.
Did make a bit of progress with the doors for the cabinet wall. Got them glued up and test fit into the openings. Going to try and use the existing piano hinges that the old doors used. Interestingly, I found that my new doors are actually lighter in weight than the old doors which are a combination of aluminum, melamine and something like a cardboard or fiberboard sandwich in the middle. Would have thought the plywood would be heavier, but its only 1/2" and the moldings surrounding the door aren't that heavy either. I also made a bit of sawdust cutting out and milling the cherry to cover the aluminum in the center of the old extrusions, where it was originally filled with the fake walnut Formica.

Milled cherry stock for inserts:

|
|
|
|
|
|
|
Currently Active Users Viewing This Thread: 1 (0 members and 1 guests)
|
|
|
 Posting Rules
|
You may not post new threads
You may not post replies
You may not post attachments
You may not edit your posts
HTML code is Off
|
|
|
|

 Recent Discussions
 |
|
|
|
|
|
|
|
|
|
|
|
|
|
|
|
|
|
|
|
|
|


 Linear Mode

