 |
|
 06-29-2014, 09:29 AM
|
#1
|
2 Rivet Member 
1969 31' Sovereign
Paris
, Texas
Join Date: Jun 2014
Posts: 77
|
'69 Sovereign camp ready renovation
Greetings all. Recently purchased my first AS and I'm excited to get started. I will not be doing a complete renovation, just enough to get her camp ready at the moment.
Here's a few before pics.


No leaks that I can see from the roof. I need to replace the front corner window and do the usual seal replacement on the rest.
Due to the Texas heat, I'm working on getting functional ac first. The original Armstrong unit still blows cold. However the condensate pan is rusted through in places.

No replacement is available, so I will have to repair the original. I put together an electrolysis system to remove the rust using a battery charger, iron rods, water, and laundry detergent.

Rust removal in process

I'm also disassembling the shroud for painting. I will also be riveting some patches to cover the areas damaged by corrosion.
 
|

|

|


|
06-29-2014, 06:33 PM
|
#2
|
2 Rivet Member
1969 31' Sovereign
Paris
, Texas
Join Date: Jun 2014
Posts: 77
|
Well, my hopes of not having to replace flooring have been dashed. Deep down I knew given the condition of the front windows that I would likely to have to work on the front floor. Huge hole in the corner and a dead mouse to boot.
|
|
|
|
|
06-29-2014, 09:00 PM
|
#3
|
2 Rivet Member
1969 31' Sovereign
Paris
, Texas
Join Date: Jun 2014
Posts: 77
|
Looks like the front 3 ft of plywood needs replacing. I was able to remove the rotted wood from behind where the front skin comes down. Can I just cut the new piece to fit and slide it under, or will I need to remove the lower skin?

|
|
|
|
|
06-30-2014, 08:29 AM
|
#4
|
Rivet Master 
1981 31' Excella II
New Market
, Alabama
Join Date: Sep 2011
Posts: 6,145
|
Remove the lower inner skin. There are bolts that need to go through the plywood. There will be a front hold down plate that is made out of steel and those connections to the frame and trailer need to be intact. I have done a rear floor replacement but not a front one. The main structural attachments between the shell and frame are at the front and rear of the trailer. I would not be surprised if the damage at the rear is worst than this but you can't see it because it is covered by the bathroom.
Perry
|
|
|
|
|
06-30-2014, 10:33 AM
|
#5
|
2 Rivet Member
1969 31' Sovereign
Paris
, Texas
Join Date: Jun 2014
Posts: 77
|
Thanks for the info Perry. I'm sure this renovation will head down the same path as most I've read about on here. One thing leads to another and so on.
By having to rework the front it has opened up some additional opportunities as far as living room layout and furniture. We still need a sofa bed but now are looking at some of the Ikea stuff. For what it would cost for new foam and upholstery, it might be less money to purchase a new sofa bed.
The bright side of replacing the flooring is it gives me a reason to pull the interior skins. I can now do a better job of straightening some dents out of the exterior.
Now, if the bathroom floor is worse, do I consider rear bedroom with queen bed? It never ends.[emoji6]
|
|
|
|
|
06-30-2014, 11:04 AM
|
#6
|
Rivet Master
1973 21' Globetrotter
Houston
, Texas
Join Date: Sep 2009
Posts: 3,322
|
Before you go through the whole process of repairing the front, you should evaluate the entire perimeter of the trailer. You might find so much rot, especially in the rear, that you may as well do the shell-off and replace the floor in one go, rather than replacing most of floor the hard way (from inside, with the shell still in place). Either way, you have to remove the edges of the bellypan, and the lower most interior skins. You may also find substantial frame rot where those holes go through your floor.
good luck!
|
|
|
|
|
07-12-2014, 06:40 PM
|
#7
|
2 Rivet Member
1969 31' Sovereign
Paris
, Texas
Join Date: Jun 2014
Posts: 77
|
|
|
|
|
|
07-12-2014, 08:28 PM
|
#8
|
2 Rivet Member
1969 31' Sovereign
Paris
, Texas
Join Date: Jun 2014
Posts: 77
|
Also removed the streetside curved window today. One of the previous owners had cut the head off the original rivets, left most of them in place, and pop riveted a few around the window. No wonder it leaked. I do have a question. What is the best way to get the remnants of the bucked rivets out? Drill them, or just attempt to push them through? The few I tried to push through didn't budge. But, I didn't get real rough with them. Not sure if you can tell much from the pic.

At first I planned to just replace the plexiglass with another piece. But after realizing what it takes to remove the window, I believe I will just bite the bullet and order the correct replacement. I don't want to do it twice if the plexiglass doesn't meet my expectations.
|
|
|
|
|
07-20-2014, 04:32 PM
|
#9
|
2 Rivet Member
1969 31' Sovereign
Paris
, Texas
Join Date: Jun 2014
Posts: 77
|
Made a little progress today. Replaced the tongue jack with a new one from Atwoods.
Filled the refurbished AC condensate pan with water to check for leaks. It seemes to hold water fine. Reinstalled it back in the trailer and I now have water exiting the trailer from the drain tube. Success!
From there we moved on to the rotten floor in the front. Removed the rotten piece along with several pounds of nasty insulation, mouse remnants, and wasp nests. I am going to weld in a center brace of 3" channel iron to support the new 2 piece floor section.
I still have to get my corner window fixed. I was able to pick up a new old stock curbside window, but I need the streetside. I'll save the curbside for later. I'm sure I'll need it.
Next on the list is new door and window seals, fixing a broken black water tank drain fitting, and deciding what to do with the refrigerator. It still cools, but the door is in bad shape.
|
|
|
|
|
07-20-2014, 05:18 PM
|
#10
|
4 Rivet Member 
1972 25' Tradewind
Hopkins
, Minnesota
Join Date: Sep 2012
Posts: 458
|
Best to drill out the rivets. Punch them first with a spring-loaded punch or an awl and hammer...to get a divet to start your drill. Use a cobalt bit and go slowly. You don't want to increase the diameter of the hole, or you will have trouble when you install new rivets.
|
|
|
|
|
07-20-2014, 07:47 PM
|
#11
|
2 Rivet Member
1969 31' Sovereign
Paris
, Texas
Join Date: Jun 2014
Posts: 77
|
Thanks for the advice arktos. I needed an excuse to get more tools.
My refrigerator decision has been made. It's not working now so a replacement is necessary. Now I just need to find out what model will give me the best fit.
|
|
|
|
|
07-29-2014, 08:38 PM
|
#12
|
2 Rivet Member
1969 31' Sovereign
Paris
, Texas
Join Date: Jun 2014
Posts: 77
|
Starting to get excited. I have ran the ac for three days straight and not a drop of water is leaking inside the trailer. The condensate pan repair is a success so far. Also got the new floor installed in the front of the trailer.
Before:
 
After:

I understand the two piece floor is not the preferred method, but I don't believe it will compromise the integrity too much. I put the seam over a frame rail and installed 1/4" self tapping stainless screws into the frame. I used the same screws in the front c channel. They are slightly smaller than the original bolts, but I added extra screws to make up for it.
Should have the roadside corner window rebuilt this week. I've changed my mind and decided to install a piece of lexan myself. I'm still in search of an original tempered glass window. I definitely want to get some kind of rock guard before I put real glass up there.
Next on the list is to get all electrical checked out. Do a final plumbing check. Then time to move the futon in for a test run. If all goes well, it will be time to take the family out for a fun weekend.
|
|
|
|
|
07-29-2014, 08:51 PM
|
#13
|
2 Rivet Member
1969 31' Sovereign
Paris
, Texas
Join Date: Jun 2014
Posts: 77
|
Quick question on AS electrical. My console is indicating a polarity problem. I'm assuming this is on the DC side of things?
|
|
|
|
|
07-29-2014, 09:43 PM
|
#14
|
2 Rivet Member
1969 31' Sovereign
Paris
, Texas
Join Date: Jun 2014
Posts: 77
|
Never mind on the polarity light question. Figured it out. Reversed neutral at the outlet.
|
|
|
|
|
08-09-2014, 09:18 PM
|
#15
|
2 Rivet Member
1969 31' Sovereign
Paris
, Texas
Join Date: Jun 2014
Posts: 77
|
Finally got the window in and propane connected. Pics to follow once the photobucket upload is done.
|
|
|
|
|
08-09-2014, 10:14 PM
|
#16
|
2 Rivet Member
1969 31' Sovereign
Paris
, Texas
Join Date: Jun 2014
Posts: 77
|
Pic of the window with new lexan installed. I need to pick up a few more rivets and shave them off to be completed.

Some of the gas piping that I had to remove. Don't believe this is quite what Airstream had in mind for aftermarket hardware.

Replaced with this.


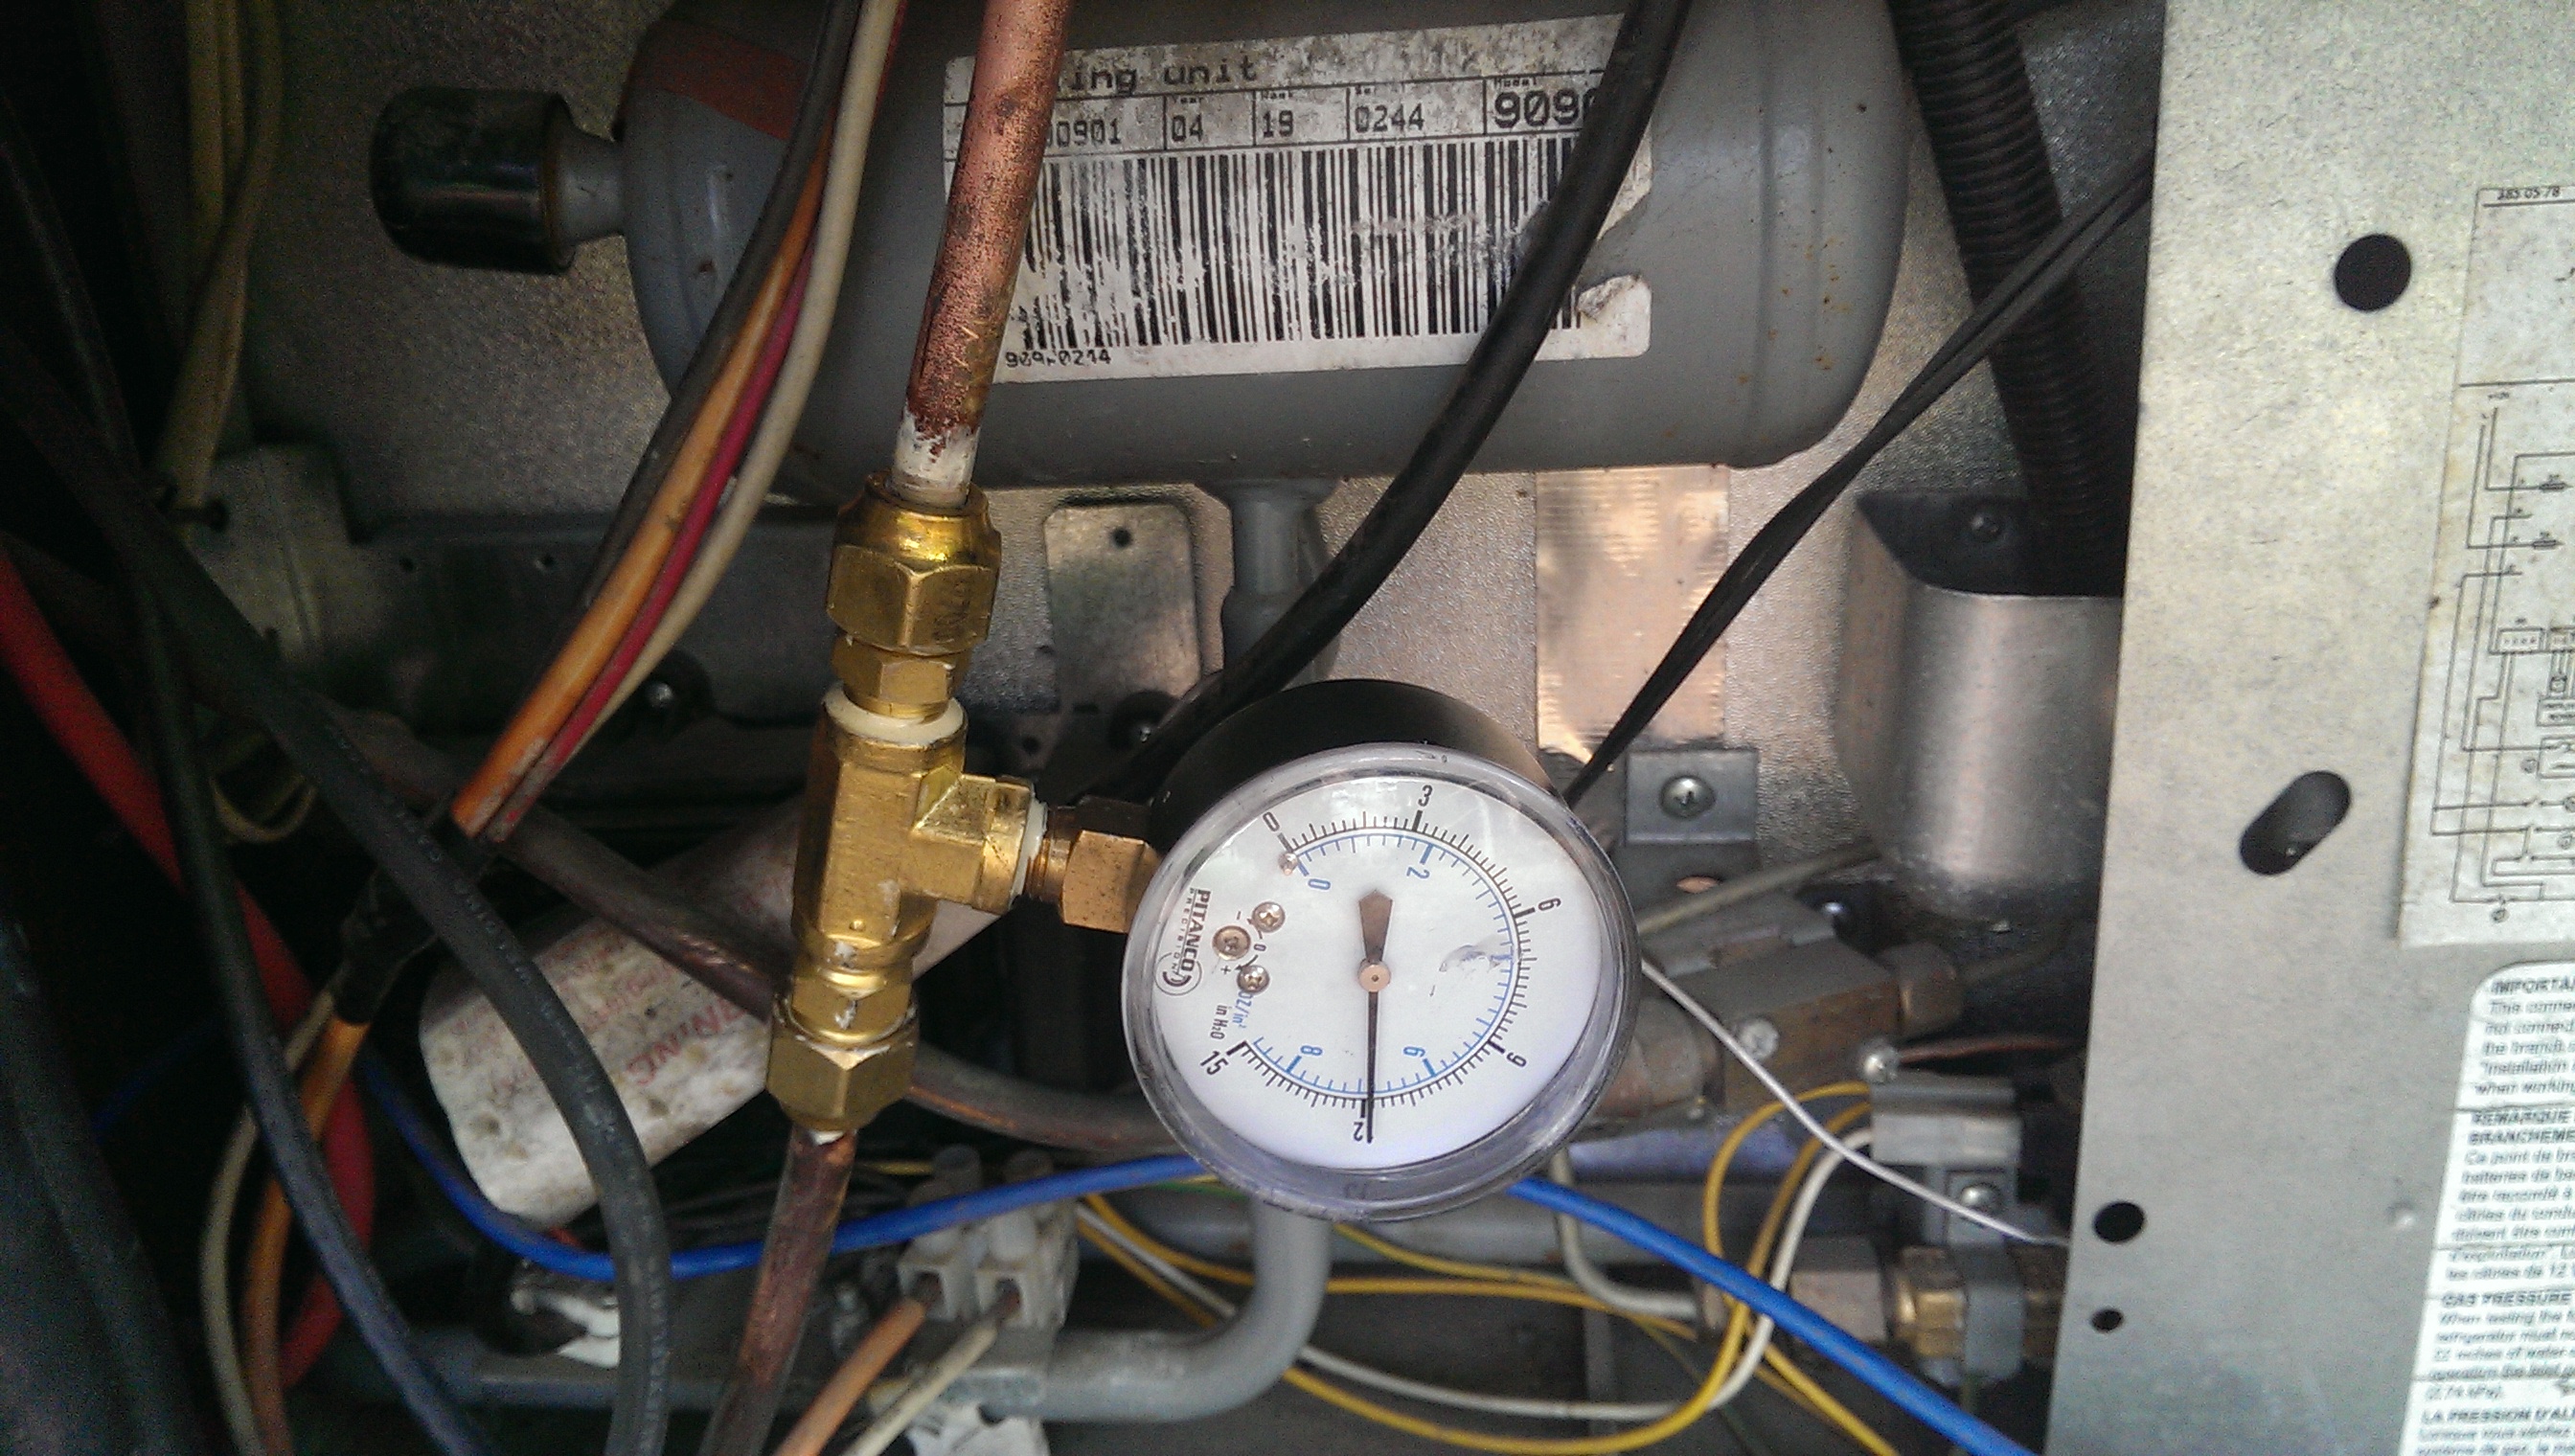
Pressure test started. 12 psi on the dot.

And, 20 minutes later, still 12 psi. No leaks!

|
|
|
|
|
08-09-2014, 10:31 PM
|
#17
|
2 Rivet Member
1969 31' Sovereign
Paris
, Texas
Join Date: Jun 2014
Posts: 77
|
By the way, what is the round disk mounted on the frame to the right of the propane tank in this pic?

|
|
|
|
|
08-11-2014, 06:01 AM
|
#18
|
Rivet Master 
1987 32' Excella
Nepean
, Ontario
Join Date: Mar 2006
Posts: 1,414
|
I had a buddy who is a gas tech install the pressure gauge permanently in the refrigerator compartment, so it is always easy to see if there is an issue. This was precipitated by a regulator which was faulty (only delivering at 8-inches of water) causing the furnace to fail. BTW, it did settle down to 11-inches shortly after this photo was taken.
__________________
VE3JDZ
AIR 12148
1987 Excella 32-foot
1999 Dodge Ram 2500HD Diesel
WBCCI 8080
|
|
|
|
|
08-11-2014, 07:25 AM
|
#19
|
4 Rivet Member
1972 29' Ambassador
grants pass
, Oregon
Join Date: Jun 2011
Posts: 262
|
Quote:
Originally Posted by e5earley

By the way, what is the round disk mounted on the frame to the right of the propane tank in this pic?
 |
Thats The "Leveler".There were 2 small levels inside there and a clear cap.
__________________
1987 Avion 34X
|
|
|
|
|
08-14-2014, 08:06 PM
|
#20
|
|
Always learning
1972 29' Ambassador
1962 19' Globetrotter
1951 21' Flying Cloud
Central
, Texas
Join Date: Oct 2010
Posts: 2,881
|
Hi from down the road a bit. Nice old Sov you have.
Nice job on the AC condensate pan. The old Armstrong os still going strong, I see.
On your propane leak down test-
You have to lower the pressure to make sure you are below the regulator lock up. I use 8" W.C.
See this very informative article.
The RV Doctor: What the Pro's Do - Propane System
When you get camp ready, come camp with the Heart of Texas Camping Unit!
Cheers!
__________________
Lance
Work is never done, so take time to play!
|
|
|
|
|
|
|
Currently Active Users Viewing This Thread: 1 (0 members and 1 guests)
|
|
|
 Posting Rules
|
You may not post new threads
You may not post replies
You may not post attachments
You may not edit your posts
HTML code is Off
|
|
|
|

 Recent Discussions
 |
|
|
|
|
|
|
|
|
|
|
|
|
|
|
|
|
|
|
|
|
|


 Linear Mode

