 |
|
 05-25-2013, 11:02 AM
|
#41
|
4 Rivet Member 
Join Date: Aug 2002
Posts: 372
|
Quote:
Originally Posted by idroba

Need some instruction....
Quote:
Originally Posted by idroba
Rather than checking voltage, or resistance, the easiest thing to do is to check the current the magnets take. Find the + 12 volt pin on the 7 wire trailer plug. Find the brake wire on the plug. Put an ammeter between those two wires. Properly operating wiring should result in 2.5 to 3 amps per wheel, or 10 to 12 amps total for a 4 wheel setup. If you are not getting that reading there is some electrical issue to deal with, from corroded wires to poor grounds. If you read the full current, then there is probably something wrong with the brake setup itself (shoes, adjustment etc.)
Not sure how you do this. If I pull the trailer plug-in the Prodigy will show 'disconnected'. Are you pulling the brake wire off the back of the 7-way and then checking amps? Just trying to picture how this is done.
Thanks for anymore precise info of how to make these checks!
OK, here you go:
Grasp the trailer cord in your hand with the locater pin at the top. Measure the current from the pin at 11 o'clock to the pin at 7 o'clock.
The 11 o'clock pin will be the +12 volts from the trailer (the charge line) and the 7 o'clock pin will be the line to the brakes.
See photo 1 below. You should measure about 5 to 6 amps for a single axle trailer, and 10 to 12 for a two axle trailer. |
Thanks Idroba,
I set the multimeter on 20 amps side and measured across the two plug positions as you recommended (12+ and brake) and I got a 12.6x amp reading for the double axle (4 brakes) which sounds about right. That's about 3 amps per wheel.
I thought I had a clamp ammeter to measure the brake wires without disconnecting. Found out that the cheap-o Harbor Freight clamp on is for AC only.
I did redo some connections under the tanks where the breakaway is wired in. They actually looked alright.
I also scraped the contacts on the 23 yr old plug which has always been out in the weather. It was a little green and the brake amp reading did try to dance around abit toward the down side. It may be time to pull out that umbilical cord and run a new one.
Thanks for all your help 
|

|

|


|
05-25-2013, 11:34 AM
|
#42
|
Rivet Master 
1974 Argosy 20
2014 20' Flying Cloud
Kooskia
, Idaho
Join Date: Jul 2009
Posts: 4,591
|
Quote:
Originally Posted by Sav'h Steve
Thanks Idroba,
I set the multimeter on 20 amps side and measured across the two plug positions as you recommended (12+ and brake) and I got a 12.6x amp reading for the double axle (4 brakes) which sounds about right. That's about 3 amps per wheel.
I thought I had a clamp ammeter to measure the brake wires without disconnecting. Found out that the cheap-o Harbor Freight clamp on is for AC only.
I did redo some connections under the tanks where the breakaway is wired in. They actually looked alright.
I also scraped the contacts on the 23 yr old plug which has always been out in the weather. It was a little green and the brake amp reading did try to dance around abit toward the down side. It may be time to pull out that umbilical cord and run a new one.
Thanks for all your help |
Glad you got a good 12+ amp reading. That for the most part checks the brake electrical system on the trailer. The tow vehicle outlet must also be in good condition. Sometimes the wires going into it become corroded and it will not deliver the brake current reliably. I have no magic test process to check that....LOL.
On clamp on meters: Very few, from any manufacturer, no matter how costly, will measure DC current. It is electrically a tricky issue to do. I have one which does do it, but it is a bit hard to use and the measurements are not all that accurate or repeatable. So, the HF meter is in there with the rest of them in not measuring DC current in the clamp on stile. For DC, direct wire measurements are best.
The trailer umbilical cord plug will get to need replacement over time and it is not a bad idea to do that. The green corrosion you see is generally on the +12 volt pin (the one at 11 o'clock) as it always has power to it, and when wet or dirty conducts a small amount of current causing the corrosion. You may find the same problem in the TV outlet pin which carries the charge current to the trailer. Looking into the TV outlet, that pin would be the one at 1 o'clock and the brake pin is at 5 o'clock.
A spray electrical contact cleaner, often available at an auto parts place, or Radio Shack is also in order. Spray both the plug and the TV outlet, put the plug in and pull it out several times and that will wipe the contacts about as well as anything I know of. Corroded wires on the back of the TV outlet are harder to deal with.
I am happy some of my ramblings are of help to you.
|
|
|
|
|
05-25-2013, 11:55 AM
|
#43
|
Rivet Master
1999 34' Excella
Currently Looking...
Hillsboro
, Texas
Join Date: Feb 2013
Posts: 6,408
|
__________________
Peace and Blessings..
Channing
WBCCI# 30676
|
|
|
|
|
05-25-2013, 12:50 PM
|
#44
|
4 Rivet Member
1999 25' Safari
On
, the road
Join Date: Aug 2010
Posts: 298
|
So I think my new brakes just needed to be warmed up and worn in a bit. I'm still not completely happy with them, but I think I will trust them for now.
Started with the P3 at max power where as before I had only run it at ~7.5. At first pulling the lever didn't seem like it was doing a lot, though I could feel a big difference in a hard braking from ~60 mph with the power at 13 vs 0, so the trailer was braking somewhat. Coming down the long hill into Durango at 60mph, I held the lever and didn't touch the truck brakes. The trailer only slightly slowed our progress and in no way would have stopped us. Yet when we got into town and hit a few stop lights I had to back off the controller down to 10v as the stopping was so touchy and jerky.
Leaving town the brakes felt solid and could definitely tell they were working. At this new campground I pulled the lever with it at 10v and easily locked up all 4 tires. Who knows.. I picked up a ton of wire and some misc bits at NAPA. I shall mess around more tomorrow.
For today Haviland Lake Campground is our home and we must go explore.

|
|
|
|
|
05-25-2013, 01:44 PM
|
#45
|
3 Rivet Member 
1983 31' Excella
2005 30' Classic
1993 33' Land Yacht
Wellfleet
, Massachusetts
Join Date: Mar 2009
Posts: 109
|
Quote:
Originally Posted by Bigventure
|
Your primary shoe is the forward shoe and secondary is the rear shoe I believe the primary shoe is the shorter shoe
|
|
|
|
|
05-25-2013, 01:46 PM
|
#46
|
3 Rivet Member
1983 31' Excella
2005 30' Classic
1993 33' Land Yacht
Wellfleet
, Massachusetts
Join Date: Mar 2009
Posts: 109
|
The primary shoe is the forward shoe and secondary shoe is the rear shoe I believe the primary shoe is the shorter brake material shoe.
|
|
|
|
|
05-25-2013, 05:58 PM
|
#47
|
4 Rivet Member
Join Date: Aug 2002
Posts: 372
|
Quote:
Originally Posted by timmaah
So I think my new brakes just needed to be warmed up and worn in a bit. I'm still not completely happy with them, but I think I will trust them for now.
............. Yet when we got into town and hit a few stop lights I had to back off the controller down to 10v as the stopping was so touchy and jerky.
Leaving town the brakes felt solid and could definitely tell they were working. At this new campground I pulled the lever with it at 10v and easily locked up all 4 tires. Who knows.. I picked up a ton of wire and some misc bits at NAPA. I shall mess around more tomorrow.
|
So Timmaah,
Are you saying that the USE of the brakes increase from NO locking to actually LOCKING the brakes??
CWF reported earlier that they needed to get hot. Perhaps there is more to that than I thought. Mine are working a LITTLE better after warming them as I took it back to storage for the next few days. I have on order one of the SEARS 82369 clamp on DC amp meters to use next week.
Best to you and your journeys! We too are trying to get on the road for a long trip. We have to have better brakes before we do. I plan to have them adjusted up next week.
Steve
|
|
|
|
|
05-25-2013, 06:17 PM
|
#48
|
Rivet Master
1999 34' Excella
Currently Looking...
Hillsboro
, Texas
Join Date: Feb 2013
Posts: 6,408
|
Quote:
Originally Posted by Sav'h Steve
So Timmaah,
Are you saying that the USE of the brakes increase from NO locking to actually LOCKING the brakes??
CWF reported earlier that they needed to get hot. Perhaps there is more to that than I thought. Mine are working a LITTLE better after warming them as I took it back to storage for the next few days. I have on order one of the SEARS 82369 clamp on DC amp meters to use next week.
Best to you and your journeys! We too are trying to get on the road for a long trip. We have to have better brakes before we do. I plan to have them adjusted up next week.
Steve
|
Steve... FYI. Brakes work best after brakes heat enough to transfer brake material to the drum or disc. Also, if circumference of shoes doesn't match from that reduces surface area of contact with shoe. Heating then cooling helps shoe fit and material transfer. This is especially import after "turning" and if you managed to get any lube on brake surface.
__________________
Peace and Blessings..
Channing
WBCCI# 30676
|
|
|
|
|
05-25-2013, 07:34 PM
|
#49
|
Rivet Master
2005 19' Safari
GLENDALE
, AZ
Join Date: Aug 2004
Posts: 2,453
|
I don't recall any mention of "arc-grinding" the shoes to match the drums. Do you know if this was necessary or performed, before installation?
If there is a significant difference between the arc radius of the new brake shoes compared to the drums, the contact patch will be limited to only the high spot(s) where the shoes touch the drums. This small contact area drastically reduces stopping power until the brake shoes wear in and the friction material completely contacts the drum, which may explain why the brakes worked better after "heating them up".
See more detailed explanation and illustrations in this link: Drum Brakes
Turning drums (even new drums) and arc-grinding shoes was standard practice years ago when all autos had drum brakes.
|
|
|
|
|
05-25-2013, 11:07 PM
|
#50
|
4 Rivet Member
1999 25' Safari
On
, the road
Join Date: Aug 2010
Posts: 298
|
Quote:
Originally Posted by Sav'h Steve
So Timmaah,
Are you saying that the USE of the brakes increase from NO locking to actually LOCKING the brakes??
|
Correct. My old set seemed to work the same way. Once driven for a while they would seemingly work better. Once cold they were back to just ok.
Remains to be seen if this new set behaves the same. I was working them hard on todays drive just to test them out.
|
|
|
|
|
05-25-2013, 11:39 PM
|
#51
|
Rivet Master 
2005 25' Safari
Salem
, Oregon
Join Date: Mar 2006
Posts: 8,377
|
Quote:
Originally Posted by Phoenix
I don't recall any mention of "arc-grinding" the shoes to match the drums. Do you know if this was necessary or performed, before installation?
|
 Hi, this is true, but the brake shoe arcing machines were outlawed decades ago.
__________________
Bob 2005 Safari 25-B
"Le Petit Chateau Argent" Small Silver Castle
2000 Navigator / 2014 F-150 Eco-Boost / Equal-i-zer / P-3
YAMAHA 2400 / AIR #12144
|
|
|
|
|
05-26-2013, 04:44 AM
|
#52
|
|
"Cloudsplitter"
2003 25' Classic
Houstatlantavegas
, Malebolgia
Join Date: Jun 2007
Posts: 20,000
|
Quote:
Originally Posted by ROBERTSUNRUS
Hi, this is true, but the brake shoe arcing machines were outlawed decades ago. |
And if you've ever done the job you'd know the reason why...don't lament the "old days" on this one.
I was one of the few who would mask-up whenever a brake job was being done in the shop, and always got questioned about the wet floor in my work area. 
FYOG.....get a spray bottle and and thoroughly spray the brakes whenever the drums are off and hose down the floor/ground when cleaning up. Ware gloves & mask.

Bob

__________________
Im done with adulting
Lets go find Bigfoot.
|
|
|
|
|
05-26-2013, 05:31 AM
|
#53
|
3 Rivet Member
1983 31' Excella
2005 30' Classic
1993 33' Land Yacht
Wellfleet
, Massachusetts
Join Date: Mar 2009
Posts: 109
|
Yes always from the drivers side as if you were sitting in the vehicle ( left hand drive ) You are right
|
|
|
|
|
05-27-2013, 05:52 PM
|
#54
|
4 Rivet Member
1999 25' Safari
On
, the road
Join Date: Aug 2010
Posts: 298
|
Quick update.. Brakes did great in the mountains today. Took the Million ollar Highway from outside of Durango to Ouray. A few 10,000+ foot passes and no guard rails where the road wasn't wide enough for the white line in places.
As we descended I had to keep adjusting the power downwards. I ended the day below 7 volts I think. Could have easily locked them up on pavement today. I guess they just really needed a good breaking in.
Thanks all for the advice and troubleshoot help.
|
|
|
|
|
05-27-2013, 06:56 PM
|
#55
|
|
Moderator
2017 26' Flying Cloud
Alamo Heights
, Texas
Join Date: Aug 2006
Posts: 8,534
|
Quote:
Originally Posted by timmaah
Quick update.. Brakes did great in the mountains today. Took the Million ollar Highway from outside of Durango to Ouray. A few 10,000+ foot passes and no guard rails where the road wasn't wide enough for the white line in places.
As we descended I had to keep adjusting the power downwards. I ended the day below 7 volts I think. Could have easily locked them up on pavement today. I guess they just really needed a good breaking in.
Thanks all for the advice and troubleshoot help.
|
I had a very similar overall experience with my all-new brakes when I got new axles... I ran a few hundred miles with some stops run mostly with the trailer brakes, etc. as recommended, then adjusted the brakes, then felt like my braking was a bit "meh" for a trip or two. Then I noticed the brakes would lock on normal braking and started backing off on the controller, and I'm now at 7V and find braking to be very satisfactory.
__________________
David
Zero Gravitas 2017 Flying Cloud 26U | WBCCI# 15566
He has all of the virtues I dislike and none of the vices I admire. Sir Winston Churchill
|
|
|
|
|
06-16-2013, 10:26 AM
|
#56
|
Rivet Master
2008 23' Safari FB SE
Boulder
, Colorado
Join Date: Mar 2010
Posts: 510
|
Quote:
Originally Posted by timmaah
Quick update.. Brakes did great in the mountains today. Took the Million ollar Highway from outside of Durango to Ouray. A few 10,000+ foot passes and no guard rails where the road wasn't wide enough for the white line in places.
As we descended I had to keep adjusting the power downwards. I ended the day below 7 volts I think. Could have easily locked them up on pavement today. I guess they just really needed a good breaking in.
Thanks all for the advice and troubleshoot help.
|
This thread is a lifesaver. We just had our brakes inspected/cleaned this week and after re-installing with our P3, I noticed that I had to crank the P3 to 7.5 to feel any trailer breaking resistance and before it was set at 6.4 for a similar resistance. I was worried that the brakes were somehow reinstalled incorrectly but after reading this post, I am going to try to drive it more and do some power braking as well as crank the power on the controller until I hit lockup with just the brake controller switch on the trailer and then adjust downward for now.
Thanks for the guidance!
|
|
|
|
|
06-16-2013, 10:26 AM
|
#57
|
Rivet Master
2008 23' Safari FB SE
Boulder
, Colorado
Join Date: Mar 2010
Posts: 510
|
Quote:
Originally Posted by timmaah
Quick update.. Brakes did great in the mountains today. Took the Million ollar Highway from outside of Durango to Ouray. A few 10,000+ foot passes and no guard rails where the road wasn't wide enough for the white line in places.
As we descended I had to keep adjusting the power downwards. I ended the day below 7 volts I think. Could have easily locked them up on pavement today. I guess they just really needed a good breaking in.
Thanks all for the advice and troubleshoot help.
|
Nice - where are you headed next in CO?
|
|
|
|
|
06-17-2013, 01:58 PM
|
#58
|
4 Rivet Member
1999 25' Safari
On
, the road
Join Date: Aug 2010
Posts: 298
|
Quote:
Originally Posted by bonginator
Nice - where are you headed next in CO?
|
Glad I could help calm some others worries... Good hard braking should do it, otherwise it is fairly simple to adjust them with a screw driver and a ramp.
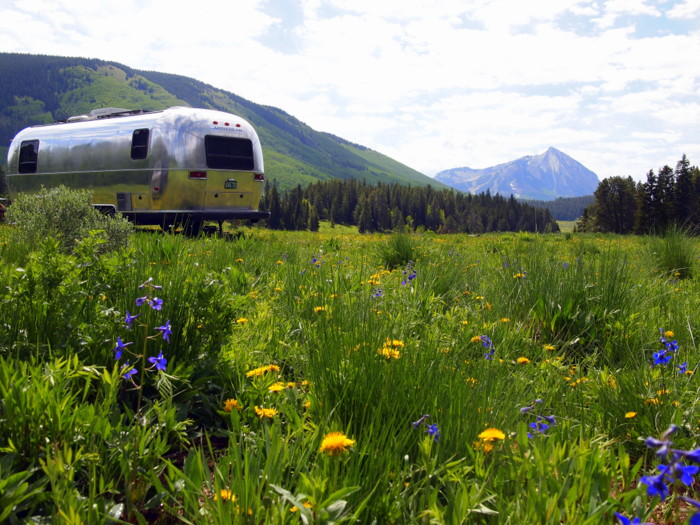
We are hanging out this week in Crested Butte.
Doesn't get much better than this...
|
|
|
|
|
06-18-2013, 07:07 AM
|
#59
|
Rivet Master
2008 23' Safari FB SE
Boulder
, Colorado
Join Date: Mar 2010
Posts: 510
|
Nice pic! I hope the hard braking does it. How long will you be in Crested Butte and where is that taken. Beautiful!
|
|
|
|
|
06-18-2013, 08:56 AM
|
#60
|
Rivet Master Commercial Member
1957 30' Sovereign of the Road
1959 28' Ambassador
1949 24' Limited
Peru
, New York
Join Date: Sep 2004
Posts: 745
|
It is true that new brakes need to be "broken in", as the "shoe arc" never matches the "drum arc" perfectly. We recommend that you drive around the block a few times applying the trailer brakes using the override lever only, while still depressing the accelerator. Do this for 20-30 seconds, then let the shoe/drums cool off a bit, then repeat several times. You will notice the brakes getting better with each successive application. This is true for any brake manufacturer as the shoe steel components are stampings that get welded together before the pad material is added. The manufacturing tolerances for this process are not as tight as we'd like, but with a little "break in" period, you're fine.
Another issue we've found numerous times is corrosion on the brake wire connections inside the bellypan. Keep in mind that one pair of wires enters the front of the bellypan & they pop out near each wheel. The split is typically in the center of the trailer, just ahead of the front axle, inside the bellypan, with no access hatch. The connection is done with wire nuts & electrical tape. It doesn't take much corrosion in that wonderfully damp environment to create some resistance. We run new wires on every restoration job & exit the bellypan near one wheel, then tie wrap the wire across the axle to the next wheel, then back to the second axle. Granted the connections are exposed, but we end up with complete serviceability & you know there are no potential hidden corrosion issues.
Colin
|
|
|
|
|
|
|
Currently Active Users Viewing This Thread: 1 (0 members and 1 guests)
|
|
|
 Posting Rules
|
You may not post new threads
You may not post replies
You may not post attachments
You may not edit your posts
HTML code is Off
|
|
|
|

 Recent Discussions
 |
|
|
|
|
|
|
|
|
|
|
|
|
|
|
|
|
|
|
|
|
|


 Linear Mode

