 |
|
 02-02-2011, 10:40 AM
|
#1
|
2 Rivet Member 
1972 23' Safari
2024 22' Bambi
Sierra Vista
, Arizona
Join Date: Jan 2011
Posts: 92
|
1968 Avion C11 Truck Camper restoration
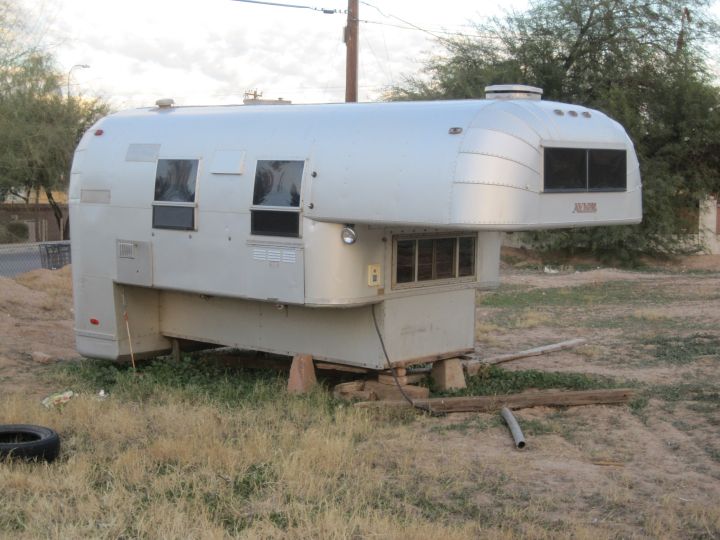
I found a 1968 Avion C11 truck camper last month, bought it, hauled it home, and am working on fixing it up for use later this summer. In case you're not familiar with the Avion truck campers, they made them in the mid to late 60s. The first model was the ten foot C10, I think it was introduced in 1965 and made into 67. The eleven foot C11 was introduced in 67 or 68, and made thru 1970(?) by Avion, and a few years longer by Cayo.
My camper was in Phoenix, I live in Sierra Vista, which is about 200 miles southeast. I'm working on fixing up a 1957 Chevy one ton truck to use the camper with, but it's not roadworthy yet. First step was to figure out how to haul the camper home. We don't have any trucks larger than 1/2 ton capacity, and the campers are reported to weigh 2200-2500 lbs, which is just too much for a lighter truck. I do have a tandem axle car trailer, so I decided to load the camper onto the trailer for the trip home. This was an adventure in itself.
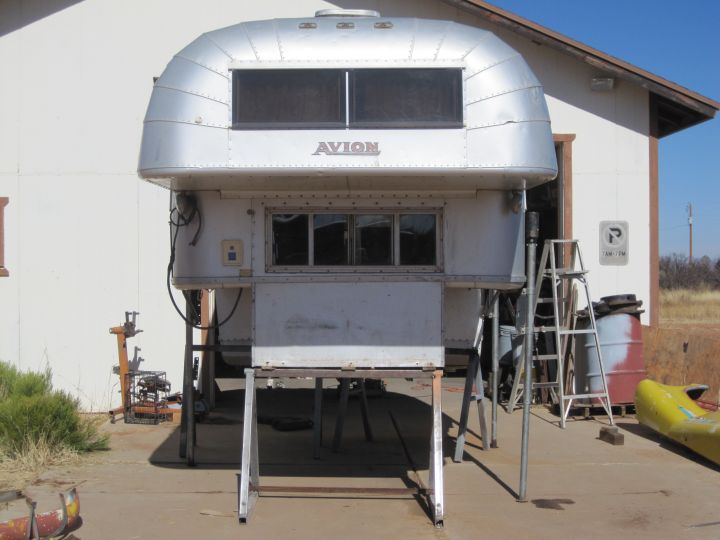
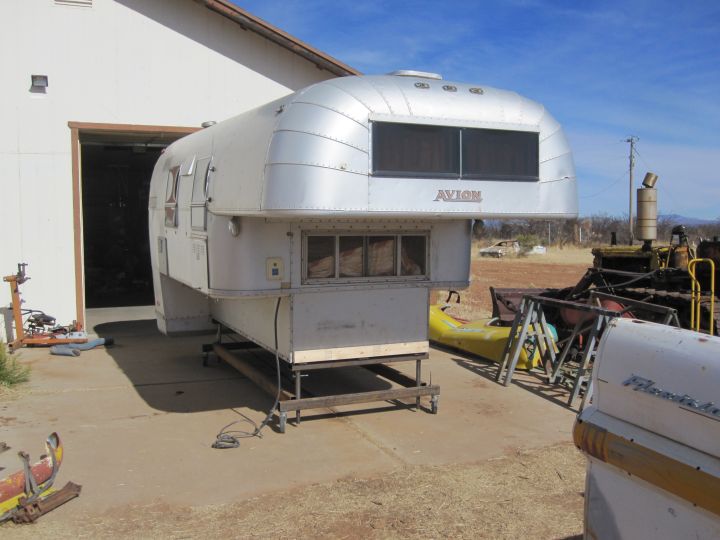
Here's the camper where it had been resting for a while before I bought it.
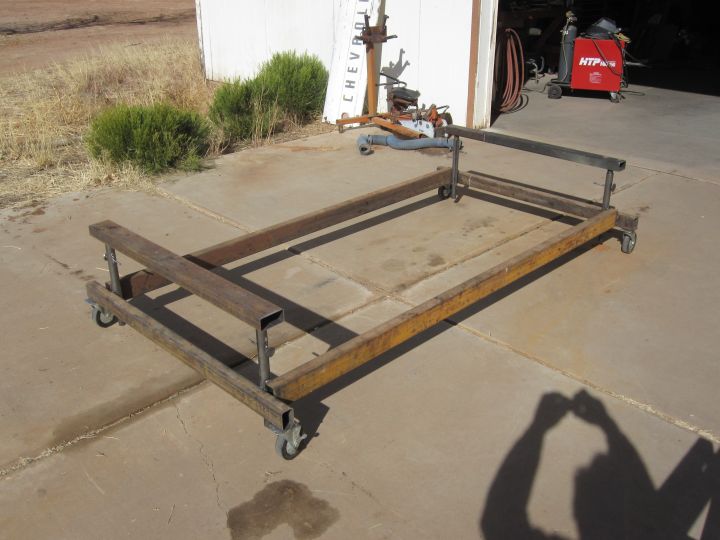
The rig including the sled that I brought to set the camper on. This was originally a frame jig for building a street rod frame. I just added the 2x6 across the back to make it into a camper sled.
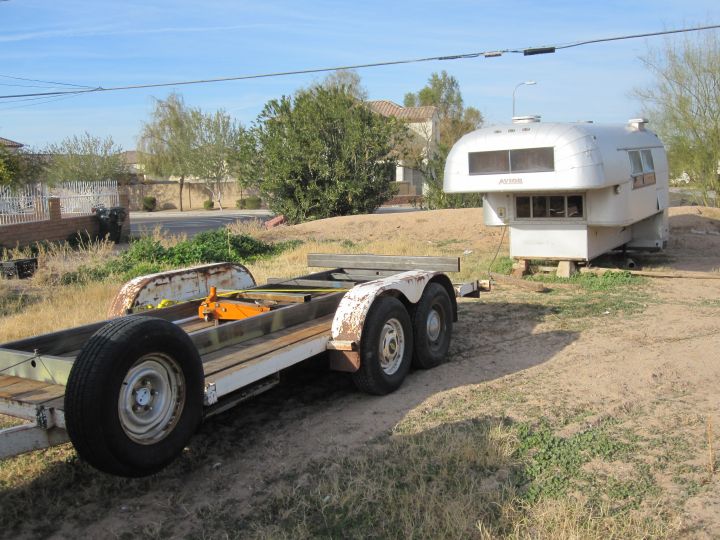
This is the plan...put the camper on the sled, put the front of the sled on the trailer, and winch it on.

up we go!
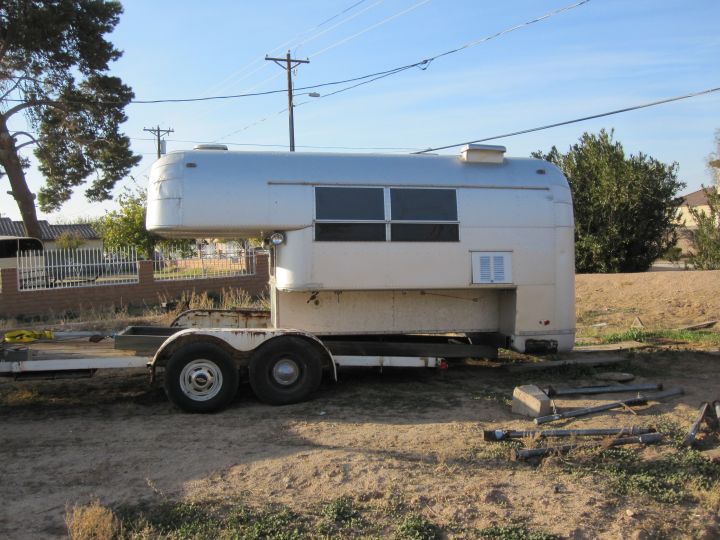
and there it is. I tied it a bit better before hitting the road.
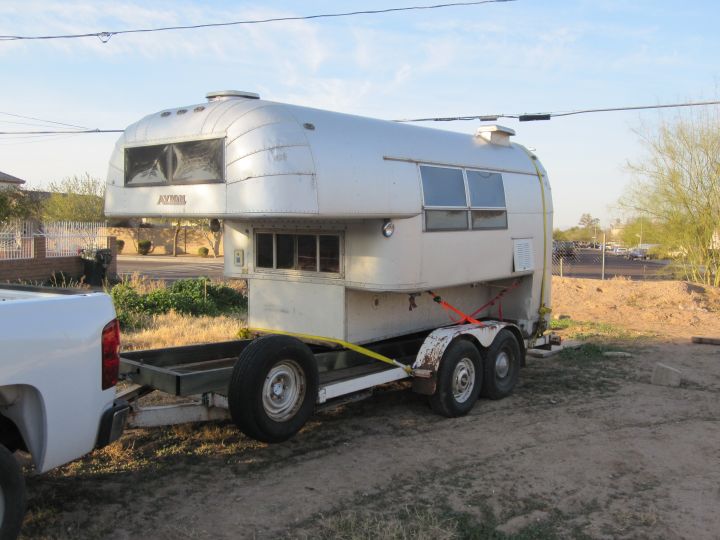
Next: getting it off the trailer.
|

|

|


|
02-02-2011, 10:55 AM
|
#2
|
|
moderator
Commercial Member

2016 27' International
Currently Looking...
Wilton
, California
Join Date: Aug 2008
Posts: 1,711
|
Welcome Jforb!
Great pictures.. we love pictures..
Looks like you have a fun project, Thanks for bringing us along!
Vinnie
|
|
|
|
|
02-02-2011, 12:27 PM
|
#3
|
|
Wise Elder
2010 30' Classic
Vintage Kin Owner
South of the river
, Minnesota
Join Date: Dec 2009
Posts: 4,169
|
Looks like an excellent specimen.
I've been keeping an eye out for a C-11 myself but there are few that come up for sale in the midwest and I'm hesitant to drive all the way to Tucson or Houston or wherever to get one.
There aren't very many web resources specific to the C-10 and C-11 so please do post more photos. I believe that many of the parts interchange with Avion trailers of the same era, and those are readily available and cheap, so that might be one thing to consider.
And do let me know if you find another one in good condition...
|
|
|
|
|
02-02-2011, 12:48 PM
|
#4
|
4 Rivet Member 
1973 31' Excella 500
Spring Green
, Wisconsin
Join Date: Aug 2010
Posts: 265
|
That looks like fun!! Could you post some pictures of the inside?
My dad had a mid sixties Dodge pickup that he always told me was a "camper special" with heavier suspension, cooling and power train. He had a 10 foot camper on it (not an Avion). I thought it was a 1/2 ton pickup, though. Somehow I didn't think the slide ins were that heavy.
Anyway, good luck with your new adventure. And, nice job of getting it home!
__________________
Lew TAC #WI-6
Nobody can help everybody, but everybody can help somebody.
|
|
|
|
|
02-02-2011, 01:06 PM
|
#5
|
2 Rivet Member
1972 23' Safari
2024 22' Bambi
Sierra Vista
, Arizona
Join Date: Jan 2011
Posts: 92
|
|
|
|
|
|
02-02-2011, 01:10 PM
|
#6
|
|
1 Rivet Short
1989 25' Excella
By The Bay
, Rhode Island
Join Date: Apr 2006
Posts: 1,620
|
Nice...welcome to the wonderful world of TC's!
I am sure you will hear from ticki2 real soon...he is just finishing up his resto of similar.
Keep us posted...this will be trey kewl with that truck!
Bill
__________________
*Life is Good-Camping all around the Continent*
*Good people drink good beer-Hunter S Thompson*
|
|
|
|
|
02-02-2011, 01:21 PM
|
#7
|
2 Rivet Member
1972 23' Safari
2024 22' Bambi
Sierra Vista
, Arizona
Join Date: Jan 2011
Posts: 92
|
How I got the camper off the trailer. The original setup used three screw type jacks, each with a tripod at the base. My camper came with 6 rather dilapidated hydraulic jacks. Three looked the same, and two of these fit into the camper jack holes on the camper. None of them really worked. I spent about a day messing with the jacks, including moving a bracket, replacing O rings, filling with oil, and making diagonal braces. I finally got them to where I felt comfortable lifting the camper, raised it up off the trailer, and set it on some steel sawhorses.
I needed to see how it looks on the truck, so I made a pallet for the truck bed that the camper sits on. The cab of this truck is too tall for the camper to just sit flat on the truck's bed. I realized this before I bought it, but decided I could live with it.
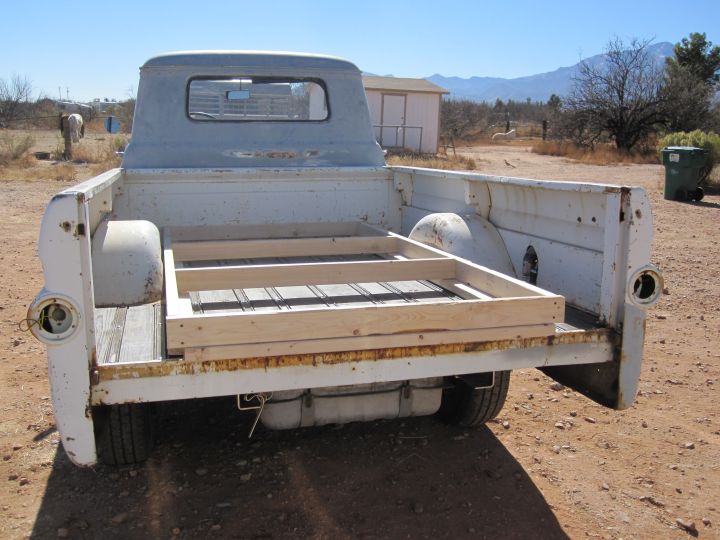
Then I raised the camper, and set it in the truck.
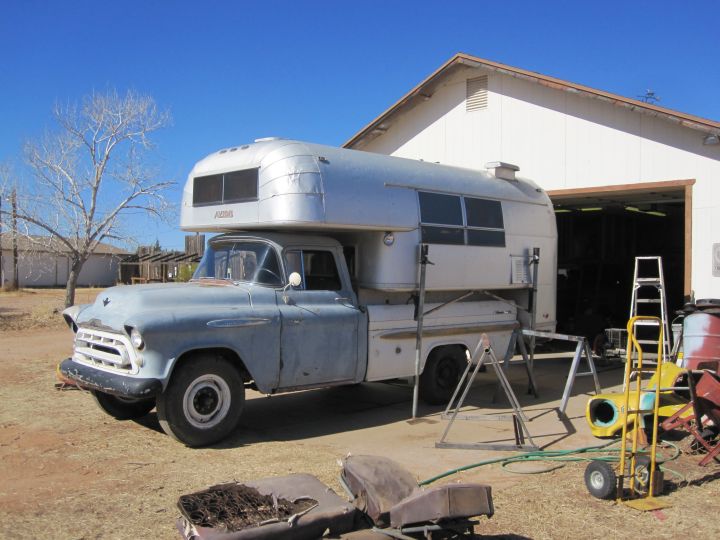
And here it is on it's own.
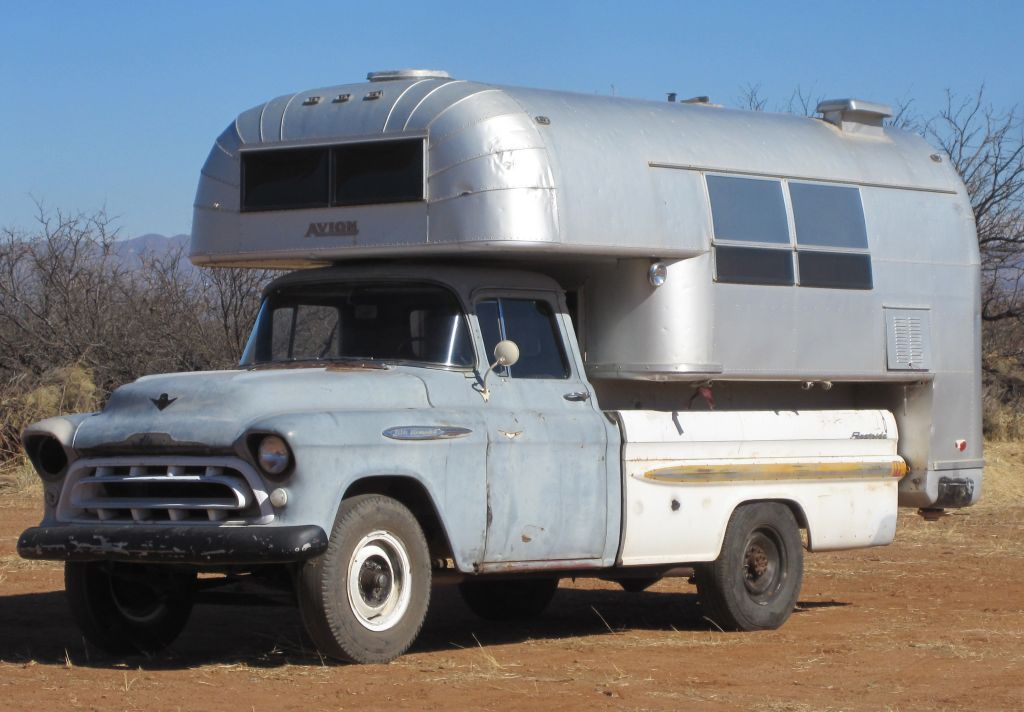
I need to do some suspension work on the truck to get it to sit right, but I have a few plans for that.
I wanted to get the camper inside so I could work on it without rain coming in thru the vent, etc. I decided I should make a dolly, with casters, and adjustable height. I looked around and found sufficient steel, wheels, etc. This is what I ended up with. It's made of 2x3 and 2x4 11 gage steel tube, with pin type height adjustments at each end.
I can adjust it up or down, and lower it a few inches at a time while lowering the camper.
And here it is after pushing into the shop. It just clears the nine foot door.
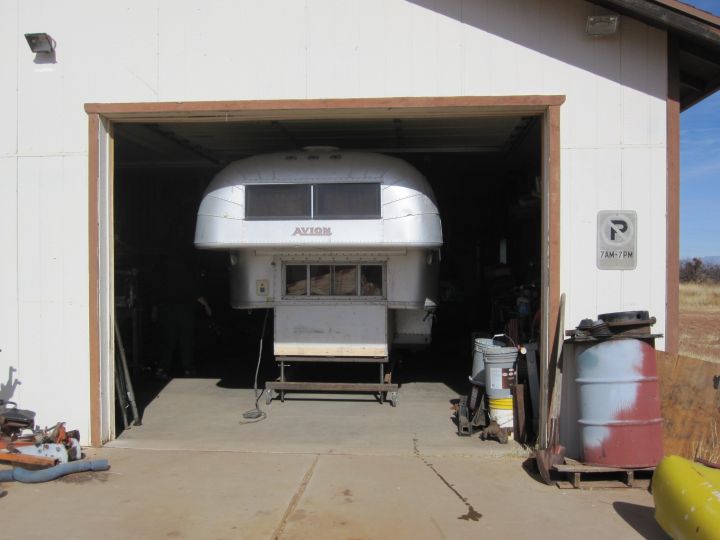
next: taking things apart.
|
|
|
|
|
02-02-2011, 01:42 PM
|
#8
|
Rivet Master 
2012 25' FB Eddie Bauer
Vintage Kin Owner
Virginia Beach
, Virginia
Join Date: Sep 2004
Posts: 7,801
|
I am Impressed
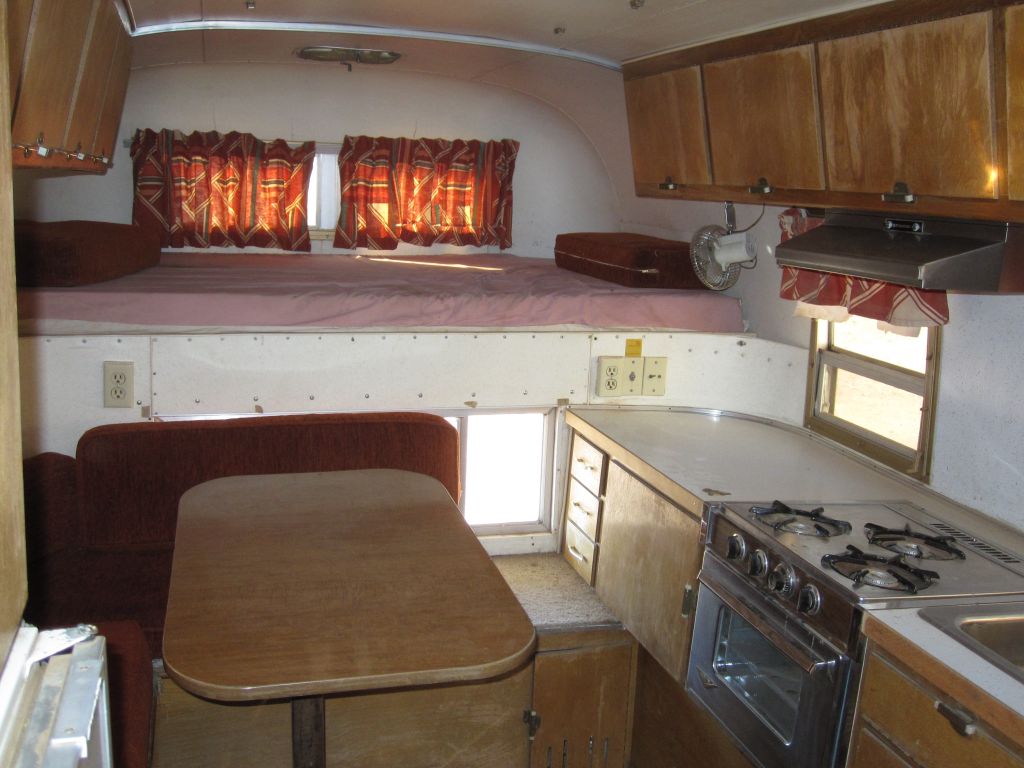
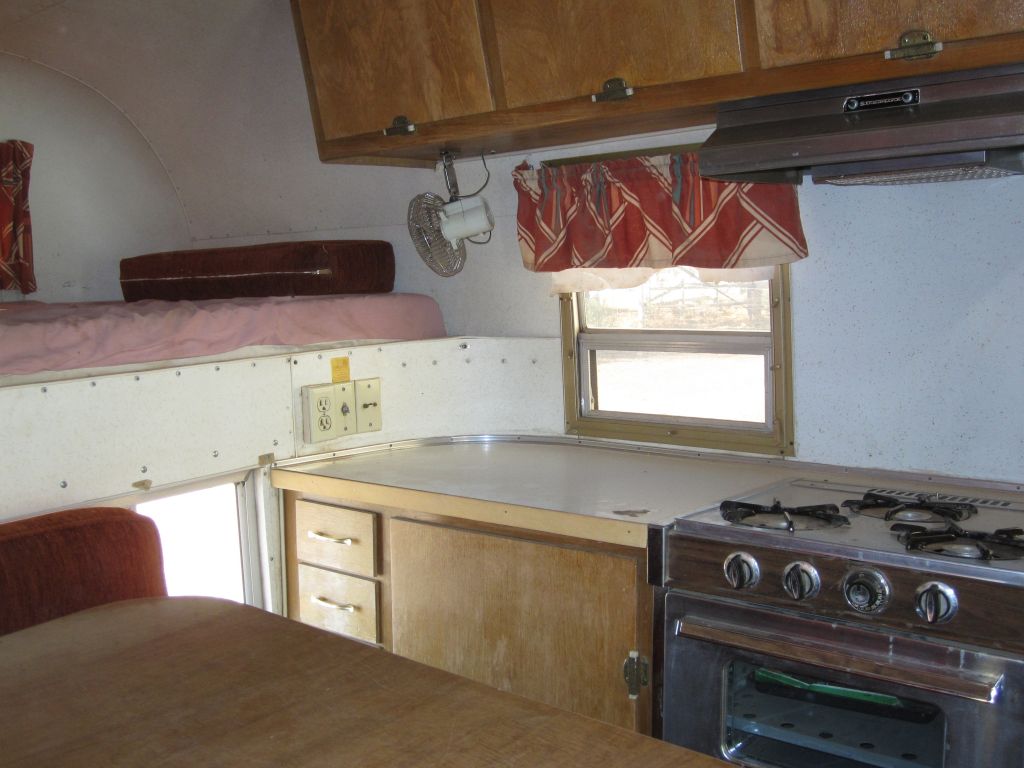
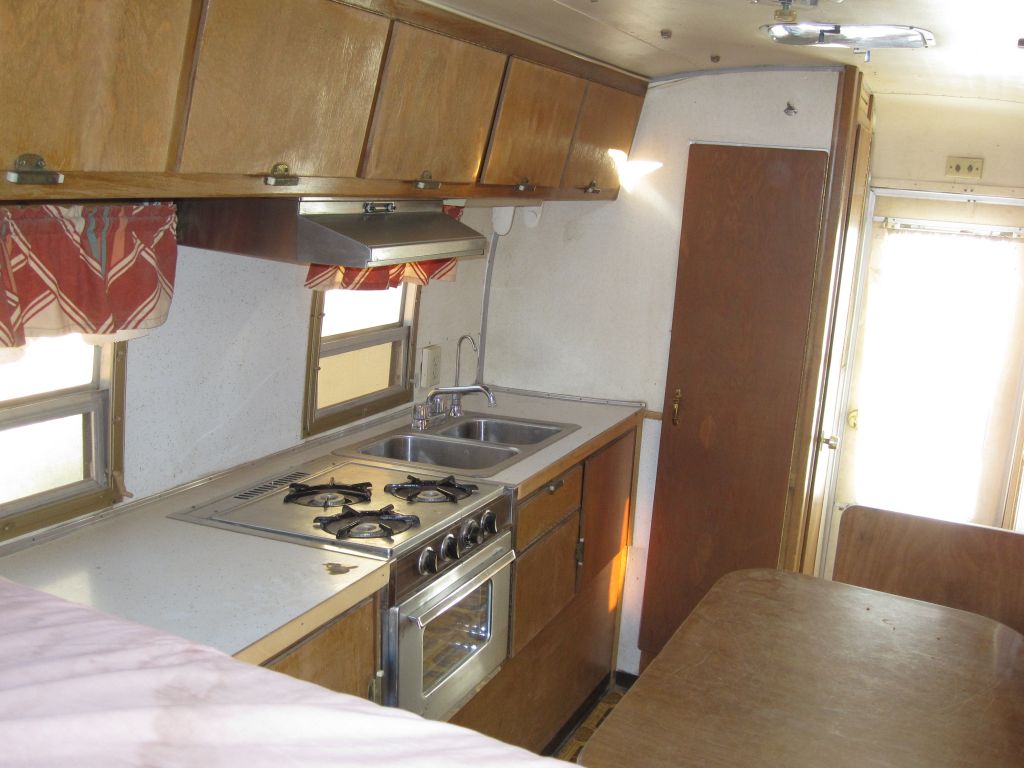
Looks clean and dry inside. Someone cleaned that stove.
That CANNOT be the original upholstery though - red/orange would never hold it's color that well.
Is there a tiny wetbath or or porta potty, or are those just storage lockers near the entrance.
Good luck on the repairs. Doesn't LOOK like it needs too much.
Paula
__________________
Today is a gift, that's why they call it the present.
|
|
|
|
|
02-02-2011, 01:48 PM
|
#9
|
2 Rivet Member
1972 23' Safari
2024 22' Bambi
Sierra Vista
, Arizona
Join Date: Jan 2011
Posts: 92
|
Looks are deceiving!
The upholstery is not original. It has a full shower/toilet bathroom, a bit cramped but definitely usable. I'll add more pictures as I get time.
|
|
|
|
|
02-02-2011, 03:53 PM
|
#10
|
|
Vintage Kin
Fort Worth
, Texas
Join Date: Nov 2006
Posts: 8,014
|
What a great thread . . so often owners do these moves without any explanation of how they rigged it, cranked it, etc. The opening pics of how the unit was trailered, and the most recent of a workstand are a real help to those of us who don't conceptualize this as well!
Am really looking forward to how this thread goes along. Silver Streak only made a few truck campers, but AVION built them (and CAYO) for quite some time. There is little available online for those interested in resto work.
Thanks for starting the thread. These are cool units, no doubt.
I have also searched for "wet" weights of these units, and while they're nothing like a modern big'un with a slide-out, I think they're more than what the brochure indicated.
.
|
|
|
|
|
02-02-2011, 07:00 PM
|
#11
|
Rivet Master
1976 25' Caravanner
Vintage Kin Owner
Campton
, New Hampshire
Join Date: Feb 2006
Posts: 1,113
|
Welcome pilgrim . It's exciting getting to discover a new old toy . There are at least 3 or 4 of us on the forums that have Avion C11's . Do a search on Vintage kin here and you'll find a few interesting threads . It looks like you have been down the restoration road before and have the tools. Looks to be in good condition , good luck and keep posting your progress . If I can be of help give a shout.
|
|
|
|
|
02-02-2011, 10:33 PM
|
#12
|
2 Rivet Member
1972 23' Safari
2024 22' Bambi
Sierra Vista
, Arizona
Join Date: Jan 2011
Posts: 92
|
Thanks tiki! Your C11 thread was one of the things that brought me to this site...I'd sure like to see more pics of your camper, mostly inside, but also outside. Little details like the TV antenna, the door check spring, the kitchen counter, under the sink (plumbing), etc.
|
|
|
|
|
02-03-2011, 08:31 AM
|
#13
|
Rivet Master
1966 24' Tradewind
1995 34' Excella
Lynchburg
, Virginia
Join Date: Jun 2006
Posts: 4,226
|
Memories from 78
jforb
Back in 1978 I was heading to my first BMW motorcycle rally in Minnasota. I decided to take the long way there via Niagra Falls, up the Bruce Peninsula to Tobermory, take the ferry, then on to the Trans Canada highway to Sault Ste. Marie and around the north shore of Lake Superior and into Minnasota. I missed the ferry at Tobermory and it worked out great. I had an extra 4 hours and took a boat tour of the harbor and the islands and then got in line to wait for the ferry.
I met the nicest older couple in an Avion TC. It was beautiful. I remember a lot of birch on the interior and they had all kinds of pictures on the walls of their children and grand children. It was the highlight of my trip. I took notes then about how I wanted to do this when I got older. Funny how things happen that shape your future.
Looks like you found one in great shape. Good luck on the resto. Looks like you have the right truck to carry it.
Dan
|
|
|
|
|
02-03-2011, 08:52 AM
|
#14
|
Rivet Master
Currently Looking...
Mantua
, Ohio
Join Date: Jul 2005
Posts: 7,062
|
Airhead or were the bricks out yet, can't remember myself. zz
|
|
|
|
|
02-03-2011, 09:16 AM
|
#15
|
Rivet Master
1966 24' Tradewind
1995 34' Excella
Lynchburg
, Virginia
Join Date: Jun 2006
Posts: 4,226
|
zz
All airheads. Mine was a 1974 R90/6 with a Saeng handlebar mounted fairing. The bricks did not come out until the early 80's. I still have a 1986 K75.
Dan
|
|
|
|
|
02-03-2011, 09:34 AM
|
#16
|
Rivet Master
1979 31' Sovereign
Milford
, Ohio
Join Date: Jan 2005
Posts: 565
|
Really cool, and mounting it on that old truck is perfect.
You say you have work to do on the camper, but where? It looks ready to go in the photos.
Christopher
|
|
|
|
|
02-03-2011, 12:11 PM
|
#17
|
2 Rivet Member
1972 23' Safari
2024 22' Bambi
Sierra Vista
, Arizona
Join Date: Jan 2011
Posts: 92
|
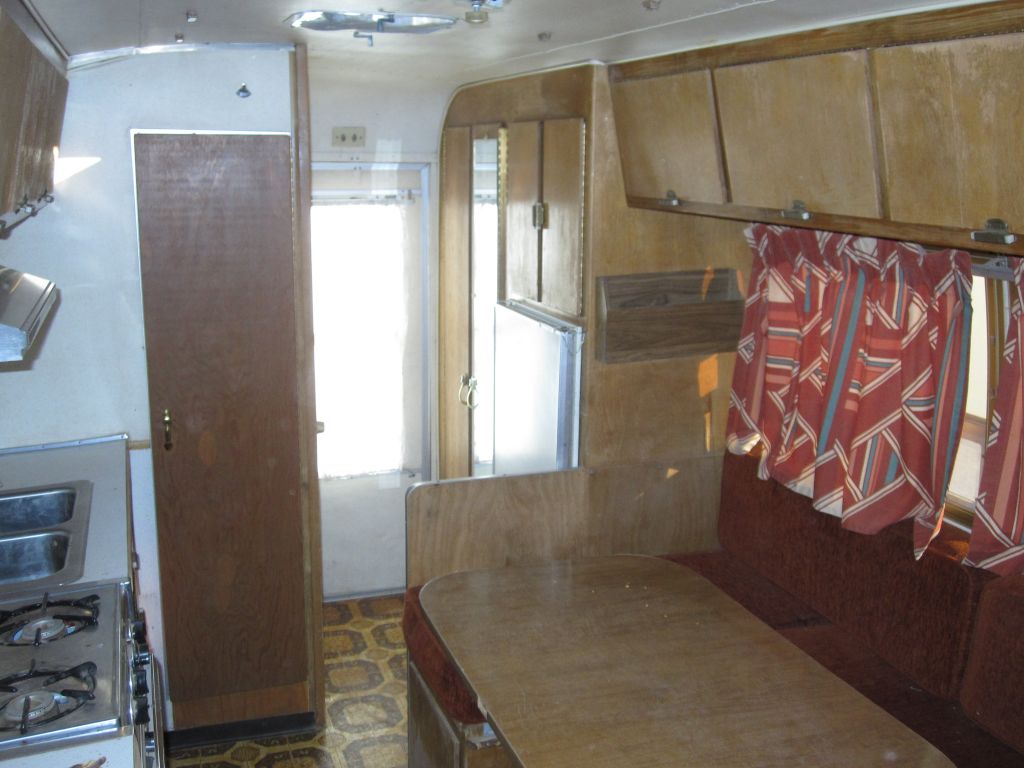
The problem is I started looking closer, and taking things apart, and found all the interesting problems.
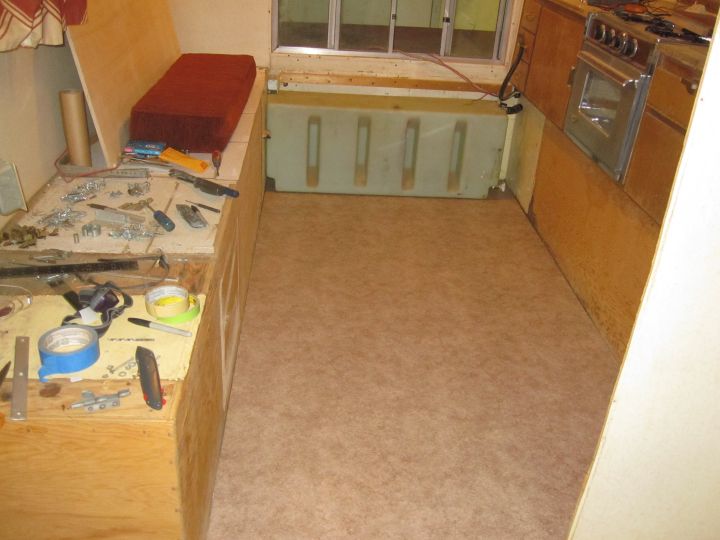
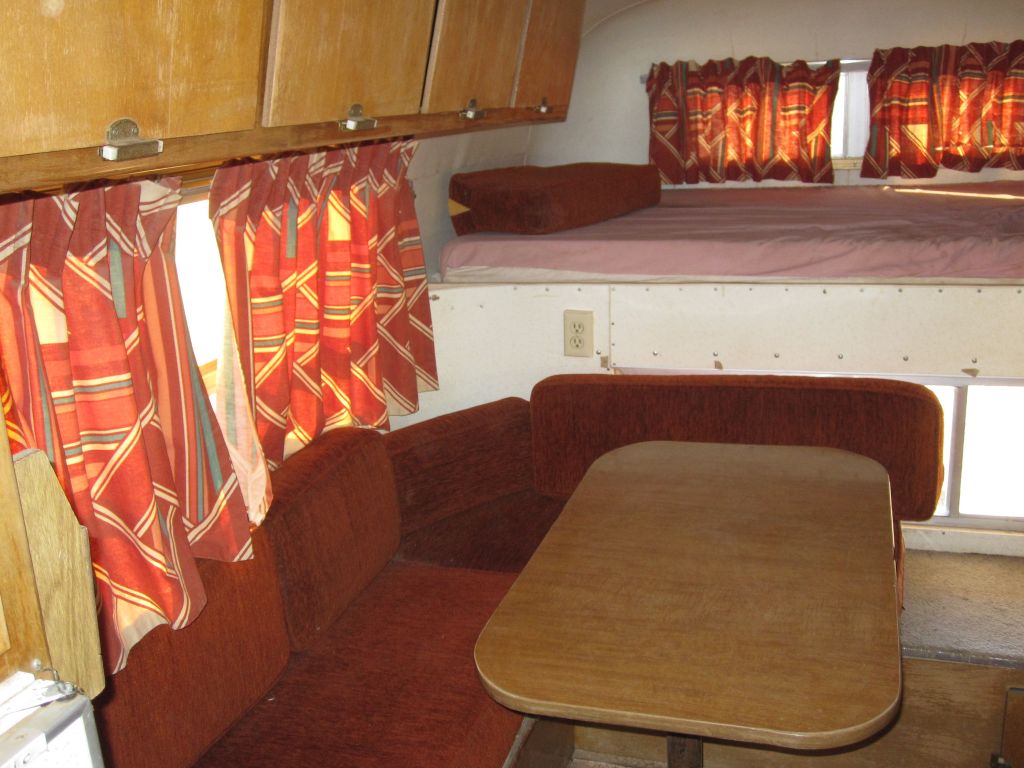
First off, I don't like the floor plan. The original design has a dinette that has a wall going halfway across the main part of the camper floor, and a seat that sticks out from the wall. There is also a raised floor under the table. I would like the camper to be more open inside. So I took out the cabinet and raised floor, and discovered that the yellow floor covering was installed on top of 1/2" plywood, which was screwed and glued over the original sheet vinyl flooring.
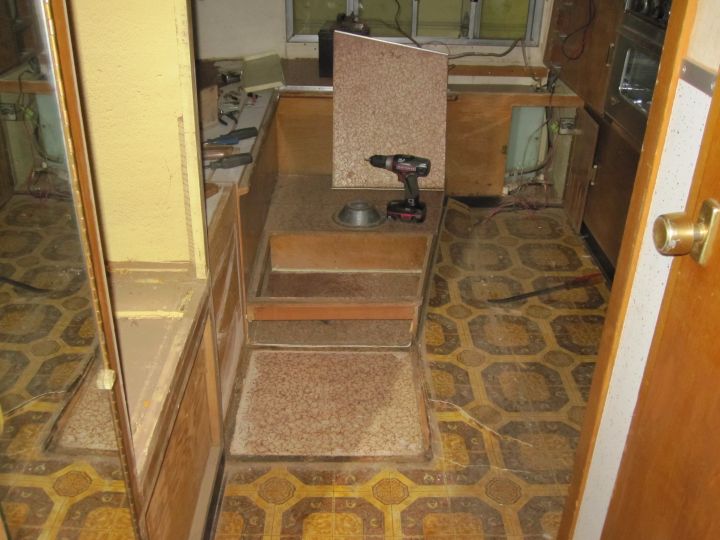
Since I wanted the floor to be open, it needs to be at one level, so I either had to remove the plywood, or add more plywood. I want to keep the weight down as low as possible, so I decided to remove the added plywood.
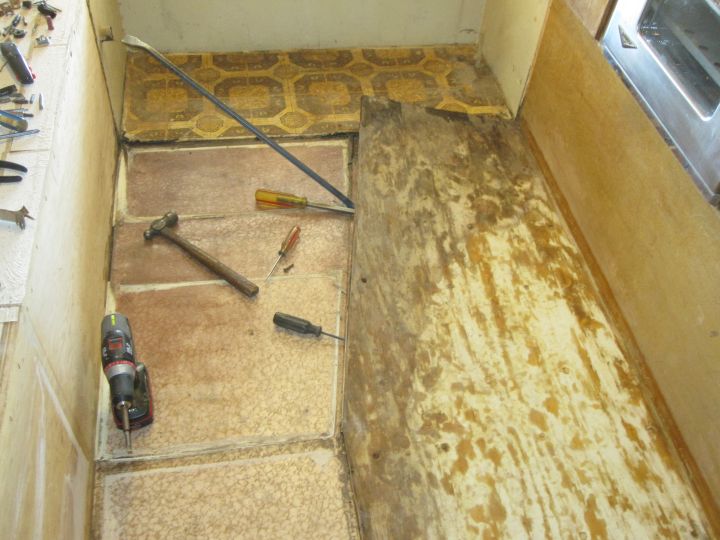
Of course after I did that, I discovered why the plywood was added (no big surprise here)...there was a rotted place in the original floor, in front of the stove. I decided to remove the floor back to where it was solid.
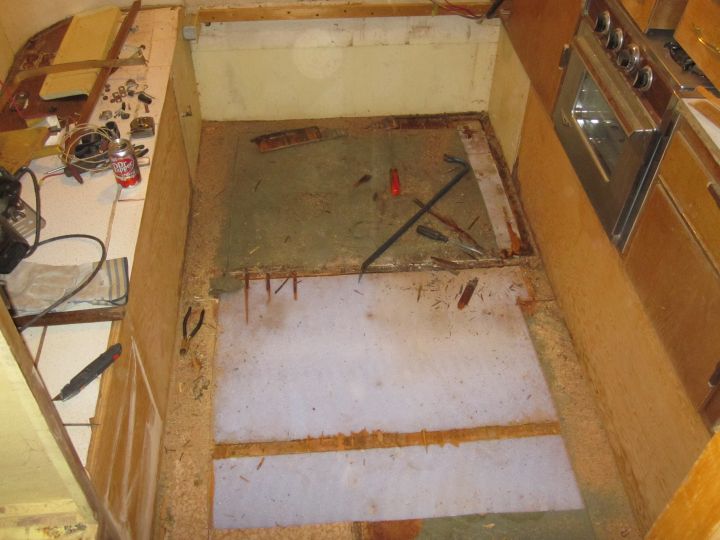
This ended up being about 7 feet back from the front of the camper. I bought a piece of 1/4" BC plywood, and cut it to fit, and glued and stapled it in place
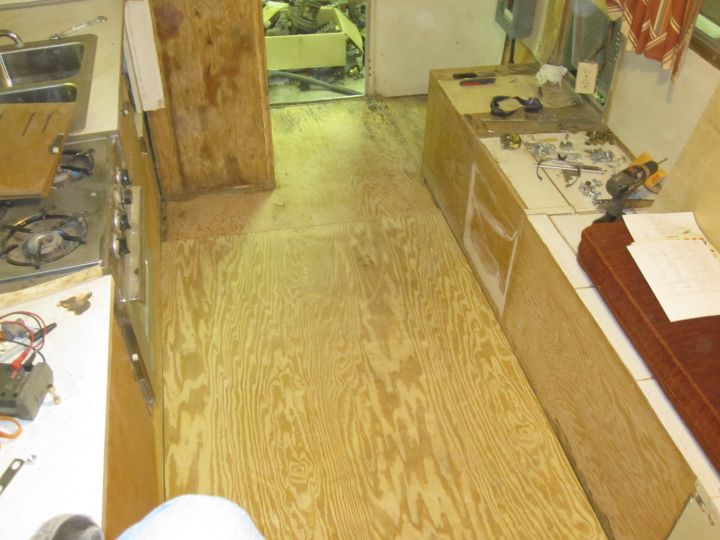
I then removed the rear cabinet, bathroom wall with the door, and the shelf unit that was installed where the heater used to be. This let me remove the remaining original vinyl from the floor. That was a fun task itself, I used a heat gun to loosen the glue, and a chisel to scrape the glue off. I found some new vinyl at a local building supply (Sutherland's), it is similar in color to the original, and does not have those pesky fake grout lines that most modern vinyl has.

I decided to leave the flooring "floating", rather than glue it down. I expect that I or someone else will want to redo this thing sometime in the not too distant future, and I want to make it easier to work on. Whoever did the last remodel used a couple tubes of liquid nails, and it is a real pain to work on stuff that has been glued together that way. The original construction used just enough fasteners and adhesive to do the job, and I think that's what should be done. I used floor adhesive around the perimeter of the rear closet, and staples around the rest of the floor. We'll see how it works out.
|
|
|
|
|
02-03-2011, 12:23 PM
|
#18
|
|
Wise Elder
2010 30' Classic
Vintage Kin Owner
South of the river
, Minnesota
Join Date: Dec 2009
Posts: 4,169
|
Very cool, keep the pics coming.
|
|
|
|
|
02-03-2011, 01:02 PM
|
#19
|
2 Rivet Member
1972 23' Safari
2024 22' Bambi
Sierra Vista
, Arizona
Join Date: Jan 2011
Posts: 92
|
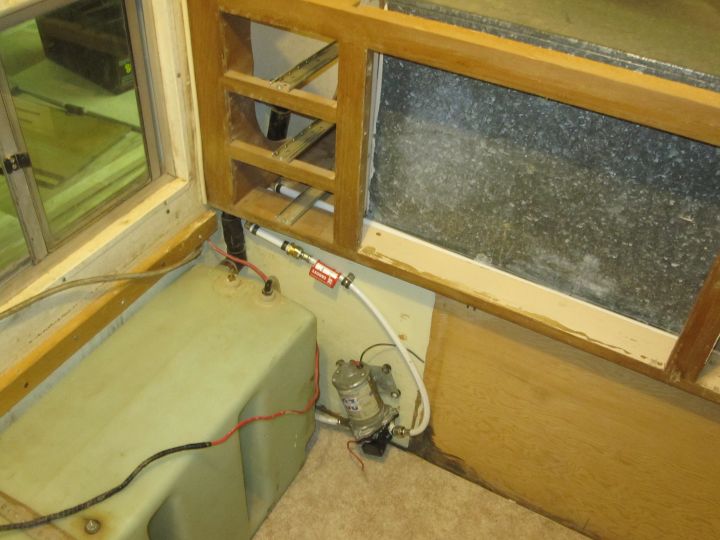
The battery box and water tank area was "interesting". The original battery box is long and slender,and takes a hard to find 3EE battery.
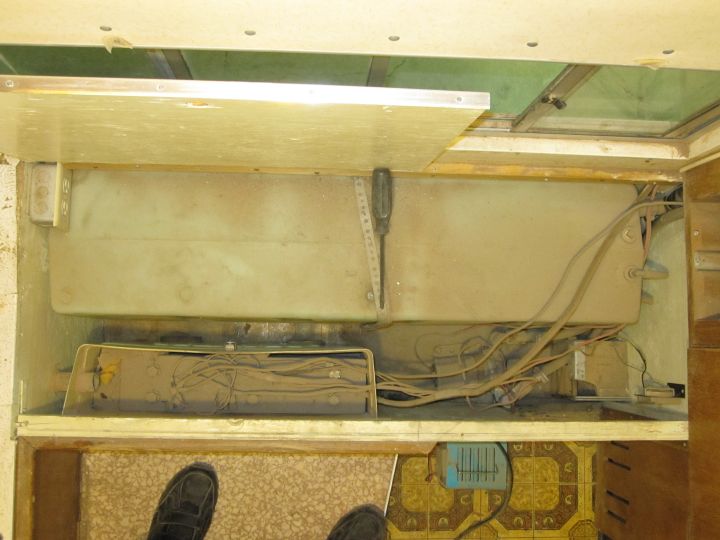
I like buying batteries at Walmart because I'm cheap and lazy. Of course a normal sized battery won't fit in the allotted space. It appears the fresh water tank has been changed, this one measures to about 28 gallons, and the brochure claims the fresh water system holds 20 gallons. After removing the tank, I plugged the outlet, and filled it with water, and allowed it to sit for a day. No leaks. I'll plan on reusing it. I did not try the pump yet, but I'll plan on reusing it too. It is only about 20 years old, which is pretty modern when working on a 43 year old camper.
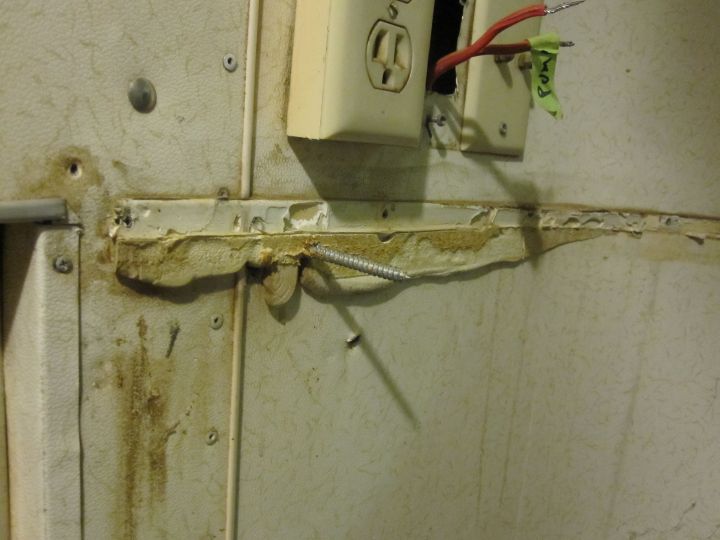
Back to the story...after installing the new flooring, I need to build a new partition for the front of the camper. The original was eaten away by battery acid, the bottom inch or two is gone. The revised floor plan I want will let the partition move back a bit into the main floor area. This lets me use a larger, more readily available battery. I decided to put the partition as far from the front wall of the camper, as the side partition (wing) is from the main outside wall of the camper. This will give me an L shaped seating area.
Here is the water tank sitting on the new floor. Building the new partition, and a new, wider battery box is still in progress. I have the planning done, I need to get my 1968ish table saw out of the shed and get it working to rip some 1x2s.
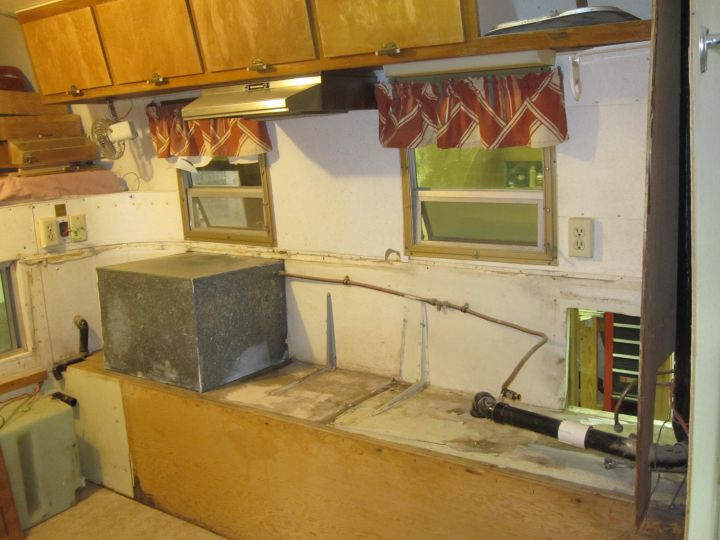
Meanwhile, I took out the kitchen cabinet and water heater.
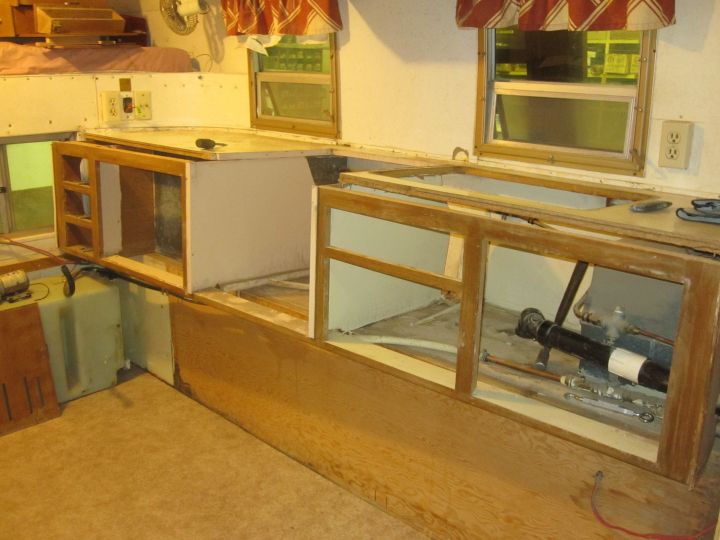
This is the "before" picture. Notice the counter slopes down toward the rear, about an inch. There were also some mysterious lag bolts and washers outside, about counter height. I never put two and two together until I tried to get the counter out--it was stuck really well. I removed the aluminum corner trim, which was very difficult, then cut the sealer/glue that had been used to attach it to the wall, and still it would not come out. Eventually I broke the back right half of the counter off, and found that the bolts outside were 4" long, and extend into the countertop edge.
Very strange, and obviously not original. After removing the rest of the screws, the remainder of the countertop came out. The cabinet and water heater came out relatively easily.
I've been working on the plumbing over the past week. I decided to use plastic, as the original copper had several splices and green spots, and copper is getting so expensive. It's also susceptible to freezing. So far I've added a 1/2" PEX tubing from the pump (with a flex line on either side of the pump itself), and I'm going to try the push on plastic fittings for the water heater, sinks, and toilet, with 1/4" id PEX tubing. I added a 1/2" pipe thread connection between the two, so I can redo the plumbing easily if needed.
I also played with the water heater. I removed the gas plumbing and regulator, and set them and the tanks outside the shop. I connected the water heater, plumbed the heater with a valve and hose fitting, filled it with water and lit it. The gas valve was very tight at first, but now is not too hard to turn.
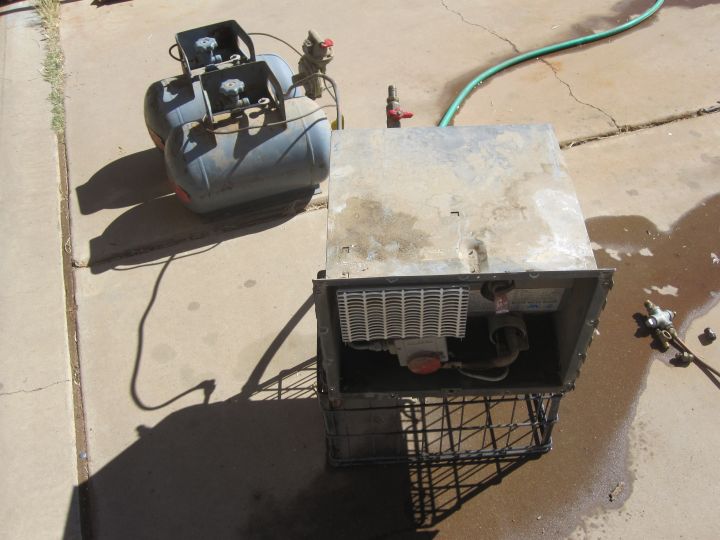
It works! the pilot stays lit, the thermostat works, the gas valve works. I replaced the T&P valve also, and reinstalled the heater in the camper.
|
|
|
|
|
02-03-2011, 01:37 PM
|
#20
|
4 Rivet Member
1979 Argosy 27
1969 21' Globetrotter
1953 25' Cruiser
Front Royal
, Virginia
Join Date: Jan 2009
Posts: 407
|
Very cool. I love those campers! Great job so far, look forward to reading your progress.
|
|
|
|
|
|
|
Currently Active Users Viewing This Thread: 1 (0 members and 1 guests)
|
|
|
 Posting Rules
|
You may not post new threads
You may not post replies
You may not post attachments
You may not edit your posts
HTML code is Off
|
|
|
|

 Recent Discussions
 |
|
|
|
|
|
|
|
|
|
|
|
|
|
|
|
|
|
|
|
|
|


 Linear Mode

