Greetings Catherine!
Welcome to the Forums!
Sorry to hear about your flood damage. I know how frustrating repairing flood damage to my bungalow was, and understand what you are going through with making similar repairs to your Airstream.
Quote:
Originally Posted by fridder13

What is a banana wrap?
|
Banana Wrap is the exterior aluminum sheet that runs from the base of your exterior walls and curves around the bottom of the wall and joins the aluminum covering the bottom of your Airstream's frame.

The photo above shows the banana wrap on the base of
PizzaChop's coach. The panel on the ground is the belly pan that also attaches to the banana wrap.
Quote:
Originally Posted by fridder13
or outriggers?
|
Outriggers are a part of the frame. On your coach, you can see the main frame beams at either end. The main horizontal frame members can be seen where the bumper connects at the rear and where the "A-Frame" hitch is formed in the front. The main horizontal frame members are joined by crossmembers that form the central structure to which the floor is attached.

The photo above was posted by
P&K and shows a typical frame consisting of the two horizontal main beams along with the cross members. What isn't shown are the outriggers.

The photo above was posted by
PizzaChop and shows typical outriggers. The outriggers are attached to the main frame rails and extend out to the outer edges of the coach's walls. The outriggers help to form the curve of the banana wrap on the coach and provide support to the outer 12" to 18" of the coach's floor.
Quote:
Originally Posted by fridder13
There seems to be a difference in rivets. Maybe in rivet tools.
|
You are correct on both counts. There are
many types of rivets as well as
many types of rivet tools. Some quick facts about rivets include:
- Materials from which rivets can be manufactured include aluminum, steel, or more exotic metals.
- Rivet types include
- Blind Rivets (pop rivets): are rivets designed to join two or more panels to which you do not have access to the rear of the panels. These are the type of rivet typically utilized to attach the interior wall panels of Airstream coach's (aluminum rivet often purchased in a color to match the interior color of the Airstream).
- Solid Aluminum Alloy Rivets: are rivets designed for structural application and require access to both sides of the panels being joined. Typically installation is a two-person job with one person inside the coach with a "bucking tool" and another person on the exterior with a "driving tool". These are the types of rivets that were used at the factory to create the exterior shell (joining the body panels to the ribs).
- Olympic Rivets: are specialized "blind rivets" that are designed to make repairs to the exterior shell of the Airstream. These rivets are rated for structural applications, but do not require access to the rear of the panels being joined. They are made of aluminum alloys, and once installed, a portion of the rivet head must be removed and the surface ground smooth to maintain a similar appearance to the factory bucked rivets. A special tool called a "rivet shaver" is often utilized to produce the best surface on Olympic Rivets.
You will find that in addition to the various metals and colors, rivets also come in different length and bore sizes depending upon their use and location within the coach.
Actual riveting tools also vary tremendously in size, cost, and application. Typically, interior pop rivets are most often installed with manual pullers that look something like a complex pair of pliers.
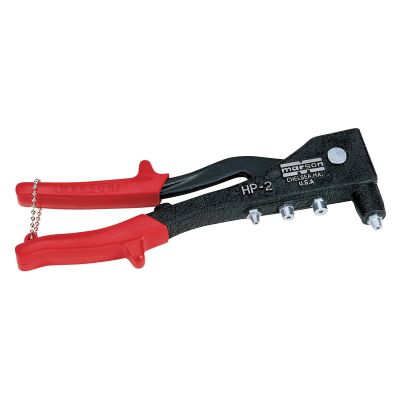
The photo above is of a typical hand riveting gun that many Airstreamers have in their tool kits for interior rivet repairs/replacements.

The above tool is an example of pneumatic or power riveting tool . . . the power can be via an air compressor or may be electric.
Quote:
Originally Posted by fridder13
I absolutely need to make the repairs to my baked potato home. I'm afraid of starting half-cocked and ending up with a pile of useless aluminum.
Thank you.
catherine
|
My guess is that time is of the essence in more ways than one as it doesn't take long for mold to multiply and produce many issues in once-flooded living areas. Depending upon the depth of the flood waters in your coach you may find that you need to adress the following among other items:
- Below the floor insulation. Your coach was supplied with fiberglass batt insulation below the floor, and if it was saturated with flood water it will need to be replace. Replacing the under-floor insulation will require removing the belly pan to access the bays where the insulation was installed.
- Interior issues can pose a number of problems. . . .
- Cabinetry exposed to flood waters can delaminate requiring replacement or other forms of restoration to be applied.
- Wall cavities contain fiberglass bat insulation, and if it was saturated it too will need to be replaced. Replacing insulation in the wall requires exposing the walls by removing cabinetry. Once the cabinetry has been removed in the areas requiring attention, the pop rivets need to be drilled out to permit the interior panels to be removed exposing the insulated cavities . . . once exposed, the damaged insulation can be removed and replaced with your preference of insulating materials.
Unfortunately, there aren't any quick and easy fixes to addressing flood damaged insulation in an Airstream. The process is likely to be very labor intensive.
Good luck with your investigation and project!
Kevin


 Linear Mode


