This was probably a crazy idea to begin with…taking our 1st real overnight trip as a 10 day* cross country trip in our Interstate. We haven’t seen family since the start of the pandemic, wanted to finally put our Airstream to use and we figured “well, this is quite the way to learn the ropes”. We are absolutely still newbies at this whole experience / lifestyle and have so much appreciation for all the helpful comments we see on this forum. We wanted to “give back” to the community and certainly for “first timers/newbies like us” with some lessons learned in our 1st real adventure (which is still ongoing and will be until probably the middle of August) in our 2021 Airstream Interstate 24 GL 4x4.
1/ SPEND TIME PREPARING & TRYING IN YOUR DRIVEWAY & CLOSE TO HOME
We spent 3 months on and off doing day trips near home (discovered some problems with the Air conditioning compressor, wheel balancing + a number of other things right after we bought it), sleeping in our Interstate in the driveway (convinced us to buy a mattress pad), testing a TPMS system (taught me we need metal valve extenders for the rear inner tires for the TST 507 6 sensor system we have), using the generator (kinda dreading the 4 hour change the oil experience

, filling up the air in tires with a ViaAir (we tried a cheaper system and it took a lot longer), and setting up our Pepwave (ordering SIM cards, configuring internet settings, etc) + a lot more. All this prep I do believe helped us feel more at ease on the first part of our journey.
2/ PEPWAVE BR1 MAX MINI WITH DUAL SIM CARDS FROM VERIZON AND ANOTHER PROVIDER WORKED PRETTY WELL PLUGGED INTO THE PRE-INSTALLED POYNTING MIMO ANTENNA ON THE ROOF + PRE-INSTALLED
12V POWER PLUG…UNTIL IT DIDN’T : there are much more detailed and better posts on the pepwave airstream setup elsewhere in this forum (@WeekendBob is especially smart on this topic) but we purchased our own pepwave cellular router, 2 SIM cards, activated them and tested them out prior to our trip. We prioritized the non-Verizon SIM card over the Verizon one (started with 30GB prepaid plan which is pricey but we are in “test to see if this all works mode”) one but still ran into areas where there was no coverage. The other SIM card I tried turns out is not compatible with pepwaves so I have to find an alternate one for the next leg of our trip.
I’m sure there are cheaper/better ways to have mobile internet (please share which Verizon plan is best if you use them). We’re also still trying to get to the bottom of the power management issues for the WiFi Keyed Switch on the 2021 Interstates. We kept it on while at campsites (plugged into shore power) and kept it on while driving but turned it off while boondocking to not drain the batteries.
3/ TURN OFF AUTOMATIC UPDATES & BACKGROUND APP REFRESH ON ALL YOUR DEVICES TO NOT CRUSH YOUR DATA PLAN: While we DID do this prior to leaving our home, I wasn’t thorough enough. I should have turned off automatic updates on the Apple Watch bc it used 2GB of data on one of the days (I’m assuming installing an update). My wife went through a few GB forgetting to turn wifi off listening to a Netflix show too
Our strategy has been to do the data-heavy things when we get to an AirBNB (helpful to break up the campsites with occasional normal shower or relatives house where they have a wifi access point that isn’t nearly as data limited.
4/ LEAVE VERY EARLY TO GET TO THE GRAND CANYON: this is a little non-sequitur compared to the other lessons learned, but I’m very glad we woke up at 5am, hit the road by 6am to drive from Kingman, AZ (boondocked at the Desert Diamond Distillery: good experience) to get to the Grand Canyon (daughter and wife’s first time). We arrived to snow on the ground (which I think my daughter enjoyed more than the Grand Canyon
and moderate amount of people. Maybe a 5 min wait in your car to get into the park. When we left, there seemed to be miles of traffic to get in (around noon on a Saturday). Lesson learned: even in March during a pandemic, the Grand Canyon south rim can get VERY crowded on weekends. I’d imagine this summer will be even more busy.
5/ HAVING AN AIR COMPRESSOR, DUCT & VELCRO TAPE, A HANDHELD VACUUM & THE CERAMIC HEATER WERE THE MVPS OF THE TRIP : of course everyone’s experience is different but for us, we ended up noticing a slow tire leak in Villanueva State Park, NM (beautiful). Having the air compressor with us was hugely helpful (actually twice had to use it) b/c it took us 2 days to finally be convinced that something really must be wrong with one of our tires. We had to stop in Oklahoma City (Mercedes dealer there was particularly helpful with our Interstate) and Sallisaw, OK (hats off to Lee’s Tire Service there who figured out we had a nail in the tire > patched it same day. Fantastic service (even though they don’t specialize in Airstreams).
On the way to Villanueva, we also noticed a “flapping” below our Interstate. Turns out the UltraHeat heater pad was “unsticking” from the undercarriage of the vehicle.
“This normally happens when the tank surface is not prep correctly by the installer on line at the manufacture” according to the manufacturer of the product who responded quickly to us. Thank you Mr. Duct Tape for helping at least temporarily here. Still need to crawl under our Interstate and re-affix the tank heater pad with heavy duty 3M tape or Gorilla Glue.
But the MVP (for us) was using this ceramic heater (no affiliate/commission links in any of these amazon URLs below).
https://www.amazon.com/gp/product/B0...?ie=UTF8&psc=1
We used the ceramic heater b/c we didn’t want to blow through our LP supply (after about 2.8 hrs total usage since we bought the unit, we are at 71% LP after starting “full”) to heat up the inside. We experienced at least 3 nights of sub-freezing weather. The coldest was 27 degrees in Kingman, AZ, Villanueva, NM and Silverpoint, TN. One of those 3 nights we boondocked (and used the Mr. Heater Buddy; worked pretty well) and the other 2 we were plugged in so we could use the ceramic heater (used 7amps on low settings; 12 amps on high) and it worked great. One of the first nights we slept in cold weather, the inside of the interstate got down to 41 degrees (we didn’t want to fall asleep leaving the ceramic heater turned on) and once we woke up and turned it on (early in the morning), within about an hour, the heater brought it up to 60 degrees.
I unplugged the exterior water hookups those nights, turned on the tank heaters and battery heater (keyed switch), shoved towels in the cavities that hold the waste water tank hoses and a tiny hand towel where the fresh water outdoor hose spigot is on the exterior of the Interstate. Who knows whether that helped insulate any pipes from freezing but we didn’t want to take any chances. We had an “Eve Degree” outdoor weather sensor that gave us the specific temperature in our location/campsite. Used a small piece of velcro tape to affix it to the outside of the RV in inconspicuous spot. Velcro tape also has been great to mount a 2nd carbon monoxide sensor (we put ours above the rear TV).
6/ THE FOLLOWING “HACKS” TO OUR INTERSTATE REALLY WORKED WELL
- CLAMPS & BASKETS : I appreciate the tiny wall inset “storage” areas on the far back right/left of the Interstate. Both have 2 USB ports which are helpful for charging your devices while you’re sleeping but I wanted a little more space to store some smaller items. After a lot of experimenting, we settled on buying 4 of
these baskets AND a bag of
these clamps (which we’ve found many uses for on this trip; my only gripe is the rubber protector parts fall off easily). I use 2 of the clamps to hold the basket from the small “storage inlets” on the far rear right/left side of the Interstate (near where your head is when you sleep). It’s more of a MacGyver-type solution than anything sightly/elegant but it works for us. We also used a 3rd basket immediately to the left of the stove top. We store fruits in the basket and just “clamp it” to the side wall.
- SUCTION CUP HOLDERS IN BATHROOM : i bet there are better setups in the wet bath but we bought
3 of these and it created great additional storage for bath odds and ends (toothbrush, soap, wipes, dog poop bags for TP =
. These suction cup storage shelves were definitely one of the best purchases. When combined with the only narrow trash can we could find to fit in the nook next to the toilet (
this one), we are pleased with our setup.
- CABBUNK: We have a 9 year old daughter who thinks she’s the offspring of a professional soccer player meets contortionist while she’s sleeping. Fitting her in almost king-sized bed in the back with the two of us IS doable but it doesn’t make for a restful sleep to say the least. We had been using an inflatable mattress by Pleasureway, and it works pretty well. There’s a
good post here on the inflatables. While we brought the inflatable on this trip, we are trying the
Cabbunk (pretty ingenious device from the UK) as my daughter has always wanted a “bunk bed” and this creates a “bunk” in the cab of your sprinter van. The inventor/manufacturer was very responsive when we had some initial challenges setting it up and now my wife has it down to a science. Happy to share more info if anyone is curious but it definitely works for us and my daughter loves it.
- LUSSO CAR ORGANIZER ON BACK OF DRIVERS SEAT :
this was one of the first purchases I made after buying the Interstate to store a variety of things within easy reach. On any given day, we might have a flashlight, USB cables, iPad, books, NOAA Weather Radio (Midland), pens, in the various pouches. We also bought a simple hanging shoe rack that we bungee (notice MacGyver theme here
around the back of the front passenger seat to store grocery bags, trash bags, flip flops, but it often gets in the way of going in and out of the vehicle. Not sure if we’d do that again.
7/ DOING THIS “FULL TIME” WITH A SCHOOL AGE KID IS HARD: we have been homeschooling our daughter since last fall and balancing the travel days while still keeping up with the school curriculum is challenging. We’re making it work, especially now that we’re able to spend some time with relatives on the East Coast but it is definitely challenging.
8/ RV TRIP WIZARD WAS A GREAT PLANNING TOOL AND WORTH THE ANNUAL FEE + DOWNLOADING OFFLINE GOOGLE MAPS IN CERTAIN REGIONS HELPED
Our months of planning and RV related YouTube video watching we found RV Trip Wizard. I’ve tried a number of apps + websites but this one takes the cake. I love it. I think the only big miscalculation we’ve done being newbies on this is relying on Google maps for trip durations. My wife says I’m the slowpoke driver (safety first!) and on this trip, we hit some pretty heavy wind in AZ, NM, TN that caused our crosswind assist to kick in MANY times. What google maps said takes 5 hours often took us 7 (driving sometimes ~60MPH in 75 MPH limit areas due to wind; quick stops for gas). We’re now trying to limit our days to 4-5 hr drives max (including my Zootopia sloth DMV driving pace).
9/ WALKIE TALKIES : we’ve owned Motorola T605 walkie talkies for a long time; there were 2 great aspects about having these on our RV trip. 1/ in areas where there was no cell reception (ex. Parts of the road to Villanueva, NM) we could still speak to each other and 2/ with a push of just 1 button you can switch the walkie talkie to NOAA weather mode and listen to the local weather report for storm warnings. We were about a day behind some terrible thunderstorms/tornados and literally missed a tornado in Palo Duro State Park (it was entirely booked up when I tried to get a reservation so we didn’t stay there.). Frequently checking weather.gov, weather apps like Carrot (which I find hilarious), and the NOAA Weather Radio was helpful.
9/ GO PRO MOUNTED ON DASHBOARD WITH VOICE COMMANDS TURNED ON WAS GREAT WAY TO CAPTURE PARTS OF THE TRIP : to document some of the trip we mounted a go-pro to the dashboard and turned on voice command feature to do “hands free” filming when we drove into some of the parks.
10/ EMPTYING THE “STINKY SLINKY” ISN’T AS FEAR-INDUCING AS I THOUGHT: while my wife would say, “hey, I did all of the dump stations” (true), the emptying the tanks experience wasn’t’ as scary as we thought. No problems so far! Our “prep” has been using these
GloveWorks Gloves (thank you
), face mask, disinfecting wipes (to wipe down the end of the tank hose), plastic bag to wrap around the end of the tank hose when done and small garbage bag to throw the wipes and gloves in there. For our family of 3, our black/grey tanks fill up every 3 days or so. We noticed a “navy shower” takes 10% of the fresh/adds 10% to gray water for my daughter and I. My wife uses about 20% of fresh water for her showers.
I’m sure there are things here that we’re not doing right (and welcome any and all guidance) and there are many more lessons learned, but I hope there is at least 1 morsel of advice in here that helps especially newbies! I will hopefully have a part 2 of this when we return to the west coast in August (after heading up to New England and then across the northern route home). Be safe!
THE APPENDIX: Other random stuff. We use a
water pressure regulator at campsites in case there's high pressure coming in (Edgar Evins State Park in TN has high pressure as example at some/most sites). Our
DEF alert went off around 3500 miles. Bought some at a gas station (our Mercedes dealer said any DEF is ok) and poured all 2.5 gallons in. We are now LIKELY running into
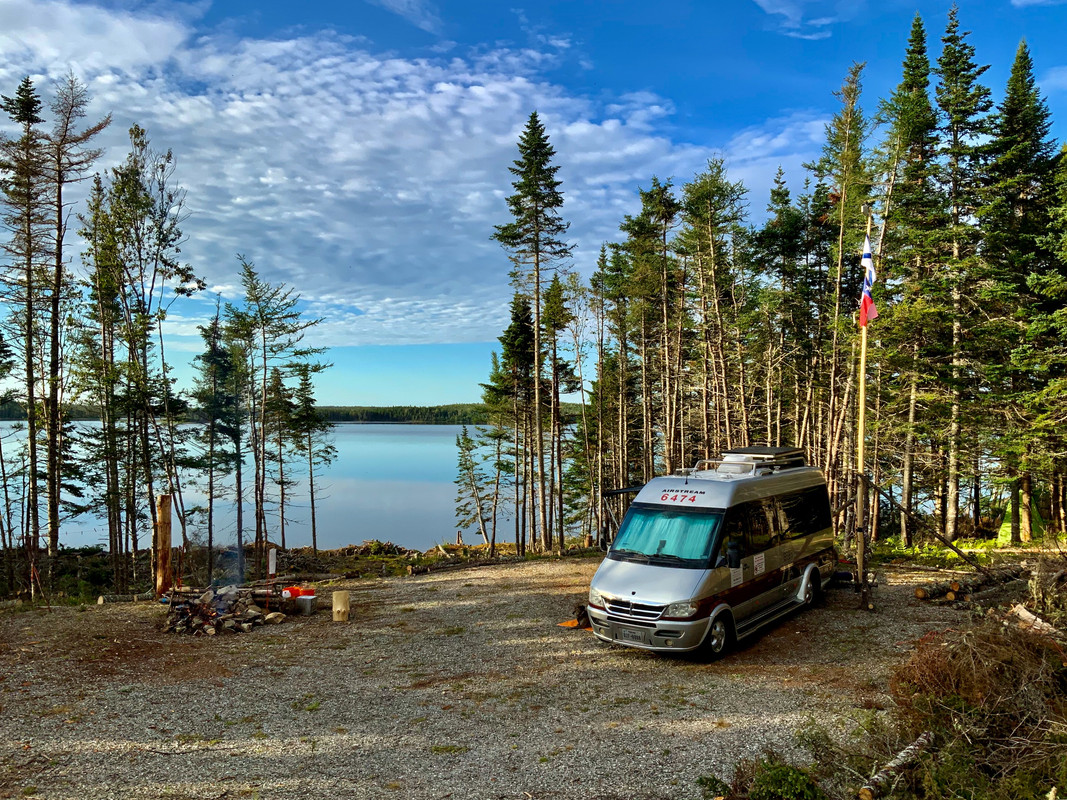
solar panel charging problems (another post of mine that I’m troubleshooting). #1 campsite so far… Mississippi River State Park, Beechpoint Campground, Site 14 (full hookup) in Marianna, AR. Runner up: Villanueva State Park, NM (site 9 - electrical/water).
*we’re now on day 22 of our journey


 Linear Mode


