 |
|
 01-24-2010, 06:32 PM
|
#21
|
4 Rivet Member 
Currently Looking...
tallahassee
, Florida
Join Date: Sep 2008
Posts: 341
|
Quote:
Originally Posted by NJtoNC

cabinet / vanity will contain 25gal greywater tank.. closet will have 30 gal greywater. smaller tank will flush out blackwater tank. bigger tank will have its own release valve.
a rough sketch;

blackwater tank is existing. grey will both be new. |
How big is the potable water tank? Two FULL grey water tanks, which hold 55 gallons would weigh over 450 lbs. This is a lot of additional weight in such a small trailer. Add to that what you have in the black tank and the weight of the tanks themselves and you probably can't add anything else including pots, pans, dishes, food, and clothes....
If you have a specific need for more holding capacity than normal, why not think about using a portable unit? What exactly are you trying to accomplish? Maybe if you state you needs/desires someone here will have a suggestion.
Carol 
|

|

|


|
01-24-2010, 06:38 PM
|
#22
|
|
Vintage Alum. Enthusiast

1959 24' Tradewind
Phoenix
, Arizona
Join Date: Feb 2002
Location: I currently do not own a 2nd Airstream
Posts: 4,360
|
Not only is that alot of grey water weight, it is too far away from the axle and is too far above the floor for the sinks to drain properly. The best location is below the floor between the frame rails. This would require either lifting the floor or coming up through the belly pan to install.
Brad
FF
__________________
4CU 2699 / AIR 10 / TAC AZ-1
I'm haunted by aluminum.
Charter Member of the 4 Corners Unit.
|
|
|
|
|
01-25-2010, 08:30 AM
|
#23
|
Rivet Master 
Currently Looking...
asbury park
, New Jersey
Join Date: Nov 2009
Posts: 905
|
brad,
in the bathroom the gray tank s are only raised 6". plus we are adding a vessel sink, so it's a wash.
the kitchen sink will be less than 2" away with plenty of room for a trap and enough rise to drain properly; my dad is doing the plumbing / design and he's been a contractor for 30+ yrs.
on the other hand, the weight, when full, may be an issue. however, i do not expect to be filling them regularly. we are more 'weekend' campers, and when we move to NC we will be hooked up directly to sewer / water / electric anyway. the 2 tanks was more so it would fit within our design than anything else; but i will keep it in mind.
what do you think is a safe amt of gray water to carry? most of the gray will be in the larger tank, which does abut the wheel well and is 46" long.
the other tank is just taking bathroom sink water, which wont take more than 6-8 gal in a weekend...
|
|
|
|
|
01-25-2010, 08:38 AM
|
#24
|
Rivet Master
Currently Looking...
asbury park
, New Jersey
Join Date: Nov 2009
Posts: 905
|
carol;
potable tank is just 30 gal.
also re: weight; we are going to come in approx 300 lbs short of original weight of 2700lbs and will get new 3500 lb axles too...
we weighed the weight of all old appliances, water heater, heater, and deducted new appliance weight. aside from that there's really only the weight of new holding tanks, but that should be much more, if any, than the original alum h2o tank... (dont know what it would weight it was missing when we got it).
also remember we removed the streetside gaucho, it's going to be replaced w/ lightweight countertop, so i will be very interested to see what the final weight is.
|
|
|
|
|
01-25-2010, 09:02 AM
|
#25
|
|
Vintage Alum. Enthusiast
1959 24' Tradewind
Phoenix
, Arizona
Join Date: Feb 2002
Location: I currently do not own a 2nd Airstream
Posts: 4,360
|
Water weighs 8.35 pounds a gallon so your 30 gallon potable tank, if/when full, would weigh 250 pounds. Considering that using this potable water some will go into the grey water tank and some in the black and some will be consumed, however most will go into the grey. Looks like you're planning on 55 gallons of grey water capacity with the two tanks but I'm not sure why you feel the need for more grey water capacity than the fresh water tank holds.
With the two tanks, why not just make the one next to the black tank smaller so it can sit directly on the floor next to the black? Then you'll not need to provide so much weight support under it and loose the space below for storage. The other grey tank could also sit on the floor.
Brad
FF
__________________
4CU 2699 / AIR 10 / TAC AZ-1
I'm haunted by aluminum.
Charter Member of the 4 Corners Unit.
|
|
|
|
|
02-28-2010, 06:22 PM
|
#26
|
Rivet Master
Currently Looking...
asbury park
, New Jersey
Join Date: Nov 2009
Posts: 905
|
ok, forgot the camera for the last 2 weeks. heres some updated pics.
my pops has been workin' the plumbing in the bathroom while we continue to strop the zolatone.
advice to the masses: DON'T STRIP ZOLATONE!!! i read the advice and ignored it. now we've spent 4 weekends x 2 people stripping *&%$# zolatone. granted, it looks AWESOME, but... its not advised.
with regard to the endcap; i was going to do aluminum or wood panels; we've lost too many man hours stripping and recently saw a pic of an endcap painted, and we tested it, and i think it looks awesome. let me know what you think.
ok, let's skip the complaining and get to the pics.
the endcap painted with rustoleum oil glossy enamel. on the stripped alum i primed it with a rustoleum primer designed for aluminum.
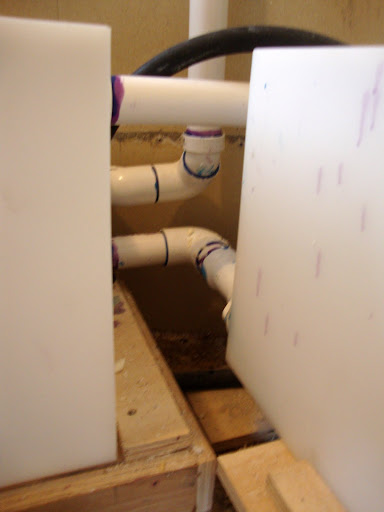
heres the 2 tanks. the bottom pipe is the drain for both. the middle pipe is the vent for blackwater - not connected to either of the 2 pipes in the pic. top pipe is overflow - if either fills up it overflows to the other.

the vent from the blackwater tank meets the vent from greywater. on-demand LP HW heater ($100 - $150 ish? marey brand) sitting atop the tanks, waiting to be installed.
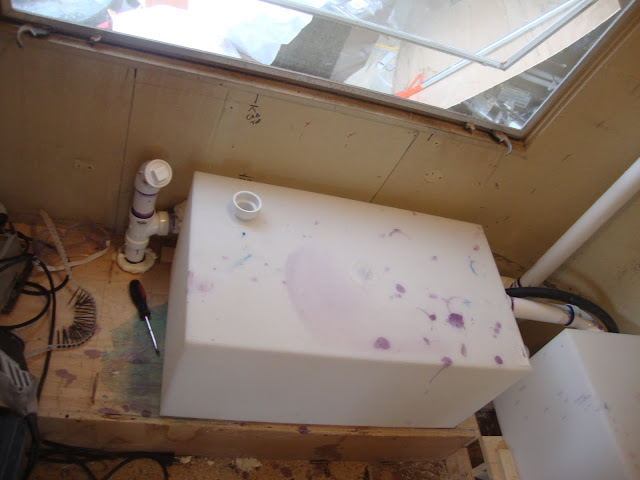
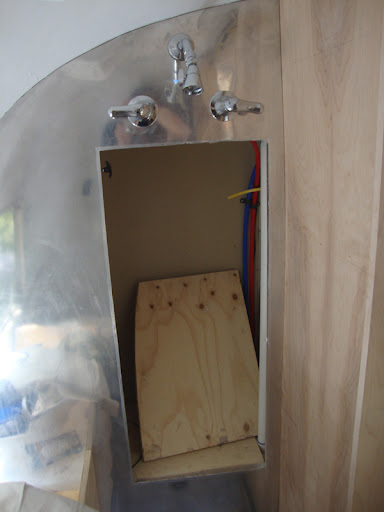
grey water tank that goes under the sink is shown above. we had planned to use this water to flush out the black water tank, but there isnt really enough room. dad put a T in the vent to flush the blackwater tank...
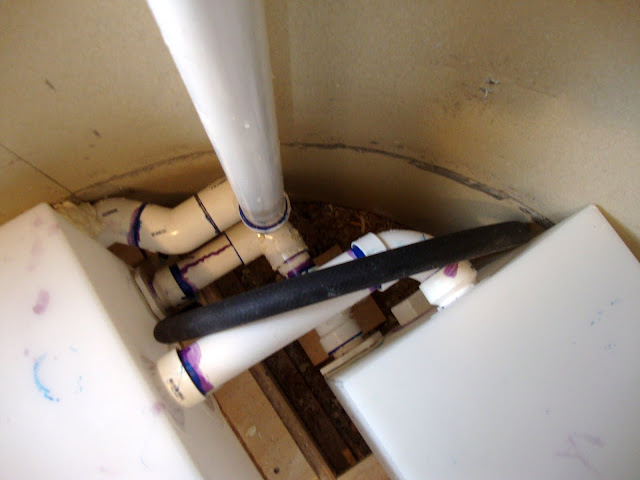
a look down the corner where the 2 tanks meet.

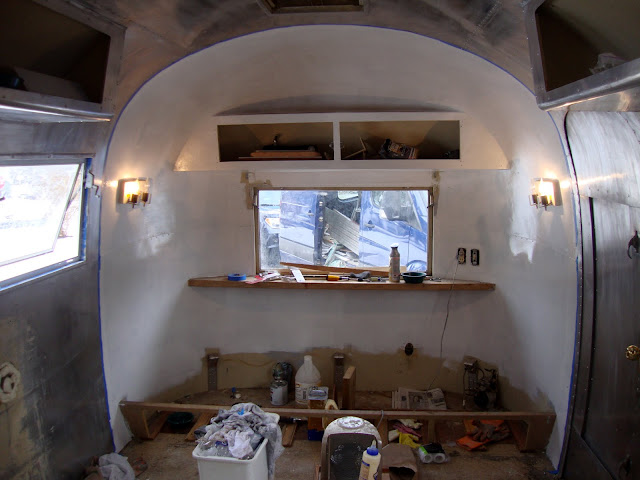
this looks back towards where the venting is - it's covered by a 'closet'. the tank is going to have a shelf on top of it. to the left, just out of the pic os the grey tank that's going to be under the sink. the hole in the wood will be covered by a door on a hinge.
|
|
|
|
|
02-28-2010, 07:46 PM
|
#27
|
Rivet Master
2002 25' Safari
1977 20' Argosy 20
northern valley
, new jersey
Join Date: Nov 2008
Posts: 532
|
Quote:
Originally Posted by NJtoNC
advice to the masses: DON'T STRIP ZOLATONE!!! i read the advice and ignored it. now we've spent 4 weekends x 2 people stripping *&%$# zolatone. granted, it looks AWESOME, but... its not advised.
|
WOW! looking good, Carol!
if you're feeling at all like a long weekend away (Zolatone instruction, included ) - try this event >> http://www.airforums.com/forums/f289...lly-61010.html
it's a long way, but we went last year, had a GREAT time, and we're going back again this June.
best,
__________________
Joseph & Gabrielle
Simplicity is the ultimate sophistication - Leonardo da Vinci.
WBCCI 2087 - AIR 3144 - TAC-NJ2
https://defendwally.org/
|
|
|
|
|
03-21-2010, 07:50 PM
|
#28
|
Rivet Master
Currently Looking...
asbury park
, New Jersey
Join Date: Nov 2009
Posts: 905
|
last weekend it rained so hard some areas of NJ flooded. Our airstream had recently switched places in the driveway with my fathers dump truck - a tall pine tree fell in this storm and narrowly missed the trailer.
fortunately, she evaded trauma. this weekend, my fiancee and I came back to work on the trailer and help clean up the yard - removed the stump and filled in the hole with topsoil and seeded it ...
so, then we were able to get some work done on the trailer. we filled the tanks and have tested the plumbing. the first flushing of the blackwater tank, (unused for at least 7+ yrs) revealed that our sewer hose has a leak and was clogged with a LOT of insulation, sawdust, and mousie poo.
so a new hose is on order, and I would ask if anyone knows where i can locate a new lever for the 62blackwater tank 'gate' pull?
we also started stripping the exterior clear coat. oy! suggestions for methodology? using klean strip... sprayable and airplane stripper.
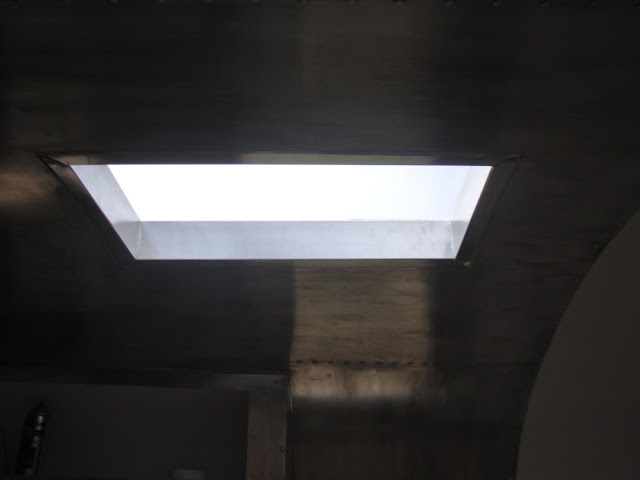
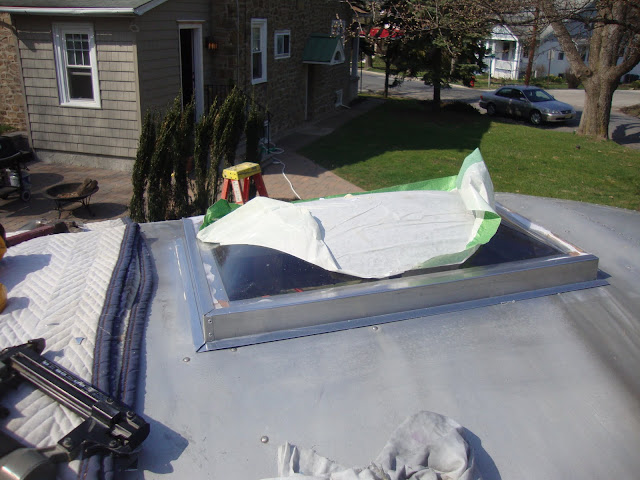
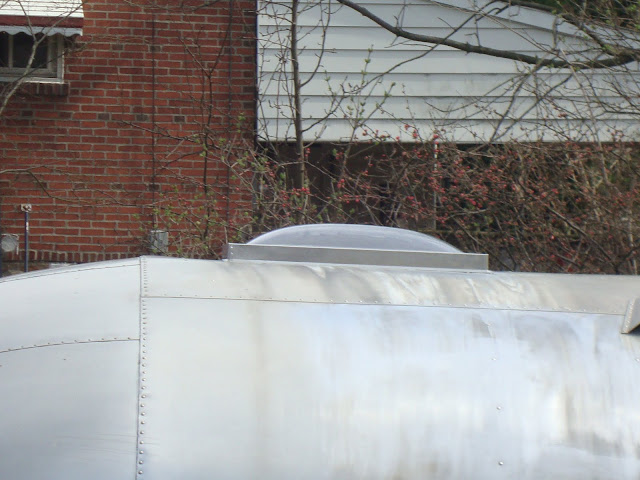
lastly, we installed the new sky light. we removed the old curbing, built a new curb of cedar, and wrapped the interior and exterior in aluminum. see pics below.

the birdies enjoyed the 70 - 73 degree days this weekend... and did a good job overseeing the airstream project.

|
|
|
|
|
03-21-2010, 08:06 PM
|
#29
|
Rivet Master
1969 23' Safari
New Orleans
, Louisiana
Join Date: Aug 2007
Posts: 699
|
..looks, great, Momma!..keep rockin on it...guess you won't be needing much a/c up there in Asbury Park, yes?...the skylight looks SO much better on the roofline than a big ole a/c!...maybe you can get Bruce or Little Steve to come pitch in! ;-)
|
|
|
|
|
04-19-2010, 08:50 AM
|
#30
|
Rivet Master
Currently Looking...
asbury park
, New Jersey
Join Date: Nov 2009
Posts: 905
|
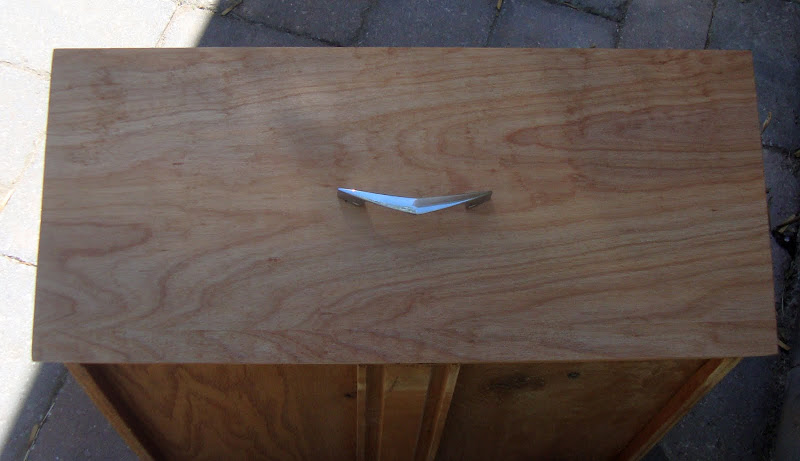
ok, its been while since i posted, but we have been working on the trailer every weekend. last weekend, we patched the hole where the old water heater used to be, and the old vent for blackwater tank (it has been relocated to the other side of bathroom). replaced some rusted old screws with olympic rivets (easier than i thought). been working on getting the kitchen cabinets in, and the bumper and tongue rust ground off.
this weekend we POR-15'ed the tounge and began polishing. I also had purchased some new weather stripping and began cleaning the exterior part of the windows and installing the weather stripping in the windows (it fits in a track which is a bit tough to do). slowly but surely, shes comin along.
now, the pics;
below is about 10 hours of polishing with grade 7;

the $30 harbor freight grinder that kicked butt;

front of trailer;
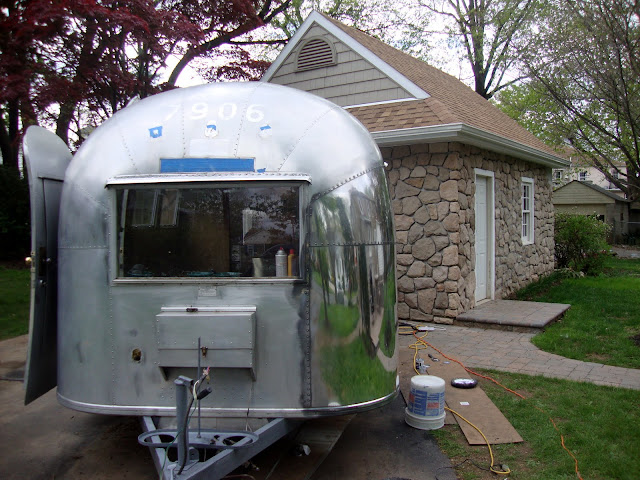
now that shes starting to look purdy, dad isn't complaining as much about having it in his driveway  by the end of it, i think we might earn ourselves a permanent parking spot! (shhh, dont tell dad)...
|
|
|
|
|
04-19-2010, 08:54 AM
|
#31
|
Rivet Master
Currently Looking...
asbury park
, New Jersey
Join Date: Nov 2009
Posts: 905
|
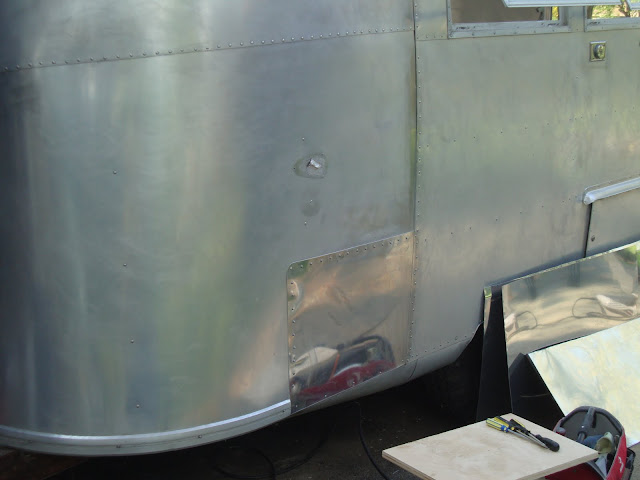
oh, i forgot. here's the kitchen cabinets;

(sporting a $60 ikea countertop)...
and my patch job ...thanks to vinstream, i found me some matching rub rail that will trim the bottom up nicely.
|
|
|
|
|
04-19-2010, 11:45 AM
|
#32
|
Rivet Master Commercial Member
1954 22' Safari
Deerfield
, Illinois
Join Date: May 2003
Posts: 1,419
|
Wow - if you're not careful, you may actually improve Harbor Freight's reputation around here! The polish job looks gorgeous so far. I can actually count the pavers in the sidewalk. I was expecting to see swirls... did you Cyclo that area as well?
Cabinetry looks wonderful too - nice work. The $60 countertop is brilliant, if only to free up a few more hundred to spend elsewhere. I was pricing out all new window glazing supplies as well -- 47 linear feet of window frame adds up quick, huh!?
__________________
Brad
|
|
|
|
|
05-24-2010, 11:07 AM
|
#33
|
Rivet Master
Currently Looking...
asbury park
, New Jersey
Join Date: Nov 2009
Posts: 905
|
ok, its almost been a month, we have been working away. i think this is our 4th weekend polishing. we got the front and back panels done this weekend (first polish), and have completed first and second polish (7 & C grade) on the sides. before final polish we need to get the top done but are waiting on more polish!
so far we'll have bought;
- 2lbs grade 7
- 1lb grade 9 (you wouldn't believe how helpful this actually is - more coarse than 7 helps with small light scratches, pitting, etc.)
- 1lb grade C
- 1lb grade S
and have tried buying 3 different sanders/grinders to polish with but the harbor freight one still works the best and keeps on truckin.
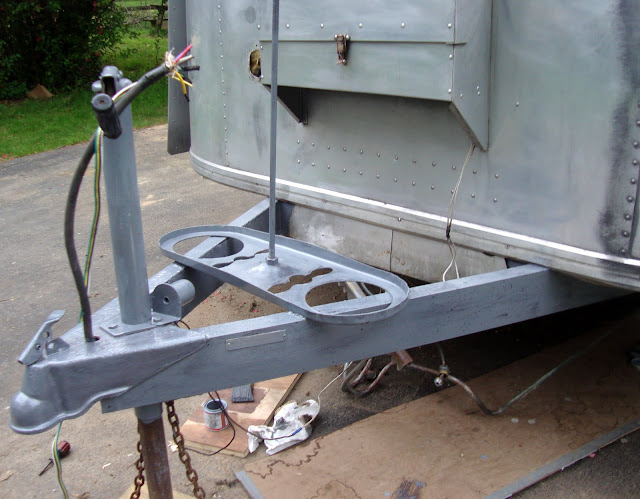
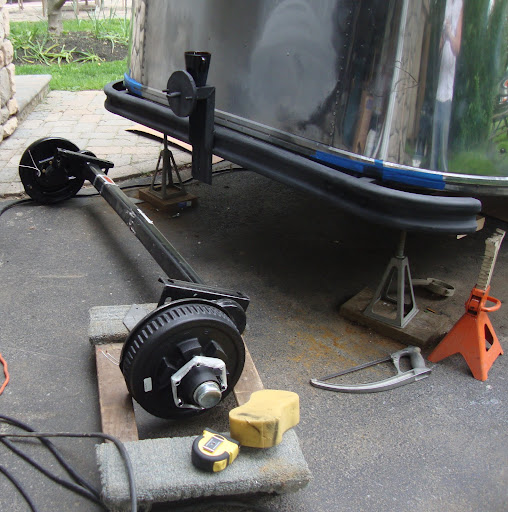
also this weekend we installed a new axle! thanks to andy & Inland RV for fast shipping on our new henschen (previously called dura torque) axle.
some things i want to address re: the axle based on my research on the forums and the actual experience of installing it;
- in regards to installing a new axle in our 62 AS, andy's guy at inland said some of the 61's and earlier 62's had the axles welded on. the newer trailers were only bolted on. Ours was bolted on, and after getting the rusted bolts off, the axle came right off. had it been welded, it would not have been so easy.
- there really is no spot on the axle for shocks. they were welded on in an aftermarket type fashion. a new axle doesn't need shocks and wasn't designed for them, confirming what i had read in the forums.
- we were told (by inland) that the install was just a matter of screwing in 4 new bolts. (it did not come with new bolts /nuts). in our experience, the position of the bolts was different on the new and old axle ; we had to drill new holes for the bolts to make it fit right. aside from that, it really was a matter of just screwing in new bolts!
- before the new axle, i didn't understand stabilizers. we would walk around in the trailer without problems. with the new axle, we bounce all around! now i get why we need them!
- many times in this forum, people will look at the position of your trailer to the wheel to determine if you need a new axle. i hope my pics can show this visually for anyone who had doubts.
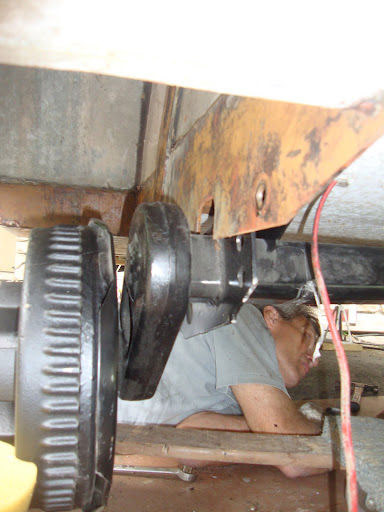
old axle :

new axle installed;

some more pics ;
in the above pic, you can see the primed bumper. when we had gotten our trailer, the bumper had fallen off. i suspect due to the extra weight from the spare. instead of re-welding , we bolted it back on with carriage bolts. this will be stronger than that little welded spots would've been.
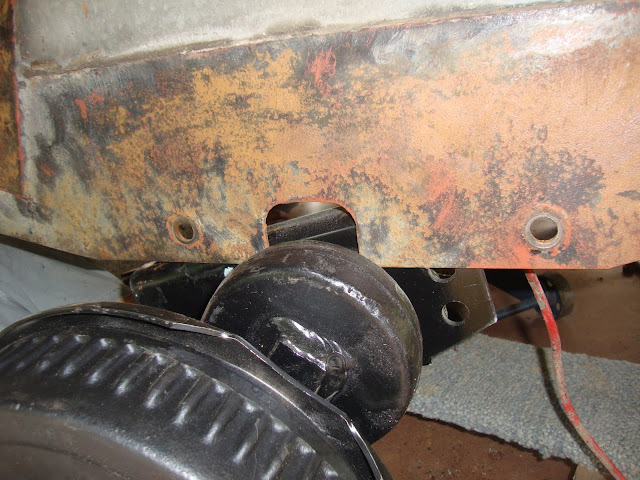 note above - the holes for the new axle dont exactly line up.
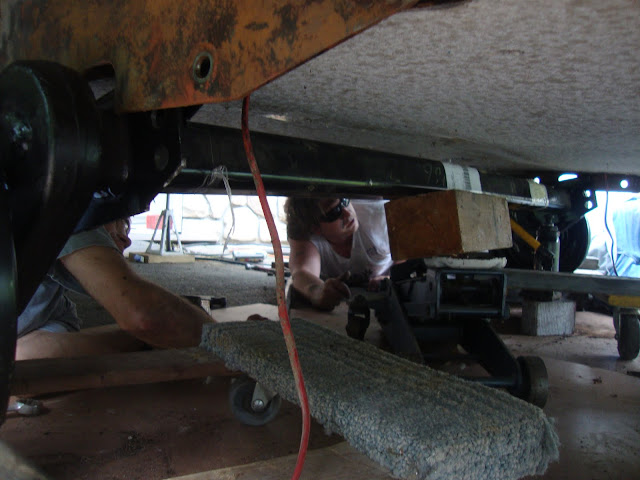
shot of hubby and (dad on left)...i wasn't thrilled with the jack in the middle there, as this is what the old axle looked like;

new arms way up in the air!
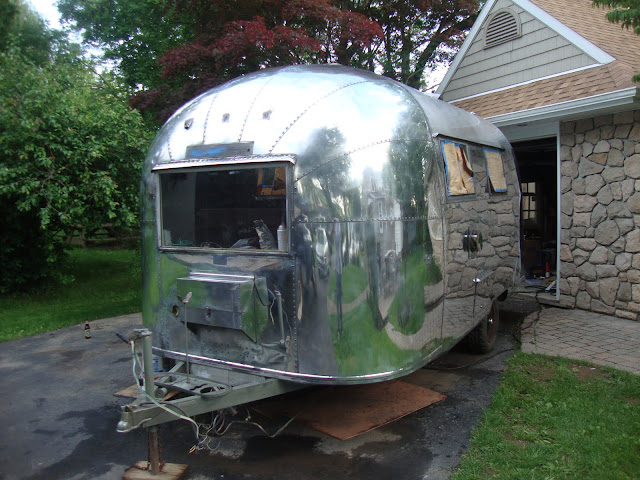
this is with nuvite #9 on front and end caps, and 7, then C, on sides...
|
|
|
|
|
05-24-2010, 03:56 PM
|
#34
|
Rivet Master Commercial Member
1954 22' Safari
Deerfield
, Illinois
Join Date: May 2003
Posts: 1,419
|
The polishing looks just beautiful, I'm really impressed.
Nice job on the new axle install, too. Hmm... maybe I should take advantage of all the help at Alumapalooza next week and install a new one right there on the lawn!
Anybody wanna help? 
__________________
Brad
|
|
|
|
|
06-06-2010, 08:03 PM
|
#35
|
Rivet Master
Currently Looking...
asbury park
, New Jersey
Join Date: Nov 2009
Posts: 905
|
so this weekend i installed a new fantastic fan (really bummed i didnt but the VTS one with the flat lid so i could exchange out the new lid for the modified old lid - the fan motor sits too high on 'regular' (read: cheap) - fantastic fans). and i shaped the new doors for the front cabinet. also gave up on finding 6V batteries and just went to sears and got a 12v rv/deep cycle batt.
OH, and - the biggest progress for the weekend - attempted to tackle the electric.
so when i attempted to install the new fan, it didnt work. (dad's) troubleshooting determined that it was that the trailer wasnt grounded.
so at some point the ground was disconnected from the trailer so we spent a while chasing that. i had ordered an intelli-power charger / dist. panel / converter but no one had any idea what the hell to do with it... so once we came up with a plan (run new wires from batt to intelli-power) , that was a whole project in itself. we wanted to go beneath flloor / above belly ban, but frame got in the way. so we worked around that by drilling a hole in the floor, threading the wires over the frame, and back down under the floor (we will be putting 1/4" ply over the subfloor anyway so no matter - it was a SMALL hole).
so once we got the ground figured out, plus a trip to home depot (third of the weekend), i was able to hook up the fan.
then i ran out of olympic rivets : / so i finished with some pop rivets with massive amts of silicone on top. the fan is crazy ugly, but whatever. we made the decision to go with no A/C so it was necessary. i'm thinking, when i have time, ill clad it in aluminum.
we had wanted the trailer finished by this weekend to make it to crawfish fest in NJ, but that didnt happen. so next deadline is to be operable (at least toilet, batteries and running lites) by the 19th, in time for my cousin's music festival in new hope, PA.
still on the 'to do' list to finish trailer;
- install 1/4" ply over old lino for install of 2mm marmoluem. install marmoleum over new flooring.
- build cabinetry for curbside of trailer. install counter over cabinets.
- stain curb & streetside cabinetry.
- install kit. sink, cooktop. run12V wiring for cooktop +110v outlet for fridge (below counter), install 12 or 110v / combo lighting.
- bathroom; fix shower faucet (handles installed wrong due to incorrect gasket), install toilet, black water tank flush line, build bath sink cabinet, install sink, sink faucet, trim. install 12V lights. paint bath fiverglass.
- finish polishing exterior; re-install ext.running lights.
- patch belly skin (we had cut holes to run new wires to intelli-power)
- install brake controller, 7 blade connector on pigtail, new batt**
- install new wheels, tires (already mounted)
**ok, so after i bought this stupid 12v batt from sears, i found out what kind of battery actually fit(s) fit into our skinny battery box on the front - a tractor battery! its called a 3ET i think. im ordering one from batteries plus. SWEET! i wont have to build a new batt box. SO PSYCHED.
less urgent;
- new screen material in screens
- replace cracked front window glass w/ auto glass.
- paint wheels, buy & install hubcaps... im sure more to do. it never ends.
last weekend i felt like we were so close to getting to the end.
this weekend, i feel like we have WAY to much to do to be close to the end.
now that its summer - i just wanna camp already!
|
|
|
|
|
07-07-2010, 12:45 PM
|
#36
|
Rivet Master
Currently Looking...
asbury park
, New Jersey
Join Date: Nov 2009
Posts: 905
|
here are some more updated pics;
newly upholstered gaucho;

bathroom cabinet removed for more headroom;

yeay, new potty!

cant remember if i posted this already, its the shower head mounted outside the closet ;
new wheels, tires and hubcaps on

cabinet doors refaced w/ new 'retro' hardware
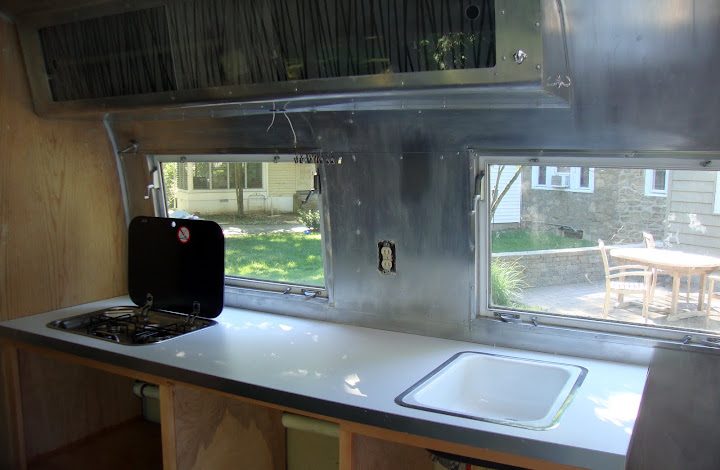
old sink in the new counter;

new cooktop in new counter
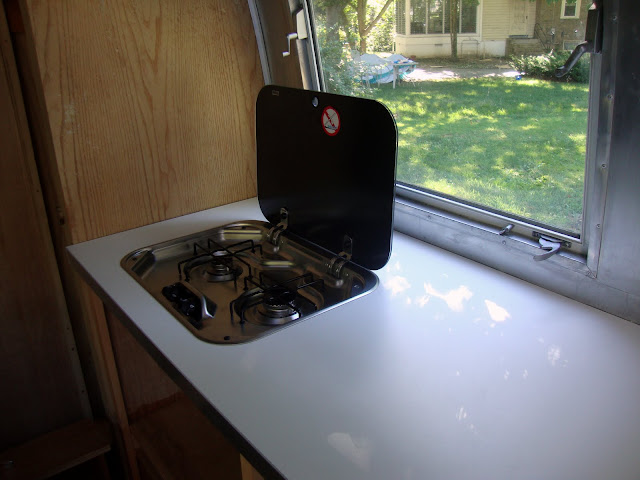
the kitchen;
new storage doors (plexi)

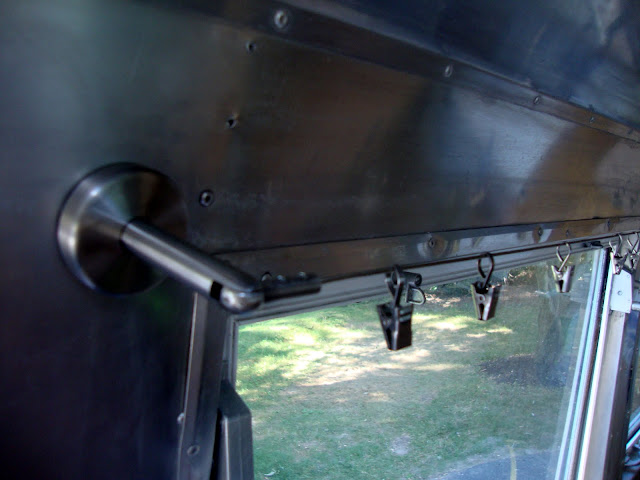
ikea curtain hardware
this is an idea im considering for the curbside cabinet - a window a/c vented to the outside via the old sewer hose storage door, and an access panel on the interior for the interior side. any pros/ cons?

|
|
|
|
|
07-07-2010, 02:48 PM
|
#37
|
Rivet Master
1966 24' Tradewind
Chicago
, Illinois
Join Date: Nov 2008
Posts: 530
|
Birdie Momma~
This little baby is really looking great! Have you camped yet?
__________________
Happy Trails!
|
|
|
|
|
07-08-2010, 06:34 AM
|
#38
|
Rivet Master
Currently Looking...
asbury park
, New Jersey
Join Date: Nov 2009
Posts: 905
|
we have camped for just one night as a 'test' run. the gaucho was more comfortable than i had imagined it would have been. overall, it made me even moer excited to get it done!!
|
|
|
|
|
07-08-2010, 09:01 AM
|
#39
|
Rivet Master Commercial Member
1954 22' Safari
Deerfield
, Illinois
Join Date: May 2003
Posts: 1,419
|
I really dig the AC vented out the old door idea. As long as you have a good drip pan underneath to protect the subfloors from accidental condensation damage (the problem being that sometimes you won't be parked perfectly level and water could run towards in the inside of the trailer) I can't think of any big problems. Plus it looks so much cleaner than a roof mounted type.
Surely this plan must've been done before - but finding the right thread with our crappy search feature is another story. 
__________________
Brad
|
|
|
|
|
07-15-2010, 02:53 PM
|
#40
|
4 Rivet Member
Currently Looking...
tallahassee
, Florida
Join Date: Sep 2008
Posts: 341
|
Norcal Bambi mounted an AC below a gaucho and I've seen quite a few vintage trailers, not necessarily Airstreams, with a small AC in a cabinet, or on a slide out support... Remember this - hot air rises - and unless you have a plan to get the cold air up to the ceiling you may freeze your toes but you probably wont be to comfy if you mount the AC near the floor in a trailer this size.
Carol
|
|
|
|
|
|
|
Currently Active Users Viewing This Thread: 1 (0 members and 1 guests)
|
|
|
| Thread Tools |
Search this Thread |
|
|
|
| Display Modes |
 Linear Mode Linear Mode
|
 Posting Rules
|
You may not post new threads
You may not post replies
You may not post attachments
You may not edit your posts
HTML code is Off
|
|
|
|

 Recent Discussions
 |
|
|
|
|
|
|
|
|
|
|
|
|
|
|
|
|
|
|
|
|
|


