 |
 06-26-2021, 07:52 PM
|
#1
|
1 Rivet Member 
1967 24' Tradewind
North Dundas
, Ontario
Join Date: Mar 2021
Posts: 9
|
Parental Leave Project: '67 Tradewind
Well, here goes nothing.
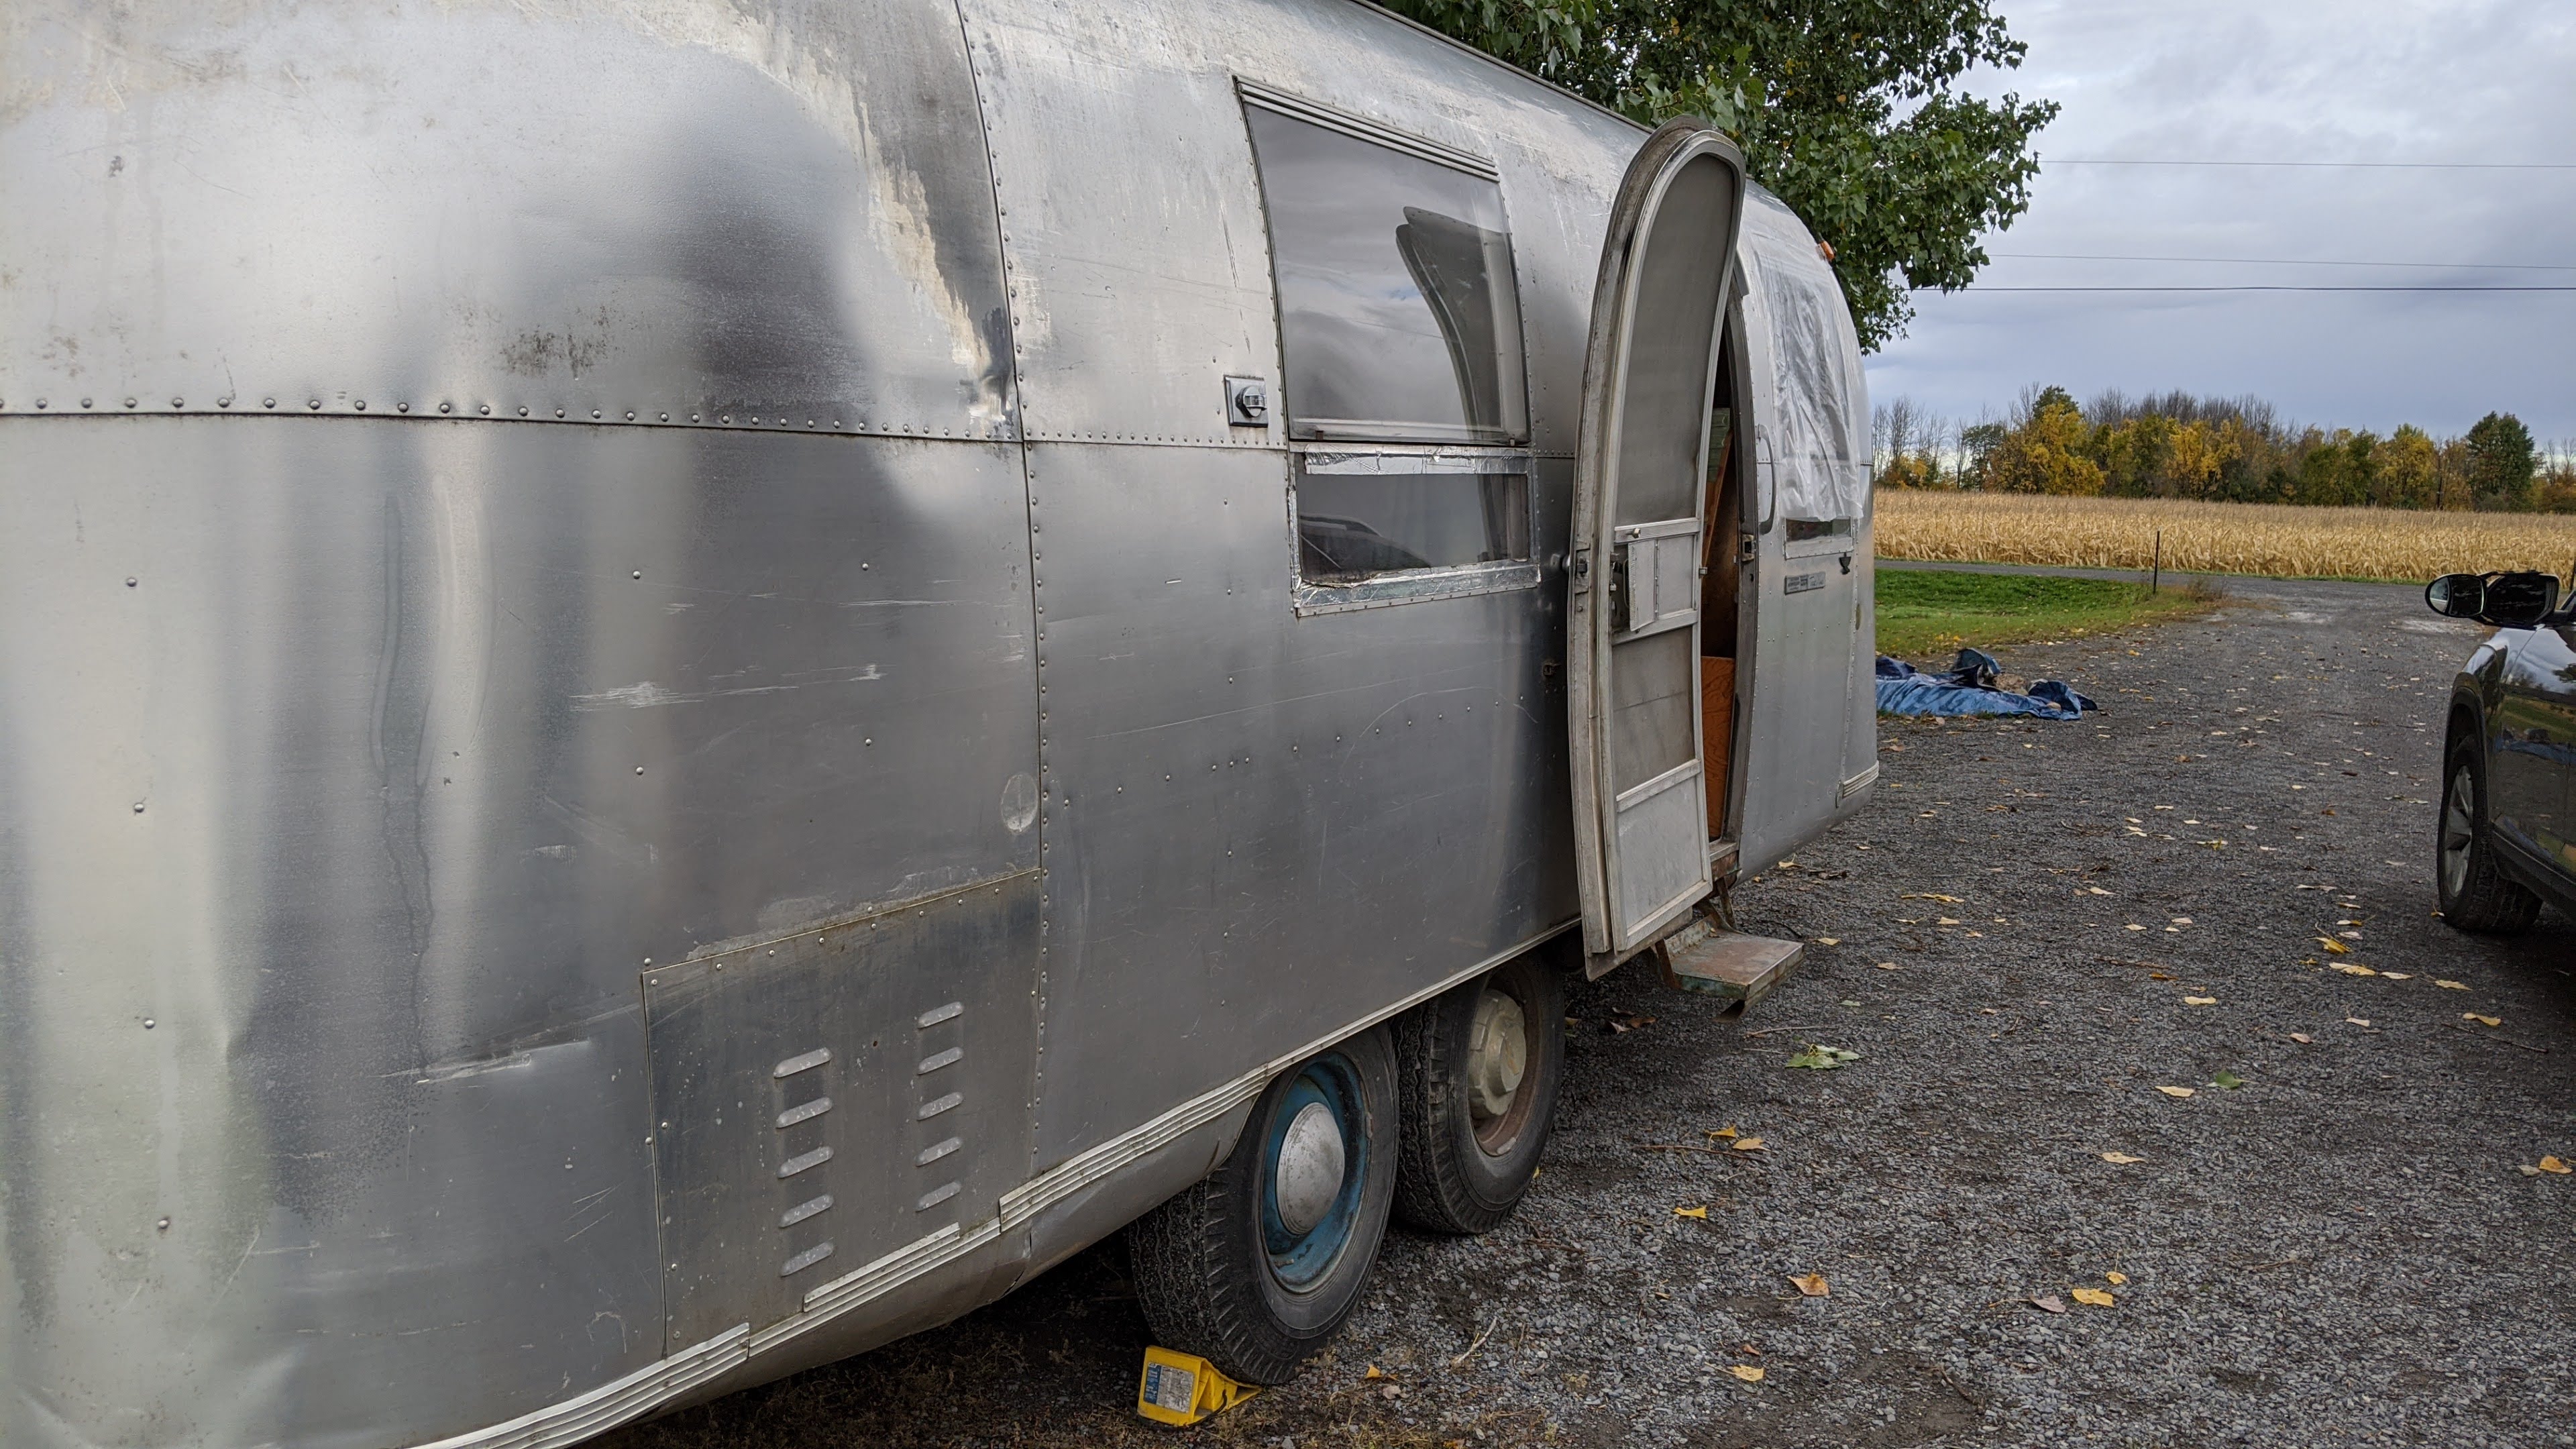
Wife and I purchased a '67 Tradewind last October. It was a bit of an impulse purchase, but the Wife has always wanted one and the price was right. It didn't look too bad when I first took a look at it.

I am gonna say this now: I am not very handy. I haven't had a lot of exposure to "working with my hands" as much. So I expect to be asking many questions over the years.
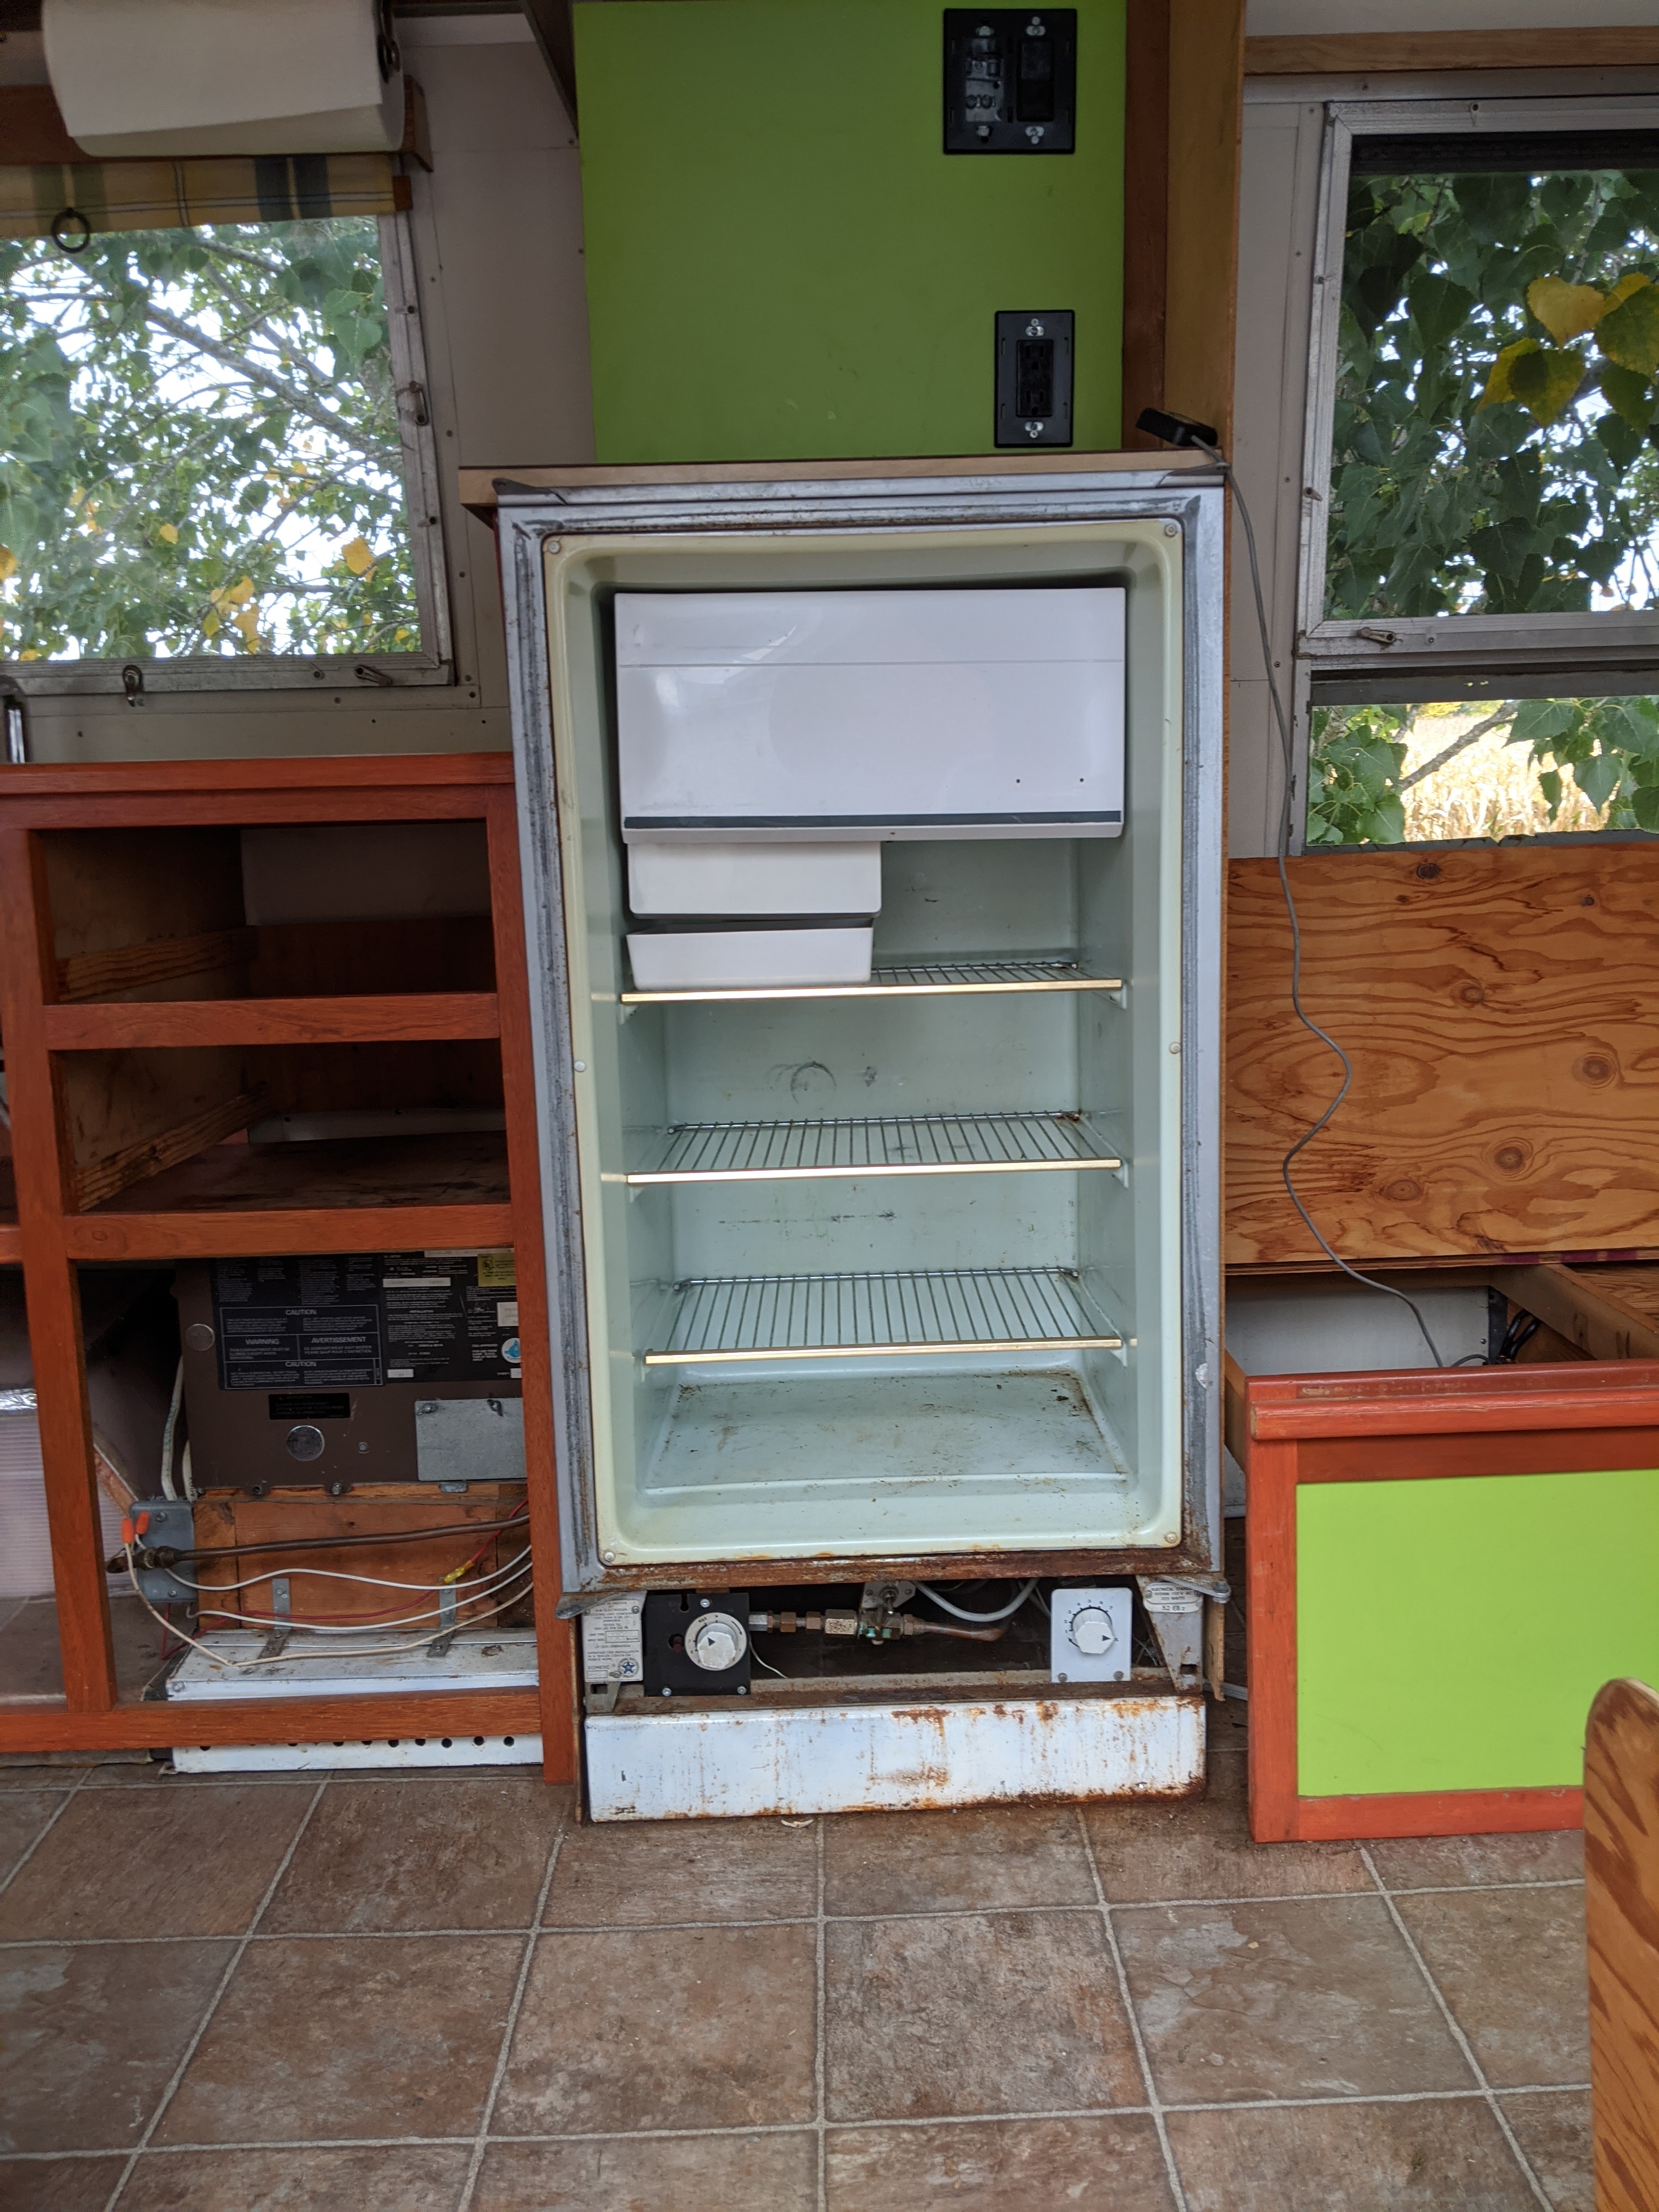
Brought it home and the issues started to show. The PO had renovated it himself, leaving some things original, and changing others. However, the subfloor was obviously rotten in certain spots, which we have had to deal with. None of the lights worked in the cabin, but the outlets connected to shore power worked fine. The batteries were not well maintained. None of the wiring was documented. The fridge didn't work. The furnace hadn't been tested in years, and I couldn't get it to start.
I took it to an RV place in the area and had them take a look at it. They gave me a quote and I countered with gutting it myself and they just do the floor for me. This was supposed to be a good idea (spoiler alert: it went ok)
I spent the winter slowly taking it apart and finding places to store everything in my house. Sent it off to the RV repair place and waited for them to do their magic. They called about a week having it that some of the cross members were rotted out. I had them repair it. There were other issues (they couldn't remove the flange from the black tank, so it had to be replaced, small stuff like that)
Now that I have it back, and since the arrival of my 3rd kid, I am spending my parental leave time off renovating the interior so that the 2022 camping season can be great.
Pictures to come.
C
|

|

|


|
07-05-2021, 07:14 PM
|
#2
|
1 Rivet Member
1967 24' Tradewind
North Dundas
, Ontario
Join Date: Mar 2021
Posts: 9
|
|
|
|
|
|
07-05-2021, 07:42 PM
|
#3
|
1 Rivet Member
1967 24' Tradewind
North Dundas
, Ontario
Join Date: Mar 2021
Posts: 9
|
Now for some more recent updates. Since receiving the "repaired" airstream, I did some poking around. While I was doing the removal of the interior items, I found a light fixture that had some considerable burns and bubbling of the jacketing, which concerned me. After some deliberation, we decided to do a skin off renovation. Which I feel like it was a bit of a mistake, but the skins are off now and its a little late to go back. I've gone out and got some new 12/2 copper wire, and a length of 10/3 for the power center/charger/whatever it's called. I also plan on putting in some rigid foam insulation to replace the old fiberglass stuff.
A couple questions:
1. Does rigid foam curve around the interior? I've read elsewhere that 1/2" will but I don't want to go out and get the 50 some odd sheets for it to not work
2. Battery chargers: What are my best options? I'm not planning on going lithium, but will be replacing the old batteries with AGM.
Some obligatory pictures:
 
|
|
|
|
|
07-05-2021, 08:46 PM
|
#4
|
Rivet Master  
1966 22' Safari
1955 22' Flying Cloud
Fredericksburg
, Texas
Join Date: May 2015
Posts: 2,955
|
Great pictures. With a 1.5 cavity, I cant imagine using one piece of foamular, or comparable, to form around the curves. It would be doable, but only curfing the back with cuts to make the curve. We used Two layers of Prodex with a dead air space between the layers where the wiring was located. You could get a few sheets of the thinner foam for a mock-up and double up with some 1 cut strips between the layers as a spacer. Theres just so much you can do with a 1.5 cavity.
Check out Progressive Dynamics website for converters.
Good luck and I think the 67 looks really good.
|
|
|
|
|
08-30-2021, 09:19 PM
|
#5
|
1 Rivet Member
1967 24' Tradewind
North Dundas
, Ontario
Join Date: Mar 2021
Posts: 9
|
Not much progress since my last posts. Due to the heat, and lack of time (a side effect of having 3 kids) I haven't been able to make much time to get out and do things. Luckily for me one of the kids starts school on Thursday so I should have a little bit of time each day to get out and get stuff done.
I have been able to test fit a chunk of 0.5" of foamular and it fits great around the curves. I know there is a 1.5" cavity, but 2 layers would give me a supposed R-6 and I am pretty happy with the numbers.
I also was able to get the floor painted with some marine paint. I rained recently and the leaks that still need to get patched weren't absorbed into the floor but just pooled on top. Once I have the leaks fixed the flooring should last me quite a while (I hope)
What's left to do immediately:
- Glue up the insulation
- Wire up whatever circuits I have planned out (Including leaving some wires loose for future solar and AC installations)
- Purchase new .040 sheeting to replace the old (I accidentally broke one of the end caps, and one thing lead to another we decided to replace all of the walls instead of just doing 1 end cap)
- Reinstall the walls
Those are the main tasks that I would like to get done before November. This way I could reasonably install the inner parts of the trailer in the winter hopefully with a space heater of some sort to keep me warm.
Some questions:
- Does someone out there have templates/measurements for doing the endcaps on a 67 Tradewind? How about for the walls?
- I know this is a while down the road, but does anyone have a recommendation on 12v pot lights? I bought some pot lights from Home Depot that use a 12v LED driver, and while the batteries can run the lights just fine, they get hot (~70 C/158 F) on the back. While that would make a great heater, I don't need the lights melting the foam.
Thanks,
|
|
|
|
|
08-31-2021, 07:00 PM
|
#6
|
Rivet Master
1958 26' Overlander
Battle Ground
, Washington
Join Date: Jun 2013
Posts: 871
|
Be careful in gluing up your insulation. A lot of the contact cement glues will melt your rigid insulation. Experiment with a piece of scrap. If it starts to melt try a lighter coating.
I realize you've already purchased some wire. Is it solid core or stranded? Solid core is not ideal for autos/trailers due to vibration, make sure its securely fastened down to minimize movement.
The .040 sheeting is a little heavier than stock. It will work fine if only a curved piece, but compound curves can be very difficult. Would suggest you consider .032 or .024 for the endcaps.
It sounds like your puck lights are halogin from the temps. I'd look at led, less temperature and power useage.
I did my endcaps from scratch. Look through my thread and see if that gives you some ideas.
|
|
|
|
|
08-31-2021, 08:12 PM
|
#7
|
1 Rivet Member
1967 24' Tradewind
North Dundas
, Ontario
Join Date: Mar 2021
Posts: 9
|
Quote:
|
Originally Posted by 57Vintage
Be careful in gluing up your insulation. A lot of the contact cement glues will melt your rigid insulation. Experiment with a piece of scrap. If it starts to melt try a lighter coating.
|
I did find foam glue that is designed to adhere to the foam without melting it. Experimentation is still key to make sure I get it right.
Quote:
|
Originally Posted by 57Vintage
I realize you've already purchased some wire. Is it solid core or stranded? Solid core is not ideal for autos/trailers due to vibration, make sure its securely fastened down to minimize movement.
|
I'll admit that I didn't do my research before purchasing the wire. I had help in town that weekend and rushed to get it, and figured if solid core came out solid core can go back in. I'll be sure to minimize vibration, though. The wiring didn't get done that weekend, however, and I realize now that stranded is standard in RV/Marine/Anything that moves.
Quote:
|
Originally Posted by 57Vintage
It sounds like your puck lights are halogin from the temps. I'd look at led, less temperature and power useage.
|
They're LED. I figure its because it's straight 12+ volt, instead of the 12 volts with a PWM a LED driver provides
Thanks for your input, it does help.
|
|
|
|
|
05-03-2022, 06:51 PM
|
#8
|
1 Rivet Member
1967 24' Tradewind
North Dundas
, Ontario
Join Date: Mar 2021
Posts: 9
|
Im back. Its been a while but Im finally able to get back at it.
Some updates:
1. My parental leave ended, so much for this being done by now (super ambitious I know)
2. I slightly regret going with the rigid foam. I dont need glue as things can be held in by ribs and friction, but its a bit of a pain to work with and the end caps are practically impossible to do without glue. The glue I have is super thick and requires 20 minutes of mechanical support to ensure adhesion, but in a curve its closer to 20 hours!
3. Wiring is mostly in, Im trying to figure out what to put in for the outlets/switches. On one hand I could use SCD outlets, on the other I should use regular switches/outlets but I need a box to fit them in. Being in Canada I cant easily get my hands on the Old Work shallow boxes because they arent CSA approved
4. I am in the process of ordering the new inner skins. Still have no idea how I am doing the end caps. Any help here would be greatly appreciated
So thats where we are at. Once the skins are on we are mostly done and can install the remainder. We have a good plan for everything else, so hopefully we can do a weekend camp by the end of summer
C
|
|
|
|
|
|
Currently Active Users Viewing This Thread: 1 (0 members and 1 guests)
|
|
|
 Posting Rules
|
You may not post new threads
You may not post replies
You may not post attachments
You may not edit your posts
HTML code is Off
|
|
|
|

 Recent Discussions
 |
|
|
|
|
|
|
|
|
|
|
|
|
|
|
|
|
|
|
|
|
|


 Linear Mode

