 |
|
 09-21-2014, 05:33 PM
|
#541
|
|
Site Team

1963 26' Overlander
Hollis
, New Hampshire
Join Date: Oct 2009
Posts: 2,647
|
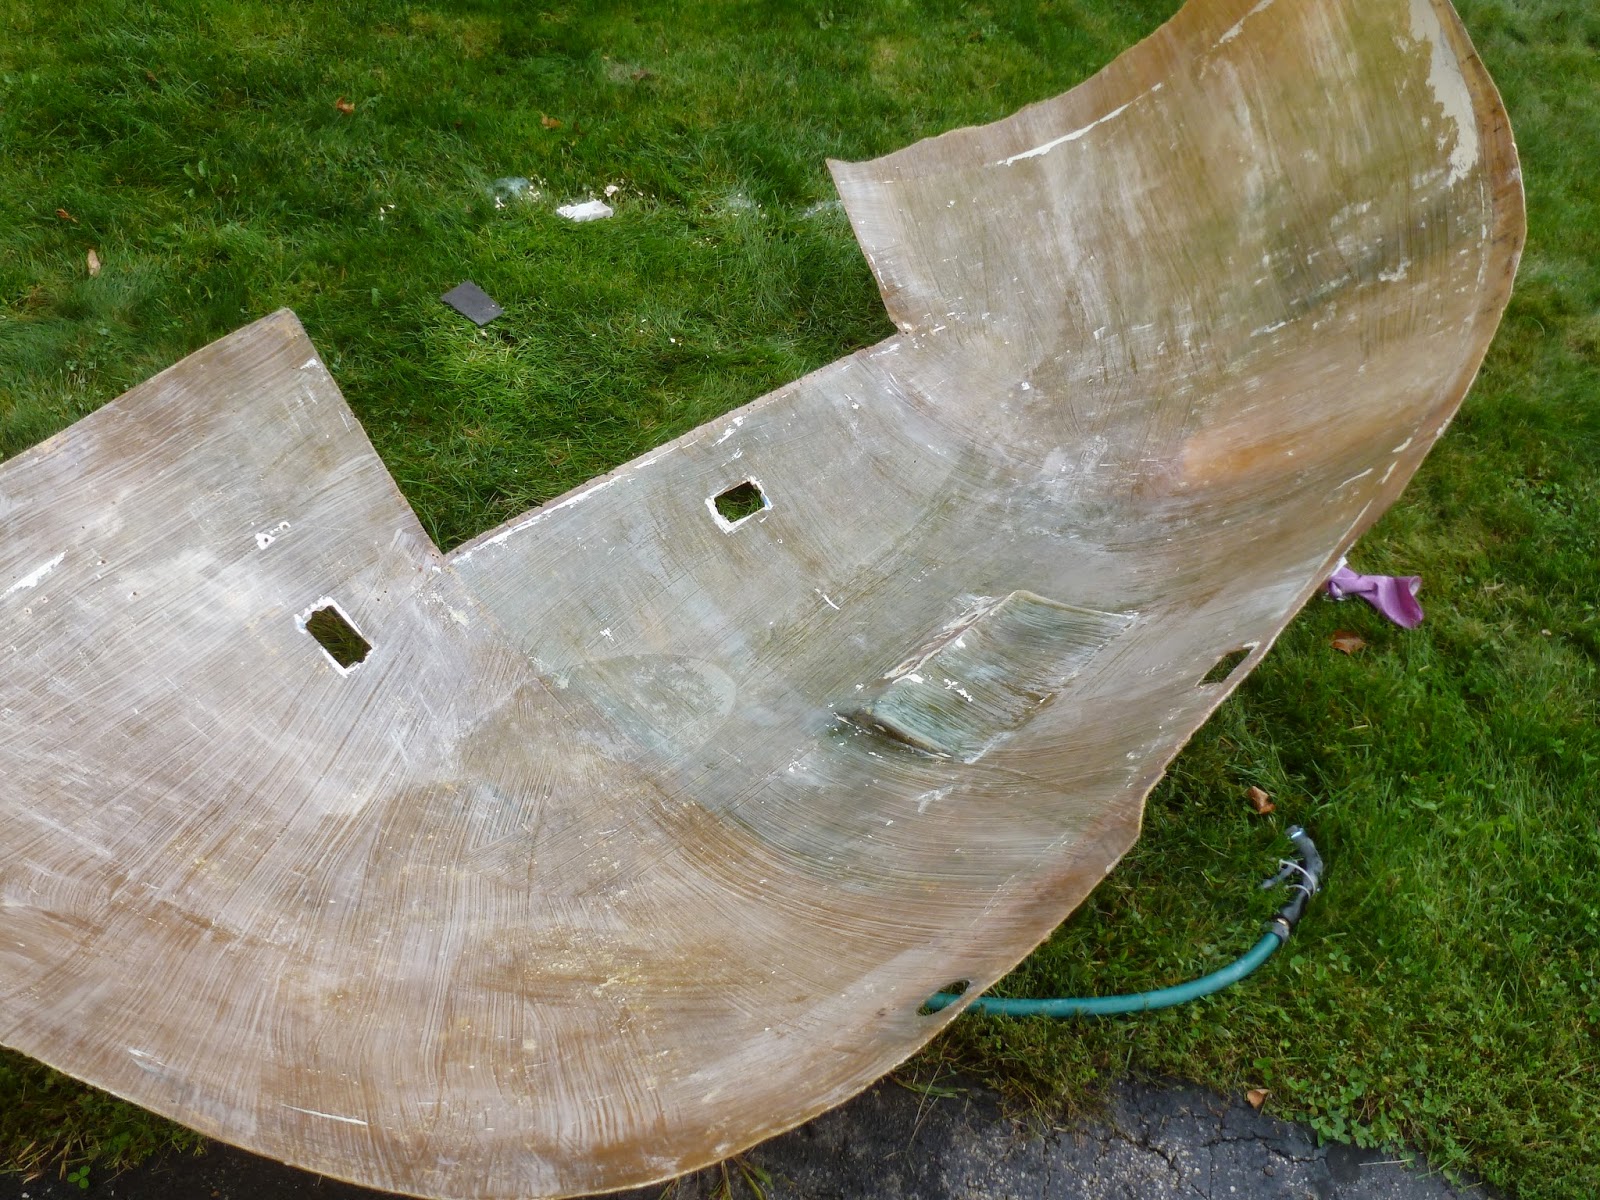
A major milestone is looming ( ie getting the skins back in) so it is time to work on the endcaps as they are the first pieces to go in.
The biggest change is that I despised the molded shelf in the front. To me it looks clunky and way too modern. And since the current plan is having wood end caps it had to go! By the way, all that speckling in the photo is not zolatone, its mold and crud and schmegglies. 
No, I did not make that word up! According to the urban dictionary its a piece of dirt, grime, or grotesqueness that appears on a object or often ones self. I like to use it as a term of endearment, but do that at your own risk! 
Usually I start with hand tools, and progress up the chain of evolution for tools. I like the control I get from hand tools. I started with a coping saw but it didn't fit next to the curved shell, I moved on to a flexible hand saw but the fiberglass was chewing up blades and spitting them out....Should I now confess that I actually first started with a exacto knife ? I was clueless to the relative hardness of old school fiberglass! ")
Okay, onto power tools, my dremel with the right angle attachment and this bit did an okay job but didn't really have enough power and the bit was bogging down. By this time, my lawn had tools and blades scattered all over it and I was 3 hours into a job that I thought would be 30 minutes top! AND I was maybe only a third of the way done . 
Out came the big boy, my rotozip. Another trip to the hardware for a new bit (I think this was my third trip for blades of various types!) Honestly, I think I cut the rest of the shelf off in under 5 minutes! Obviously the right tool for the job, huh.... I used the regular bit for wood and plastic.
A little trimming with a grinder stone on the dremel and DONE! If I get the time I may patch this up and smooth it over. Or I may just leave it ugly and consider it my motivation to do the wood end cap!
Then I cleaned and sealed both endcap backs with West system Epoxy, just like the floors. Unfortunately, no amount of scrubbing was going to get these clean. I'm happy I took the time to do this because they no longer have that peculiar pungent pee smell. Go ahead say that ten times fast I dare ya!

Then onto the fronts, despite my fears they'd dissolve into a pile of goo, I used Citrastrip to get the paint off. Lots and lots of plastic razorblades later....
This angry little fellow watched me the whole day....What am I? Squirrel television?  Gheesh. It's funny, he happily coexists with the large garter snake that lives under my front doorstep. They even use the same tunnels!
__________________
Shelly : TAC NH-6 | AIR 41359
Visit my blog!
Parts needed : Braund Antenna front tube fold down model! 
|

|

|


|
09-21-2014, 06:46 PM
|
#542
|
Rivet Master 
1959 26' Overlander
Western
, Massachusetts
Join Date: Sep 2005
Posts: 1,468
|
"f I get the time I may patch this up and smooth it over. Or I may just leave it ugly and consider it my motivation to do the wood end cap!"
If you do, here is a little cheat used by boat repairers. For filling voids, use lots of micro balloons with West Systems Epoxy -- it makes it light and very easy to sand -- with enough filler it is as easy to work as Bondo. Next, use the full strength West Systems and a thin layer will keep it from damage. Bonding is not an issue since you're using compatible materials. (always remove amine blush on epoxy).
I agree with removing the storage. We have nothing over the forward end cap and it really gives a wide open feeling in the living space forward in the trailer. With all the windows, it is almost as well-lit as a new Airstream with a way-cooler vintage feel.
|
|
|
|
|
10-13-2014, 08:44 PM
|
#543
|
|
Site Team
1963 26' Overlander
Hollis
, New Hampshire
Join Date: Oct 2009
Posts: 2,647
|
A Eureka Moment!
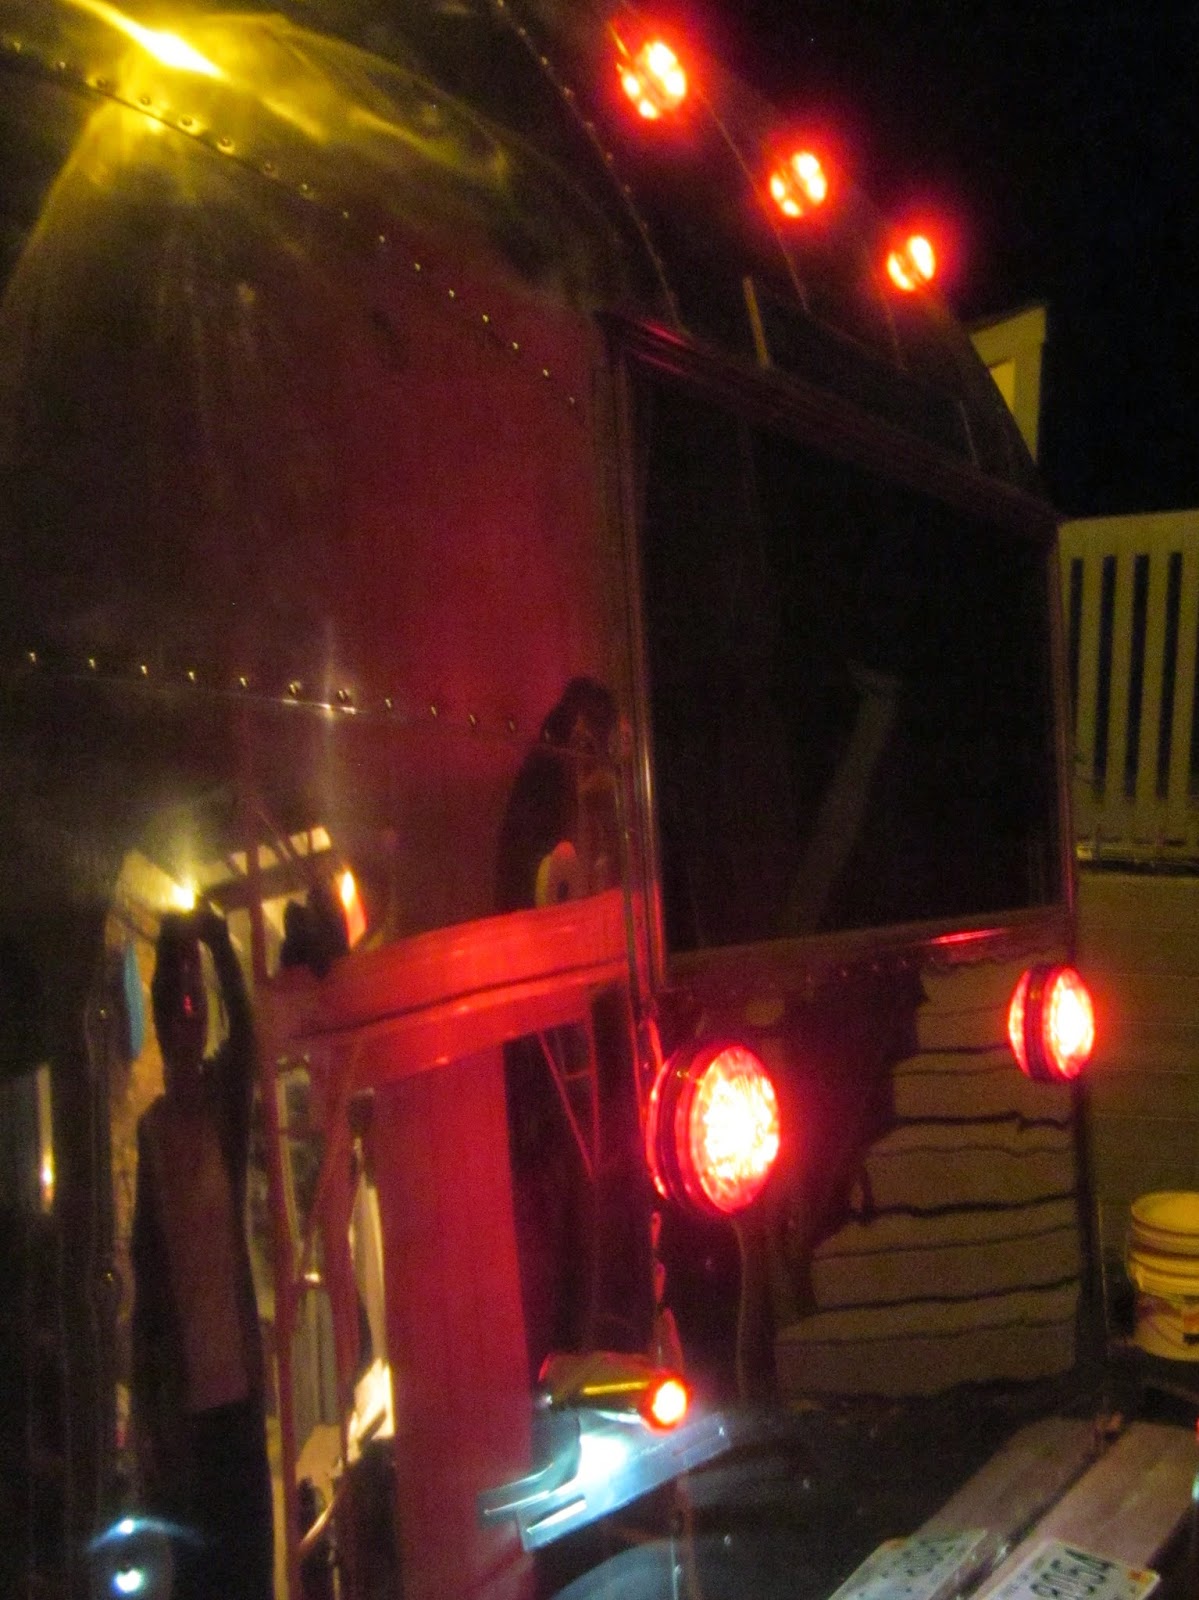
As in ....we have light! There probably are other things I should write about first, but tonight was very exciting! Peter finally wired the last light (the license plate light) and we have LIGHTS! YIPPEE!
Proof by picture...
As in all great epiphanies, there was a lot of work that led up to this moment. Here's Peter wiring in the last light, surrounded by a summers worth of insulation work, rib taping and electrical. And then there was the reworking of all the lights to make them LED, and installing them!
The batteries are going in the front of the trailer, so this is going to be my 12 volt Power central! The seven way wires come into a junction box. I know the truck would be fused but does anyone also add fuses to the junction box to protect the truck? 
All the teardrop grounds are accessed from outside the trailer. The Stop/tail/turns are grounded to the inside ribs. If need be, I left enough wire so that they could get pulled and an outside ground added if there are issues.
We still don't have a truck (waiting on seeing the new aluminum Ford trucks ) so we used one of these to test it.
And following the instructions on this youtube video on how to test the Bargman plug, I'm sure some of you are snickering about needing instructions...YOU BE QUIET! 
Anyway, I'm as happy as a bird with a french fry!
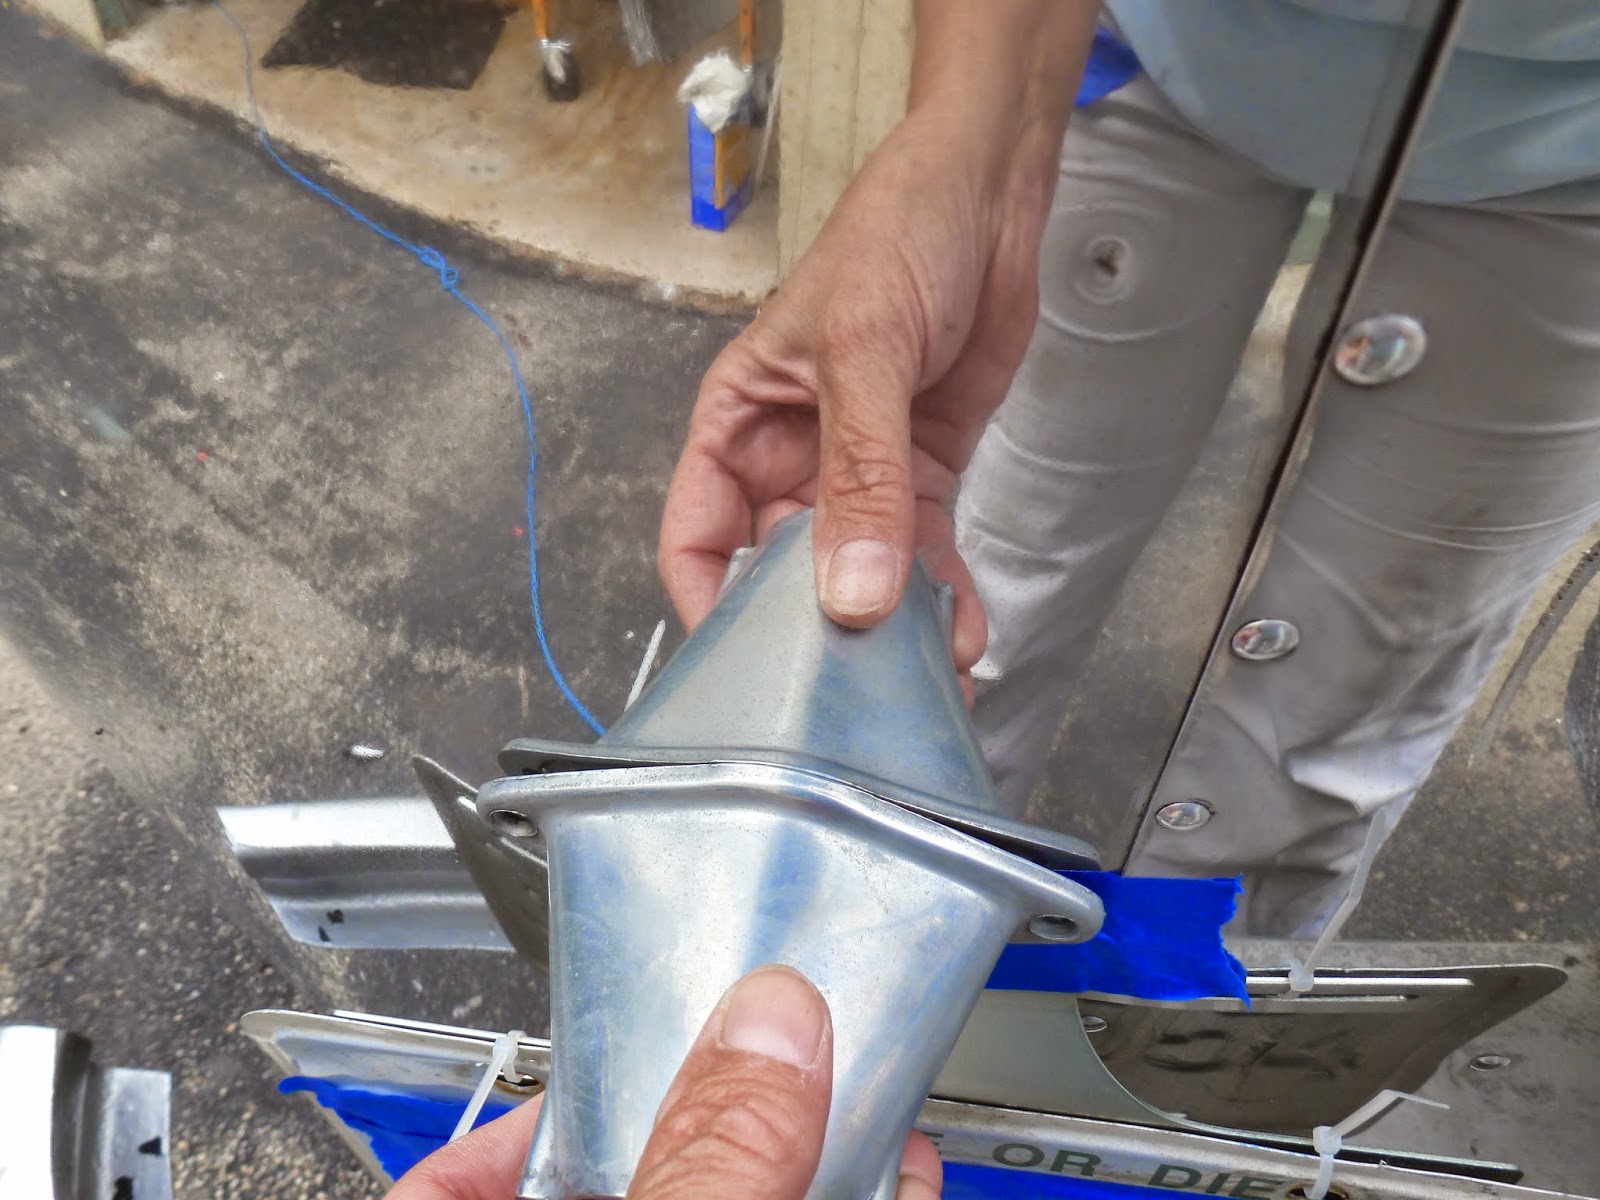
On a side note, I found a new product that's really kinda cool, If you notice in the picture of the lights, my license plate light is installed way off to the left on a curved side section of metal. This is because I still intend to put the tire in a continental kit on the back bumper. But I needed a gasket that was bigger on one side than the other, and narrower in the center. Yes, I probably could have built up some buytl tape but I was looking for something a little more elegant. What I found was a moldable gasket material called Versimold.
This stuff is cool! This is the gap before I had a gasket.
Basically you mold it, shape it, then cure it in the oven (or with a heat gun) and it becomes a custom gasket.
The first time I tried to remove it from the light to cure it..... but it got stretched out and didn't fit nicely enough. The second time I left it on the light and put the whole thing in the oven with much better results. Sweet! Best of all I gave it the hose test and no leaks!
.
This light is grounded by the screws. But I did manage to find an LED bulb that fits. LED's don't like water but this is sealed in the little glass cylinder so hopefully it will be okay. I used this one.
That's all for now! I love my lights
__________________
Shelly : TAC NH-6 | AIR 41359
Visit my blog!
Parts needed : Braund Antenna front tube fold down model!
|
|
|
|
|
10-14-2014, 05:58 AM
|
#544
|
2 Rivet Member 
2021 20' Basecamp
2023 23' Flying Cloud
Canon City
, Colorado
Join Date: Jul 2014
Posts: 27
|
WOW! The LEDs are sweet! I've just added another do-over to my list of projects. Nice job. How many layers of insulation?
Rob
|
|
|
|
|
10-14-2014, 08:15 AM
|
#545
|
Rivet Master
1964 17' Bambi II
Vintage Kin Owner
Schererville
, Indiana
Join Date: Jul 2005
Posts: 2,637
|
Looks great, Shelly! Time for a road trip! I might have to tear apart my tail lights & make them LED like you did! They're super bright & look great! You'll be so happy once your skins go back up inside....you're almost there!
__________________
Becky
1964 Bambi II
1988 Avion 32S
|
|
|
|
|
10-14-2014, 05:48 PM
|
#546
|
|
Site Team
1963 26' Overlander
Hollis
, New Hampshire
Join Date: Oct 2009
Posts: 2,647
|
Quote:
Originally Posted by Al Uminum

WOW! The LEDs are sweet! I've just added another do-over to my list of projects. Nice job. How many layers of insulation?
Rob
|
There's foam strips (1/2 inch Dow R Tuff foam), followed by a
layer of Prodex , more spacers and another layer of Prodex . Just fits! I'm hoping the endcaps will allow the second layer but I haven't test fit them yet!
I hear VTS is coming out with LED marker lights....
__________________
Shelly : TAC NH-6 | AIR 41359
Visit my blog!
Parts needed : Braund Antenna front tube fold down model!
|
|
|
|
|
10-14-2014, 05:54 PM
|
#547
|
|
Site Team
1963 26' Overlander
Hollis
, New Hampshire
Join Date: Oct 2009
Posts: 2,647
|
Quote:
Originally Posted by beckybillrae
Looks great, Shelly! Time for a road trip! I might have to tear apart my tail lights & make them LED like you did! They're super bright & look great! You'll be so happy once your skins go back up inside....you're almost there! |
I can't wait to do the skins . I need to pull the trigger on a truck to be able to camp!
I like the tail lights but they require a one inch hole in the exterior skin, that was nerve wracking  , but good practice for the 2 3/4 hole for the furrion cable inlet I have dreams about messing up !
__________________
Shelly : TAC NH-6 | AIR 41359
Visit my blog!
Parts needed : Braund Antenna front tube fold down model!
|
|
|
|
|
10-16-2014, 07:11 PM
|
#548
|
|
Site Team
1963 26' Overlander
Hollis
, New Hampshire
Join Date: Oct 2009
Posts: 2,647
|
Bug out!
This is a leak free workplace. It has proudly been ZERO days since the last incident!
Yep, well ...yeah, another leak, sigh. A couple weeks back I sealed one long roof seam with Acryl R and the other long roof seam with Tempro 635. Just doing my best for you all in the name of research.... The plan was to check them in the spring to see which held up better.
Well the Acryl R seam was leaking in at least two areas.... and winter is coming (said in my very best Game of Thrones imitation). So I got up on the roof, removed the Acryl R and used Trempro 635. It rained last night and I was worried about whether it had cured. So I grabbed my camera and when I looked at the roof seam I see this. Ignore the morning dew, concentrate on the seam, this was about 6 inches of it.
Every dang black fly left in the northeast committed suicide on my roof seam. LITERALLY hundreds. It was like 40 degrees, there shouldn't have been ANY black flies with 100 miles of my roof! 
Well they better "wear off" cause I'm not doing it again. Just saying.
Update, well it POURED 2 inches today, think I got this licked, the only thing that leaked was where the wind blew it in the refrigerator roof vent. Might have to think of someway to put a waterproof pan under the frig.
PS Yes, I checked, the bugs are still there
__________________
Shelly : TAC NH-6 | AIR 41359
Visit my blog!
Parts needed : Braund Antenna front tube fold down model!
|
|
|
|
|
10-16-2014, 07:45 PM
|
#549
|
Rivet Master
1959 26' Overlander
Western
, Massachusetts
Join Date: Sep 2005
Posts: 1,468
|
Shelly,
Thanks for the reminder! Once I have the leaves done, I should set up the blower for another round of Hillbilly leak testing. It's been 2 years since I did my seams.
Why is the fridge vent leakage a problem? Don't you expect water to be able to get in from underneath via your air intake opening? If it leaks in from above -- and you have sealed the chimney so that you and hubs (and kids) aren't exposed to CO, haven't you contained your leakage to an area that is prepped for water? With all your West Systems Epoxy, your floor and opening should be like a boat and should withstand moisture. Am I missing something?
John
|
|
|
|
|
10-16-2014, 08:00 PM
|
#550
|
|
Site Team
1963 26' Overlander
Hollis
, New Hampshire
Join Date: Oct 2009
Posts: 2,647
|
John,
Yeah, I haven't posted about this... I had issues with water getting under the c channel. There's penetrating epoxy on the edges, but I've had ALOT of leaks, water got into the c channel, seeped into the floor underneath ( maybe through the screw/ bolt holes?) then because I expoxied the floor with the west system the water literally had no way to evaporate. It started creeping in from the floor edge and I was seeing darker areas.
Another theory is that the belt line rivets leaked and got into the end grain of the plywood. They've been sealed now.
I monitored a spot that stayed at 40% saturated for a couple of weeks. There were 4 or 5 areas I actually sanded down to bare wood again. Over a couple of days they dried out and now that I have the leaks identified they have stayed dry. Still not sure I will west system them again.
One of the many do overs.
__________________
Shelly : TAC NH-6 | AIR 41359
Visit my blog!
Parts needed : Braund Antenna front tube fold down model!
|
|
|
|
|
10-16-2014, 08:07 PM
|
#551
|
Rivet Master
1991 34' Excella
1963 26' Overlander
1961 26' Overlander
Central
, Mississippi
Join Date: Nov 2006
Posts: 5,919
|
Bugs, can you take a rag soaked in mineral spirits and wipe them off before it cures anymore?
|
|
|
|
|
10-16-2014, 08:11 PM
|
#552
|
|
Site Team
1963 26' Overlander
Hollis
, New Hampshire
Join Date: Oct 2009
Posts: 2,647
|
I might try that! I though I might be able to brush them off once they decompose a little.
__________________
Shelly : TAC NH-6 | AIR 41359
Visit my blog!
Parts needed : Braund Antenna front tube fold down model!
|
|
|
|
|
10-16-2014, 08:45 PM
|
#553
|
Rivet Master
1964 17' Bambi II
Vintage Kin Owner
Schererville
, Indiana
Join Date: Jul 2005
Posts: 2,637
|
The bugs will probably get crispy & their little bitty legs will look like next to nothing on your seam after their stupid bodies blow off. I'd be ticked too!! Sorry you're having leak issues. If I am, I'm going with the saying that "ignorance is bliss"...I do know the sinking feeling of leaks & prefer to think I don't have any!
__________________
Becky
1964 Bambi II
1988 Avion 32S
|
|
|
|
|
10-16-2014, 08:54 PM
|
#554
|
|
Site Team
1963 26' Overlander
Hollis
, New Hampshire
Join Date: Oct 2009
Posts: 2,647
|
I bet their itty bitty legs are hollow and with my luck they will funnel water into the seam .
Thanks for the sympathy . I remember when you were chasing leaks!
__________________
Shelly : TAC NH-6 | AIR 41359
Visit my blog!
Parts needed : Braund Antenna front tube fold down model!
|
|
|
|
|
11-07-2014, 06:40 PM
|
#555
|
|
Site Team
1963 26' Overlander
Hollis
, New Hampshire
Join Date: Oct 2009
Posts: 2,647
|
Okay, so I have a two final details that need to take place before my skins go in. Our electrician was here last night and gave us the go ahead to proceed! So we are almost ready to cover it all up except for.....
Solar
We are prewiring for solar with #6AWG. The plan is for at least 200 watts in flex panels from AM Solar (assuming the tests Lewster is doing pan out) I know most people go thru the refrigerator vent, but then many people have their batteries in close proximity.
My batteries on the other hand are up front under the window. This would require going through three ribs (mostly above the door with frankly HONKIN' big holes. I'm not even sure there is room to grommet after they are drilled because the flange on the rib gets in the way. I suppose I could "unjacket" the wire? I'm nervous about doing these holes in this area as a couple of these ribs don't go all the way from one side to the other. I did brace the ribs to the stringers but it's an inherently weak point in the structure. Here's the area in question
Alternatively, I could put the wire somewhere near the front astrodome (that would mean drilling through one rib) and running the wire down the endcap. This would require putting a combiner box on the roof and drilling a hole thru the roof which makes me hyperventilate.
I'm thinking the second option is a little better but could be persuaded differently.
Air conditioner drain
In the unlikely event we ever put an air conditioner on the roof, I'm putting in a drain line just in case. Somewhere on the forum I read it should be 1/2 inch inner diameter. That is a really big hose! If I place it street side leading down to the wheel well if has to go through one rib and 4 stringers. I wish I could draw on these pictures but I don't have a way to do that!! Basically it would be through the stringer at the back of where the fantastic fan now, and then down through the stringers like the black pipe (the water tank vent).
Is it really necessary for it to be this big? Can I use a smaller tube and adapt it somehow to the tube at the air conditioner?
All this work for something that will probably never happen! Unless we move to Texas.....and I break my leg and am stuck in the trailer with a cast on.... and the planned air conditioner never works out..... yeah, get the picture?
So any suggestions? Other than to stop overthinking things and just get the interior skins in!!!!!
__________________
Shelly : TAC NH-6 | AIR 41359
Visit my blog!
Parts needed : Braund Antenna front tube fold down model!
|
|
|
|
|
11-07-2014, 06:55 PM
|
#556
|
Rivet Master
1960 33' Custom
Athens
, Georgia
Join Date: Jun 2005
Posts: 1,373
|
I'm not the guy with the answer but could you split the #6 into it's two components and work with smaller holes/grommets?
|
|
|
|
|
11-07-2014, 07:28 PM
|
#557
|
4 Rivet Member 
1976 25' Tradewind
, Florida
Join Date: Apr 2014
Posts: 353
|
The issue with the AC drain is that gunk sometimes grows in the drain pan. Those globs of stuff can clog a small drain line. My 1976 had 1/2 inch landscaping tubing, it is pretty inexpensive I bought 50 ft for less than $10 at a local hardware store. My tube exits behind the rear tire through a hole in the lower wraps.
Your wiring and insulation look great BTW, mine is a mess compared to yours.
Sent from my iPhone using Airstream Forums
76 'Airstream Tradewind
__________________
Matt
|
|
|
|
|
11-07-2014, 09:16 PM
|
#558
|
Rivet Master
1966 22' Safari
Hilltop Lakes
, Texas
Join Date: Jun 2008
Posts: 1,767
|
The black plastic "hose" they sell for underground sprinkler systems worked just fine for our air conditioner drain. 1/2" inside diameter and not much more than that outside diameter. It has thin, tough walls. Works fine when the air conditioner is running, and it does that quite a lot here in Texas.
|
|
|
|
|
11-08-2014, 06:04 AM
|
#559
|
|
Restorations done right
Commercial Member
1962 26' Overlander
1961 26' Overlander
Vintage Kin Owner
Currently Looking...
Baltimore
, Maryland
Join Date: Aug 2007
Posts: 5,545
|
I use PEX for the drain line. You probably have some on hand. The transition from PEX to vinyl(on the drain kit) is easy with one PEX fitting.
|
|
|
|
|
11-08-2014, 07:18 AM
|
#560
|
Rivet Master
1959 26' Overlander
Western
, Massachusetts
Join Date: Sep 2005
Posts: 1,468
|
Quote:
Originally Posted by truckasaurus
I'm not the guy with the answer but could you split the #6 into it's two components and work with smaller holes/grommets?
|
... and keep those holes separated by a couple of inches, the effect should be no different from running Romex. The original holes in my ribs were more than adequate to handle a single strand of #6.
|
|
|
|
|
|
|
Currently Active Users Viewing This Thread: 1 (0 members and 1 guests)
|
|
|
 Posting Rules
|
You may not post new threads
You may not post replies
You may not post attachments
You may not edit your posts
HTML code is Off
|
|
|
|

 Recent Discussions
 |
|
|
|
|
|
|
|
|
|
|
|
|
|
|
|
|
|
|
|
|
|


 Linear Mode

