 |
|
 08-09-2013, 05:35 PM
|
#381
|
|
Site Team

1963 26' Overlander
Hollis
, New Hampshire
Join Date: Oct 2009
Posts: 2,647
|
Thanks Kip!
I know you have access to all the good tools! That's part of the reason your airstream is so well built! The rest of us just schlep along. 
Part of the reason I thought that eastwood unit was so attractive was that it operates at 7cfm @ 80 psi. Just hate to buy a tool that may not work. Still thinking about it.
__________________
Shelly : TAC NH-6 | AIR 41359
Visit my blog!
Parts needed : Braund Antenna front tube fold down model! 
|

|

|


|
08-09-2013, 05:57 PM
|
#382
|
|
Site Team
1963 26' Overlander
Hollis
, New Hampshire
Join Date: Oct 2009
Posts: 2,647
|
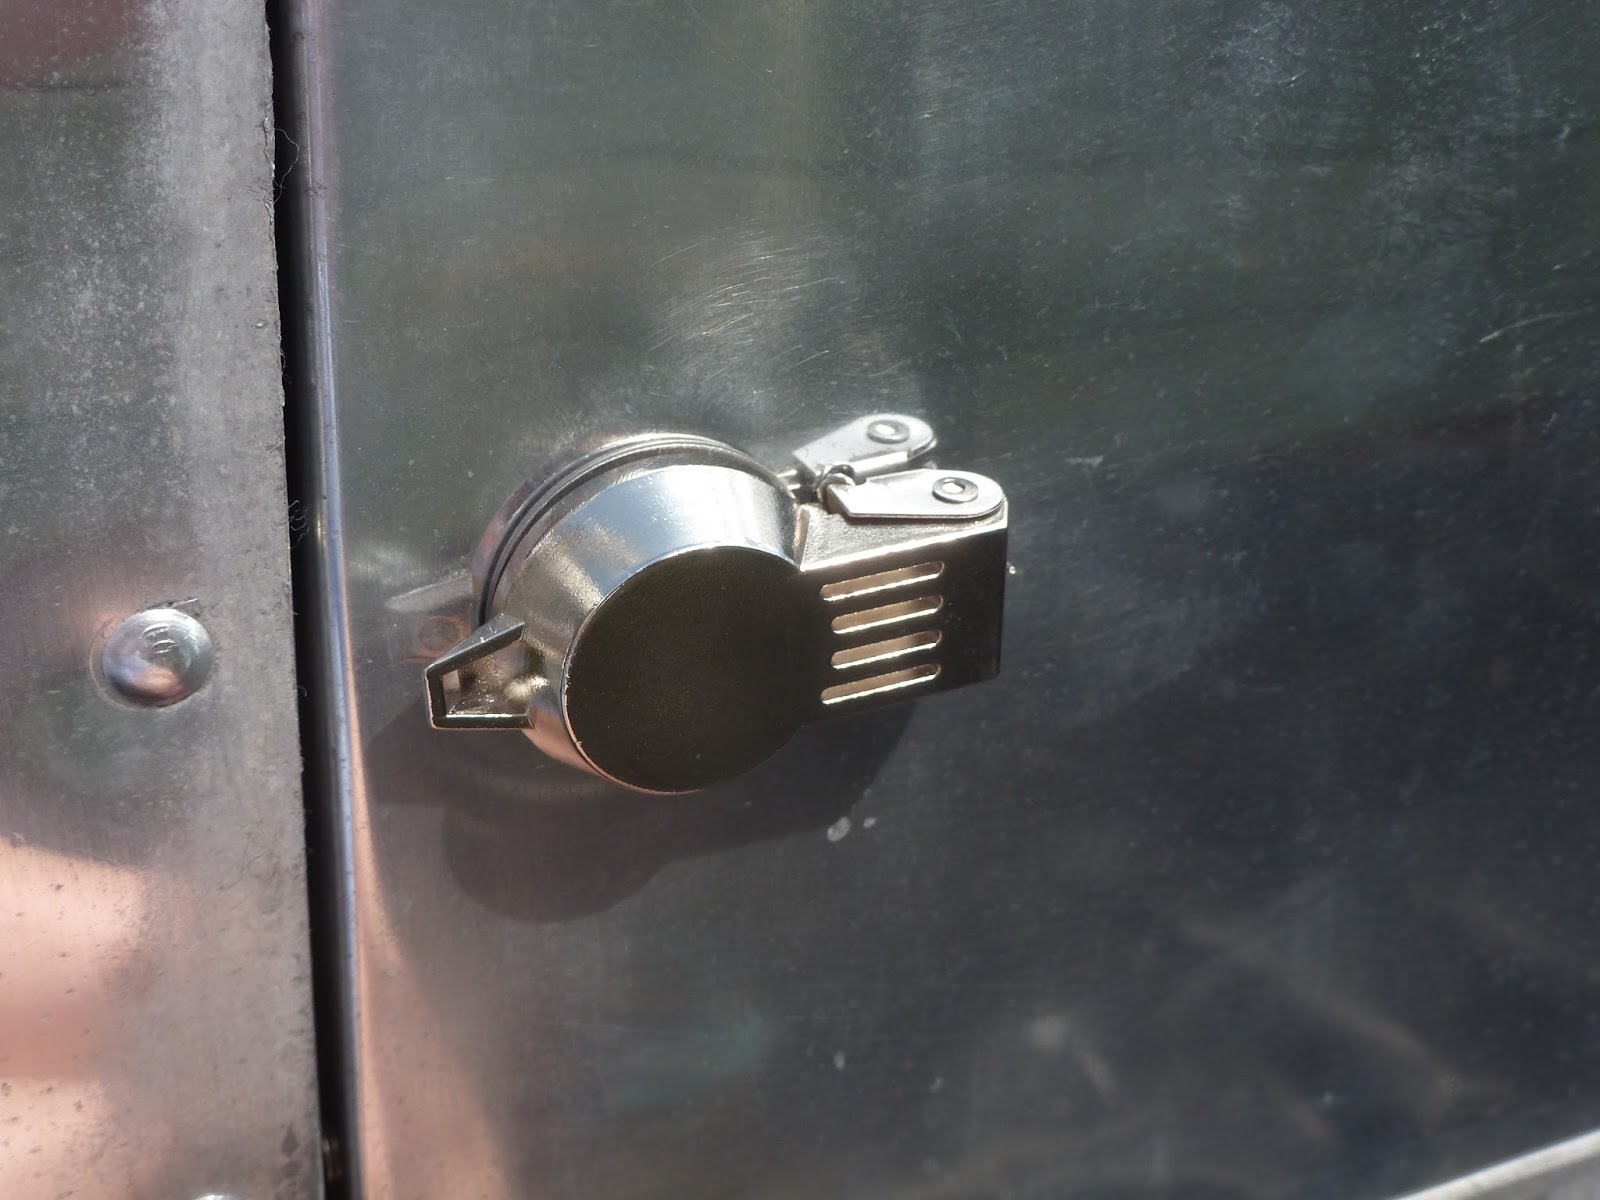
New locks for the compartment doors
Here's my compartment door lock, corroded and without a key. Time to replace with something better!
Does anyone remember Mello Mike? He used to post on the Airforums, (had an Overlander) but now runs a very informative blog here. He wrote a post about baggage door locks that I found to be very interesting. Ditching the worthless CH751 rv locks!
His comment about the site being confusing was spot on, but they were very nice on the phone, just have your old lock in front of you when you call and Brenda will walk you right thru it!
A couple of days later these showed up in the mail, they are very well made. Made in USA and have good instructions. Note the instructions are only in English and a single page! No extra trees had to die to produce instructions in 14 different languages!
Note: I ordered the same lock cam (the straight piece of metal in the picture that holds the door shut) as my original. However, because I beefed up the interior seal (I wanted the compartment door to lie flush with the outside skin) and by using this medium D seal the cam no longer fit.
I had to call the company back and sheepishly admit I'd ordered wrong one and asked for the 1/4 inch offset that looks like this.
Brenda was very nice and shipped them out the same day for a very nominal fee of $1.50 each. Excellent AMERICAN company with great service. They also guarantee that no one in your geographical area will have the same key as you do! They assign a key code to you the first time you call and if you wish, all future orders can be made to have the same keying. There's also a special key they send you that will "fix" the lock if it ever jumps out of alignment.
OKOKOK I know you want pricing and they are a little more expensive. At the time of this writing I paid $11.35 a lock with $3.00 for the additional dust cover. The dust cover protects the investment and looks cool IMHO. 
Installation of the lock was pretty straight forward with just a few speedbumps.
The directions don't say to install the lock dust cover after the washer but I assure you it doesn't look right the other way. How do I know? I had to re-drill all the rivets out of the compartment door and start all over! 
This is the correct way.... notice how the hinge is slightly offset, this insures it won't scratch your freshly polished aluminum skin.
Then add the mounting nut (slightly bronzy in the picture)
The next metal piece is called the governor. It sits snug up against the lock, I pulled it out a little so you could see it
Now temporarily add the nylon mounting nut, just slightly snug. No, you don't really have to do this, but if you don't you'll wish you had. Read on..... well someone's got to read to the end of this post!LOL
Rivet the back door in place. If you didn't add the nylon locking nut you'll risk the governor falling down into the space between the two doors. Raise your hand if you know where this is going! Yep, the first time I did this I had to redrill all the door rivets out again to retrieve that little piece. 
NOW take the nylon nut off and add your cam (with the correct offset of course) there is additionally a little square space you can add if it improves the fit (it comes in the kit)
Ta da ! , The finished product 
__________________
Shelly : TAC NH-6 | AIR 41359
Visit my blog!
Parts needed : Braund Antenna front tube fold down model!
|
|
|
|
|
08-09-2013, 06:19 PM
|
#383
|
Rivet Master 
1959 26' Overlander
Western
, Massachusetts
Join Date: Sep 2005
Posts: 1,468
|
Shelly,
Great write-ups! Thanks for all the detail on the locks -- I think I'll upgrade too. I have to get a new one for the newly added door to vent my A/C. I'll probably get the fridge access door at the same time. The current one has a funky bend after I added the gasket. It just doesn't fit right.
I hate redoing jobs and am glad that I'm not the only one suffering through it.
John
|
|
|
|
|
08-09-2013, 07:32 PM
|
#384
|
Rivet Master
1964 17' Bambi II
Vintage Kin Owner
Schererville
, Indiana
Join Date: Jul 2005
Posts: 2,637
|
Looks really slick, Shelly! I redid my doors too, but with just plain locks (didn't know any other kind exists!) One can never have enough bling!
I used Eternabond on the roof of my Avion. It really sticks!! Should work well on your frames.
__________________
Becky
1964 Bambi II
1988 Avion 32S
|
|
|
|
|
08-12-2013, 03:13 PM
|
#385
|
|
Site Team
1963 26' Overlander
Hollis
, New Hampshire
Join Date: Oct 2009
Posts: 2,647
|
Quote:
Originally Posted by 65CV

Shelly,
Great write-ups! Thanks for all the detail on the locks -- I think I'll upgrade too. I have to get a new one for the newly added door to vent my A/C. I'll probably get the fridge access door at the same time. The current one has a funky bend after I added the gasket. It just doesn't fit right.
I hate redoing jobs and am glad that I'm not the only one suffering through it.
John
|
Sometimes I feel like I'm redoing everything! Hopefully someone will learn from my mistakes 
Becky, thanks! I spend lots of hours at night combing the Internet! I have no life other than my family and moonraker right now.... And the Internet 
__________________
Shelly : TAC NH-6 | AIR 41359
Visit my blog!
Parts needed : Braund Antenna front tube fold down model!
|
|
|
|
|
08-12-2013, 03:17 PM
|
#386
|
|
Site Team
1963 26' Overlander
Hollis
, New Hampshire
Join Date: Oct 2009
Posts: 2,647
|
A fast question!
Can the jalousie interior window frame be removed without drilling out all the buck rivets on the outside? There is an internal frame that holds all the levers for the glass panes, I'm hoping there's a way to remove that but for the life of me I can't figure it out. Anyone?
__________________
Shelly : TAC NH-6 | AIR 41359
Visit my blog!
Parts needed : Braund Antenna front tube fold down model!
|
|
|
|
|
08-12-2013, 04:17 PM
|
#387
|
|
Restorations done right
Commercial Member
1962 26' Overlander
1961 26' Overlander
Vintage Kin Owner
Currently Looking...
Baltimore
, Maryland
Join Date: Aug 2007
Posts: 5,545
|
break out the sharp drill bits... Sorry.
|
|
|
|
|
08-28-2013, 08:40 AM
|
#388
|
Rivet Master
1962 22' Safari
1957 22' Custom
1963 16' Bambi
Vacationland
, Maine
Join Date: Apr 2006
Posts: 956
|
Some fancy work going on here! I've got some serious tool envy going on right now!
Shelly, is the Eternabond the same as the Butyl product VTS sells? The butyl tape is 3/4" wide which is what I was considering for drip edge reinstallation. Just removed a 12 ft long drip edge and the original chaulking was very soft.
Also, you suggested Prodex over Reflectex insulation. Why and where do you buy it.
Thanks
Gary
__________________
wbcci #3363
VAC - Region 1 vintage Club rep
New England unit
|
|
|
|
|
08-29-2013, 05:22 PM
|
#389
|
|
Site Team
1963 26' Overlander
Hollis
, New Hampshire
Join Date: Oct 2009
Posts: 2,647
|
Hi Gary,
Eternabond and butyl putty are used for the same purpose. I will be using eternabond's double stick and aluminum tape to install my fantastic fans so I had the stuff already. They both won't harden. I'm not sure what the new butyl tape from VTS is like but I'm not liking the old stuff I'm digging out of seams, it's pretty friable.
I bought the eternabond from Best Materials.
Eternabond Roof Tape
The Prodex is only available from one website that I know of, the website is hard to understand and shipping is expensive. . If you sign up for emails ( be prepared to get frequent notices!) and wait for their "two for the price of one" sale , the cost becomes more in line with Reflectix. I got it at Insulation for Less : Prodex : Metal Building Insulation : Reflective Insulation : Reflectix : Pole Barn Insulation : Bubble Insulation : Home Insulation : Insulation types : Radiant Barrier : house insulation
Prodex has a much higher r value (r16) and is much stiffer and easier to cut.
__________________
Shelly : TAC NH-6 | AIR 41359
Visit my blog!
Parts needed : Braund Antenna front tube fold down model!
|
|
|
|
|
09-11-2013, 05:34 PM
|
#390
|
|
Site Team
1963 26' Overlander
Hollis
, New Hampshire
Join Date: Oct 2009
Posts: 2,647
|
Its a wrap, cyclo wrap that is!
No worries, I'm still working on Moonraker, just finishing up windows and I'll write a post about that shortly.
In the meantime, I've been using the cyclo. It only took me a day to figure out that the method of using the one big piece of sweatshirt material and cutting slits and moving it around as advocated here at Perfect Polish.com is seriously like wrestling with a huge dirty diaper!  It also adds weight to an already heavy polisher and having the clean space to lay it out to roll it up correctly was impossible as my tools keep migrating into the open area!
So I set out to make my own bonnets. I bought sweatshirt material from wazoodle. It comes 60 inches wide. I cut 10x15 inch rectangles. then using a zigzag stitch on my sewing machine I put round cord elastic around the edge. Be careful not to catch the cord so you can pull up on the end, cut off and tie.

Voila!

Here it is on the polisher. Its a generous size, I think I could make them slightly smaller, but I like the fact they stay on.
Was it more economical? Well out of just over a yard of fabric (40 x 60 inches wide) I get 16 bonnets for just under $10 or $1.60 a piece. The perfect polish material comes in a 10 pack for $68, one piece gives you 16 positions (assuming you can keep the cloth uncontaminated) so each "position" costs 50 cents. So no, not cost effective, (  gee, I wish I'd done this analysis first instead of waiting til now!) but all my bonnets stay uncontaminated in their own plastic baggies and can be washed easily.
I couldn't find all cotton sweatshirt material locally if you can, you might be able to reduce the cost! You could also just buy the perfect polish sweatshirt material and cut it up too, that would work out to 8 bonnets per piece or 85 cents a bonnet.
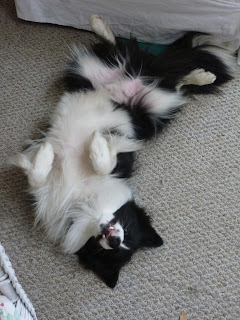
Finn didn't think much of my polishing bonnets but enjoyed the air conditioned comfort of being inside for once!
__________________
Shelly : TAC NH-6 | AIR 41359
Visit my blog!
Parts needed : Braund Antenna front tube fold down model!
|
|
|
|
|
09-11-2013, 05:53 PM
|
#391
|
Rivet Master
1966 22' Safari
1954 22' Flying Cloud
Saline
, Michigan
Join Date: Aug 2011
Posts: 854
|
Shelly not sower kind of guy but I AM interested in your home made bonnets. When you sowed your elastic onto your rectangles did you stretch it as you sowed so when let loose they "bunch" up and make the pocket(?) that fits over the Cyclo? Thanks for any info... I too don't like all the extra material when using the huge sheets with all the slits in it.
|
|
|
|
|
09-11-2013, 05:56 PM
|
#392
|
Rivet Master
1991 34' Excella
1963 26' Overlander
1961 26' Overlander
Central
, Mississippi
Join Date: Nov 2006
Posts: 5,919
|
Bonnets are like underware, 16 make for 64...
frontwards, backwards, inside out frontwards, inside out backwards = 4 out of 1 bonnet. 
Are you going to be able to re-use any of your old interior?
|
|
|
|
|
09-11-2013, 06:13 PM
|
#393
|
|
Site Team
1963 26' Overlander
Hollis
, New Hampshire
Join Date: Oct 2009
Posts: 2,647
|
Quote:
Originally Posted by goshawks00
Shelly not sower kind of guy but I AM interested in your home made bonnets. When you sowed your elastic onto your rectangles did you stretch it as you sowed so when let loose they "bunch" up and make the pocket(?) that fits over the Cyclo? Thanks for any info... I too don't like all the extra material when using the huge sheets with all the slits in it.
|
I didn't stretch it when I sewed the elastic, the zigzag stitch goes back and forth over the elastic cord but doesn't catch it, so at the end I could pull on one end, gather it up to the appropriate size, then tie it off and cut it. I had to fit a few on the cyclo before i figured out how much to gather it up, too much and it won't fit on, too little and it comes off when you use it.
One thing I really like is that I could finally see what I was doing, all that extra fabric got in the way
__________________
Shelly : TAC NH-6 | AIR 41359
Visit my blog!
Parts needed : Braund Antenna front tube fold down model!
|
|
|
|
|
09-11-2013, 06:19 PM
|
#394
|
|
Site Team
1963 26' Overlander
Hollis
, New Hampshire
Join Date: Oct 2009
Posts: 2,647
|
Quote:
Originally Posted by HiHoAgRV
Bonnets are like underware, 16 make for 64...
frontwards, backwards, inside out frontwards, inside out backwards = 4 out of 1 bonnet.
Are you going to be able to re-use any of your old interior? |
Very funny HiHo, but what do you do if you wear thongs! 
I'm going reuse almost all of the aluminum, that's the plan anyway. I've spent too much time stripping it to toss it! We'll see, some of it is in tough shape, but I'm painting so it won't matter much. I really like the look of your aluminum but there's no way I can replicate it with the current panels.
__________________
Shelly : TAC NH-6 | AIR 41359
Visit my blog!
Parts needed : Braund Antenna front tube fold down model!
|
|
|
|
|
09-11-2013, 07:58 PM
|
#395
|
Rivet Master
1964 17' Bambi II
Vintage Kin Owner
Schererville
, Indiana
Join Date: Jul 2005
Posts: 2,637
|
Thanks for the tutorial, Shelly. Maybe I'll drag my sewing machine out this winter & make some out of my sheets from Perfect Polish. I never can get the side slitted sides to stay on with those & your bonnets look pretty slick! Polish pictures?????
__________________
Becky
1964 Bambi II
1988 Avion 32S
|
|
|
|
|
09-11-2013, 08:28 PM
|
#396
|
|
Site Team
1963 26' Overlander
Hollis
, New Hampshire
Join Date: Oct 2009
Posts: 2,647
|
Quote:
Originally Posted by beckybillrae
Polish pictures????? |
No polishing pictures, the fat lady hasn't sung yet 
I got sidetracked by windows and I'm still majorly unhappy with the undercast spots, tried alumiprep 33, did nothing , going to try f9 and a bunch of passes like you said.
__________________
Shelly : TAC NH-6 | AIR 41359
Visit my blog!
Parts needed : Braund Antenna front tube fold down model!
|
|
|
|
|
09-12-2013, 01:01 PM
|
#397
|
Rivet Master
2020 27' Globetrotter
1999 25' Safari
Somewhere
, Ohio
Join Date: Jul 2010
Posts: 861
|
Great idea about the bonnets, Shelly. I'm wondering if heavy weight flannel would work? I do draperies, etc., so I have quite a few remnants of heavy weight flannel, 100% cotton; I use this flannel as interlining on my French blackout panels (draperies) in my high-end line (French blackout panels consist of four layers of fabric -- time-consuming and high $$$, but they work like a charm to keep sun out and heat in/cool out, or vice versa in summer).
Anyway, when I read you had difficulty finding 100% cotton sweatshirt fabricate, I immediately thought of my flannel remnants and was wondering if I could use it with our Cyclo, when we pick one up. I realize one thing the sweatshirt fabric probably does not do is scratch, and I don't really know if this flannel would, but I would think not. I guess I'll have to give it a try to see.
Deb
|
|
|
|
|
09-12-2013, 07:09 PM
|
#398
|
|
Site Team
1963 26' Overlander
Hollis
, New Hampshire
Join Date: Oct 2009
Posts: 2,647
|
I think the flannel would be perfect! In fact nuvite sells polishing cloths for the cyclo that are flannel. I'm jealous of your free supply! The key to not scratching is more about keeping it uncontaminated by dirt and such. Save those scraps!
__________________
Shelly : TAC NH-6 | AIR 41359
Visit my blog!
Parts needed : Braund Antenna front tube fold down model!
|
|
|
|
|
09-13-2013, 07:16 AM
|
#399
|
Rivet Master
1966 26' Overlander
Woodstock
, Georgia
Join Date: Feb 2002
Posts: 8,525
|
My wife quilts I use left over cotton and fleece to wrap the cyclo.
|
|
|
|
|
09-13-2013, 07:33 PM
|
#400
|
|
Site Team
1963 26' Overlander
Hollis
, New Hampshire
Join Date: Oct 2009
Posts: 2,647
|
Out out d%&*# spots!
Okay, I posted this on the Jestco thread on the Airforums here, post #18 but I had spots on my trailer from undercasting the aluminum while polishing. I guess if you use too much polish, or polish at too high/slow a speed (or basically even look at it funny!) you can actually burn the polish under the surface of the aluminum. There it lies in wait until you try to get a mirror shine and then these spots start to catch and hold the polish, no amount of extra polishing will get them out.
They looked like this
I am happy, no ECSTATIC to report that they are now gone! I owe many thanks to Becky, Vernon, Top and Frank for giving me options and encouraging me to press on. And special thanks to Alansd for starting the Jestco thread as I was pretty sure I had burned thru the AlClad and was going to have to live with it! If and when I ever meet you all, the beverages are on me!
In the end, it was a case of not being aggressive enough. The first time I tried Nuvite F7, I used a new pad and I guess it didn't have enough " bite" to it yet. This time it worked perfectly although it took some time, they kept getting lighter and lighter. I did have to resort to using Alumiprep 33 on one spot (I diluted 3 parts water to one part Alumprep and left it on 3 minutes), and I think there's another that I'll have to look at again in the morning sun. But overall I'm a happy camper tonite!
And no Becky, still no polishing pictures LOL!!!!
__________________
Shelly : TAC NH-6 | AIR 41359
Visit my blog!
Parts needed : Braund Antenna front tube fold down model!
|
|
|
|
|
|
|
Currently Active Users Viewing This Thread: 1 (0 members and 1 guests)
|
|
|
 Posting Rules
|
You may not post new threads
You may not post replies
You may not post attachments
You may not edit your posts
HTML code is Off
|
|
|
|

 Recent Discussions
 |
|
|
|
|
|
|
|
|
|
|
|
|
|
|
|
|
|
|
|
|
|


 Linear Mode

