


I bought my 1976 31" Sovereign International on June 24, 2010 about two miles from my home.
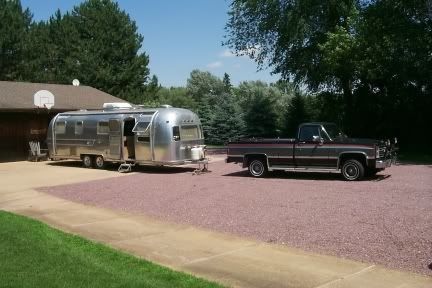
It's going to be a work in progress. I'll uncover, discover, and recover. It has some old leaks. I suspect the TV antenna and the skylights. I believe the leakage is minimal but I'll see.

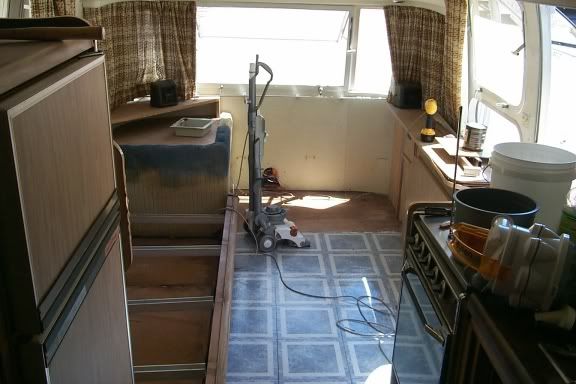
We began by removing the living area builtins.
sofa out
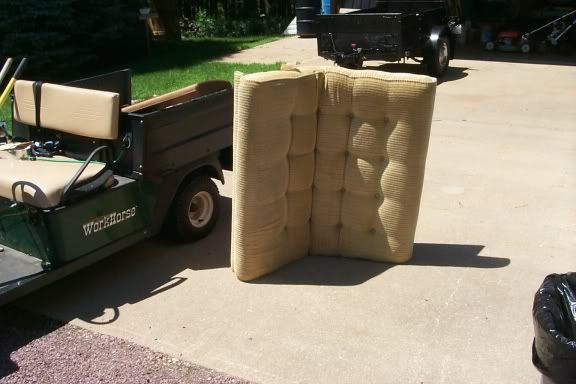
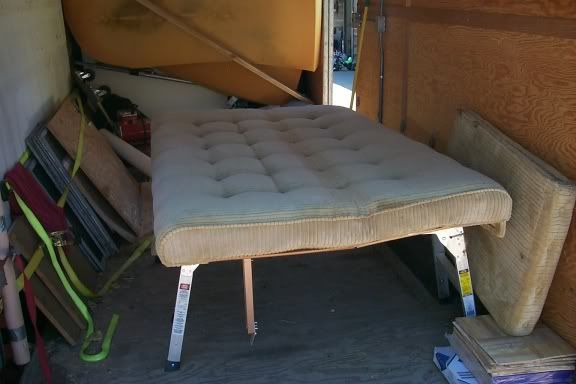
Both sofas out along with the mickey mouse corner table and the finger pinch table.
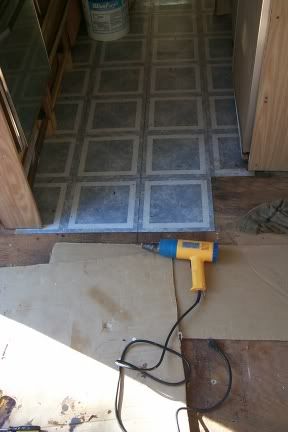
Before removing the rotted floor sections under the window and by the door, I'll remove those nice blue floor tiles.
They appear to be original because the floor is like new under the tiles and the tiles go under the builtins. They come up like they were never glued with a heat gun.
The whole tile comes up in one piece. Unfortunately the glue stays down and stays sticky. Some comes up with Krud Kutter.
I removed the drapes. The end caps come off and there's a screw in the bottom track to remove and the drapes just run out the end.
It's going to be a work in progress. I'll uncover, discover, and recover. It has some old leaks. I suspect the TV antenna and the skylights. I believe the leakage is minimal but I'll see.
We began by removing the living area builtins.
sofa out
Both sofas out along with the mickey mouse corner table and the finger pinch table.
Before removing the rotted floor sections under the window and by the door, I'll remove those nice blue floor tiles.
They appear to be original because the floor is like new under the tiles and the tiles go under the builtins. They come up like they were never glued with a heat gun.
The whole tile comes up in one piece. Unfortunately the glue stays down and stays sticky. Some comes up with Krud Kutter.
I removed the drapes. The end caps come off and there's a screw in the bottom track to remove and the drapes just run out the end.
Cabinet ends, faceframes, shop
Posted 07-31-2011 at 04:27 PM by Splitrock
Tags cabinets
Cabinet ends, faceframes, shop

The four tall cabinet ends are done, the faceframes are done and sanded, and the fit up is finished on the street side.

The wood is yellow birch,


The frames were glued and screwed on a square up clamp table.

Cut to length on the old saw I've had since 1974.

Sanded on a modern belt sander.

Next, make doors and drawers and stain and finish.
The four tall cabinet ends are done, the faceframes are done and sanded, and the fit up is finished on the street side.
The wood is yellow birch,
The frames were glued and screwed on a square up clamp table.
Cut to length on the old saw I've had since 1974.
Sanded on a modern belt sander.
Next, make doors and drawers and stain and finish.
Total Comments 4
Comments
-

 Wow you have done an excellent job!
Posted 07-31-2011 at 05:03 PM by Peggy Wilson 
-
 The heat is slowing me down:-)
Posted 07-31-2011 at 05:42 PM by Splitrock
-
 Looks like some great work Split. Some cool tools too!
Posted 08-03-2011 at 04:55 AM by Lance M
-
Thanks! This phase is a LOT more fun than frame welding and tracking down leaks:-)Quote:Originally Posted by TopLooks like some great work Split. Some cool tools too!
We had a 5" rain in two hours and no leaks! I'm pretty happy!Posted 08-03-2011 at 08:03 AM by Splitrock

