


Project #5 - The J-Lounge
Posted 03-25-2013 at 03:30 PM by outofcontrol
This project was going to be months down the road. Once we spent some time with the trailer and did some research, and thought about it.
Our maiden voyage was supposed to be this weekend as well. Then the complexity of having a joint ownership reared it's head. My wife assumed we'd be sleeping in the now plush and private rear Mega-King (see project #3) bedroom. The Brother and his wife also assumed they'd be sleeping in the new (awesome) bedroom. Tensions were getting high, and the 4 week old baby was also having an abnormally loud crying day. Nobody wanted to sleep on the smelly old Gaucho except me.
The end solution was to scrap the camping weekend and instead spend our weekend remodeling the living room. I'm pretty excited, but felt totally unprepared for the action. But for better or worse, we jumped in.
I had a hard time getting used to the idea of scrapping the Gaucho and built in side tables, but I was alone, outvoted 3 to 1.
We started by removing the living room, and quickly realized that the floor didn't go forward far enough. (see project #4)
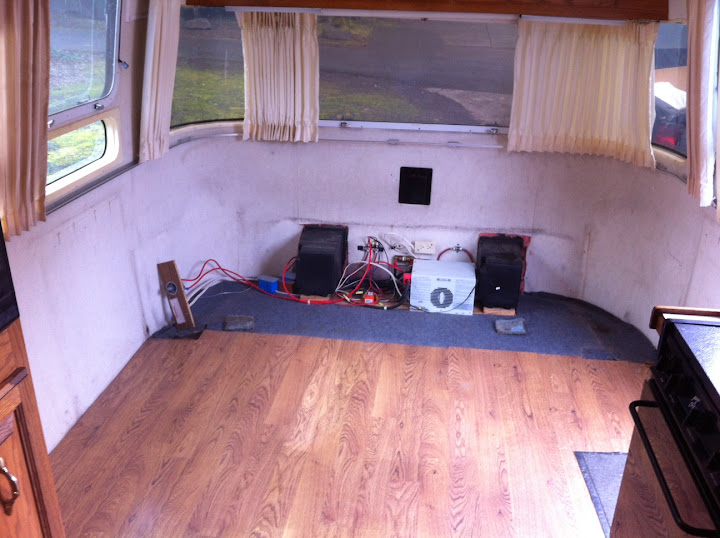
New floor and we're ready to go.
The design is mostly inspired by the work of ddruker here and we're going to pretty much copy his ideas and measurements. I used his pictures and designs as a sales tool to get the rest of the family to agree on a plan of attack. I even got them to agree on placing the flooring across the coach like ddruker did.
Here's a good link to his build:
https://www.airforums.com/forums/f196...tte-95651.html
More to follow. It's going to be awesome! I don't have quite the woodworking skills that ddruker has, but I have some fun ideas and we're going to work off his basic design.
-Kevin
Our maiden voyage was supposed to be this weekend as well. Then the complexity of having a joint ownership reared it's head. My wife assumed we'd be sleeping in the now plush and private rear Mega-King (see project #3) bedroom. The Brother and his wife also assumed they'd be sleeping in the new (awesome) bedroom. Tensions were getting high, and the 4 week old baby was also having an abnormally loud crying day. Nobody wanted to sleep on the smelly old Gaucho except me.
The end solution was to scrap the camping weekend and instead spend our weekend remodeling the living room. I'm pretty excited, but felt totally unprepared for the action. But for better or worse, we jumped in.
I had a hard time getting used to the idea of scrapping the Gaucho and built in side tables, but I was alone, outvoted 3 to 1.
We started by removing the living room, and quickly realized that the floor didn't go forward far enough. (see project #4)
New floor and we're ready to go.
The design is mostly inspired by the work of ddruker here and we're going to pretty much copy his ideas and measurements. I used his pictures and designs as a sales tool to get the rest of the family to agree on a plan of attack. I even got them to agree on placing the flooring across the coach like ddruker did.
Here's a good link to his build:
https://www.airforums.com/forums/f196...tte-95651.html
More to follow. It's going to be awesome! I don't have quite the woodworking skills that ddruker has, but I have some fun ideas and we're going to work off his basic design.
-Kevin
Total Comments 6
Comments
-


Started on the lounge.
Picked up some cabinetry quality hardwood plywood today and some bits for my dad's router that he's never used in 30 years.
I started out by marking out on the floor where I want the J-Lounge to be. Then I ripped the plywood into 14 inch wide pieces and setup the general layout. I think it's going to work.

I measured out some of the accent windows and spent a lot of time figuring out what the dimensions of these bench windows are going to be. The radius of the corners is 5"... and I used a 5" orbital sander pad to draw the corners.
First with the saw and the jig saw.

Then finished it up with the router. I think I'm going to be using this a lot on the trailer remodel!

Notice the inspiration for the shape of the holes?

That's all I got done. Took forever. I'm going to do the one by the door over. It has to match the curve of the body next to the door. Oh well, maybe this weekend.Posted 03-29-2013 at 01:36 AM by outofcontrol 
-

-KevinPosted 03-29-2013 at 01:37 AM by outofcontrol
-
Got some more accomplished this weekend on the "J-Lounge".


I really hope these drawer sliders are strong enough to support 14" of overhanging bed.
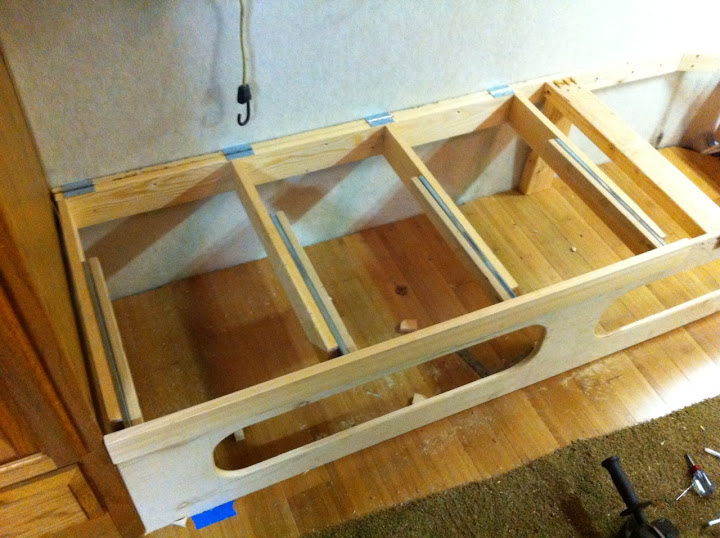

Posted 04-08-2013 at 06:10 PM by outofcontrol
Updated 04-08-2013 at 06:12 PM by outofcontrol (smaller pics) -
The idea is that the whole thing will lift to access the large storage area underneath.

-KevinPosted 04-08-2013 at 06:10 PM by outofcontrol
Updated 04-08-2013 at 06:13 PM by outofcontrol -
On final approach. Pattern set.
Spent 4 hours last night cutting the plywood for the bench top. Then another hour scratching my head with the seat cushions. Took some cushions from our couch in the house to test out the fit. Might have to go with 5" thick foam instead of 6.
It's a real puzzle to figure out how to use the seat backs to fill the hole in the middle when this area does it's "Go-Go-Gadget Bed" transformation. But I think I have it worked out.
Dropped the patterns off at the upholsterer this morning. Probably going to be 3 weeks before we have the finished product. That will give me some time to work on the special secret accent lighting project I have in mind.
-Kevin

Posted 04-10-2013 at 02:19 PM by outofcontrol
-
LED lights teaser
Got my LEDs in the mail last night and tested them out in the Aristream on 12v power. I just laid out the 16ft string and I'm testing out how the music sensor reacts to the music.
I think it all works, and now I need to secure the lights. They're going to go near the ceiling, and under the bench in the cut-out windows.
-Kevin
Airstream LED light magic teaser - YouTubePosted 04-19-2013 at 02:19 PM by outofcontrol

