 |
|
 11-07-2014, 02:52 PM
|
#1
|
Rivet Master 
1973 27' Overlander
Portsmouth
, Virginia
Join Date: Jun 2012
Posts: 776
|
Starting Phase 3, '73 Overlander: The gaucho goes and we finish up the front interior
For us the camping season is over and with that I'm starting what I hope is the final phase of rehab that I plan on doing with this trailer. I'm calling this phase three in that the first phase involved replacing the rotted floor in the bath along with a complete redo as documented here: http://www.airforums.com/forums/f46/73-overlander-bath-remodel-started-a-few-questions-for-the-group-100164.html I also replaced the axles and cleaned up the rear frame and installed new foam board as insulation.
The second phase was started about this time last year and involved tearing out the kitchen sink base cabinet and replacing it along with removing the front belly pan and cleaning up the frame and new insulation there as well. That work is documented here: http://www.airforums.com/forums/f46/...on-115482.html
This last phase should not be as extensive as the first two. The goal is to improve the livability and bring the interior up to a more modern state. I plan to finish up the upper cabinets by removing the tambour doors and replacing them with cherry veneer ply doors and solid cherry trim. All the interior walls and ceiling will be cleaned again and will be painted. Probably the most expensive part will be replacing the gaucho with two recliners. I will also probably remove all the parquet floor all the way back to the bedroom area and put down some type of vinyl floor planking.
Not everything will be for show, the front window wings have had signs of leakage since I got the rig about 2 years ago. So I'm going to bit the bullet and try and pull them apart and reseal them properly. That job will surely take some research and online guidance since I know that there are not too many replacements hanging around and I have to work with what I've got. I'll also buy a good amount of door and window seal and do as much as I can, from what I can tell, most of what is on the trailer is original, and that is 40 years old. And there is a soft spot by the front door that will have to be cut out and patched in from a pesky leak by the side window.
I'm also going to put in more LED lighting, similar to what I did earlier. I want to replace one or two of the vents with fantastic fans and will probably upgrade the original speakers as well.
An old saying I've heard from an old Army colonel was that "No plan survives first contact" and so I'm fully aware that things may change as I get into it. I'm also starting back to a full time job from working part time so I won't have as much free time to do the work. But funds won't be as tight so that will be a help, especially with the new chairs and the fantastic fans. I hope to have it back on the road by April next year so we can get some good use out of her. Wish me luck.
And since I know folks like pictures, here are a few:
Where we are starting from, the front gaucho:


The bedroom area, that 70's dark wood has to go. The plan is to paint the walls and the cabinetry under the beds:


So the gaucho starts to come out:


The tanbour rolls look to be fine, I'll put them on the classifieds free to a good home.

Gaucho gone, you can see the area by the side window on the right were the leak was:

The plastic trim came off the window in one piece, that will be finished in silver like the rest of the interior screen frames. Lot of old gunky sealant in there, my guess is that it has been leaking for years.

The roadside window has lots of evidence of water intrusion:

Enough fun for today:

|

|

|


|
11-07-2014, 07:48 PM
|
#2
|
4 Rivet Member 
1976 25' Tradewind
, Florida
Join Date: Apr 2014
Posts: 353
|
Nice first days work! Best of luck in stage 3 I appreciated your posts and pictures as I am redoing my 76.
My front wing windows leak also around the old seals. I cut the old seals flush and filled with a bead of parbond, seems to be working shofar pretty nicely.
You are light years ahead of me. The thought of speakers or beds just makes me laugh, how about interior skins that would be nice 
I have no doubt you will do great, I look forward to your progress.
Sent from my iPhone using Airstream Forums
76 'Airstream Tradewind
__________________
Matt
|
|
|
|
|
11-08-2014, 04:04 AM
|
#3
|
Rivet Master
1973 27' Overlander
Portsmouth
, Virginia
Join Date: Jun 2012
Posts: 776
|
Quote:
Originally Posted by millertimeUS

Nice first days work! Best of luck in stage 3 I appreciated your posts and pictures as I am redoing my 76.
My front wing windows leak also around the old seals. I cut the old seals flush and filled with a bead of parbond, seems to be working shofar pretty nicely.
You are light years ahead of me. The thought of speakers or beds just makes me laugh, how about interior skins that would be nice
I have no doubt you will do great, I look forward to your progress.
Sent from my iPhone using Airstream Forums
76 'Airstream Tradewind |
Matt
I've kept an eye on your progress as well. You got the much tougher job, honestly I might have cut my losses on that rig if it were me. But at the stage you are at, once you are done you will have a vintage new trailer.
I've got to pull those windows apart. There is residue from where water got inside between the two panes and I dont think just trying to seal them from the outside would be adequate. I also have the small lower oval windows to deal with too, that inner pane is some sort of plastic or plexi and I think most folks just remove it. Neither of those jobs looks to be lots of fun, but compared to crawling underneath, it shouldn't be as bad.
|
|
|
|
|
11-14-2014, 07:11 PM
|
#4
|
2 Rivet Member 
1973 31' Sovereign
Boerne
, Texas
Join Date: May 2014
Posts: 43
|
Reading with anticipation as we are going to start in the back (center bath model) and work our way toward the front. All beds and seating were removed by a previous owner. Have to start from scratch, but your pics have helped me understand the mysterious holes in the "walls".
|
|
|
|
|
01-08-2015, 05:55 AM
|
#5
|
Rivet Master
1973 27' Overlander
Portsmouth
, Virginia
Join Date: Jun 2012
Posts: 776
|
Been working this a few days this last week. Started removing the parquet floor. What an ugly job. Going very slow, working on hand an knees using a cheapie multi tool with a straight (no teeth) blade to get underneath each tile and separate it from the still gunky mastic that holds it to the subfloor. I just about killed myself the first day working on it for about 5 hours straight. Now I'm taking it in smaller doses, maybe an hour or so at a time. Thats about all this old body can hack. I figure it will take me about a week or two to get all the tiles up as I can do maybe 2-3 sq feet an hour. I'll post some pics tonight, not doing any work with the temps down in the 20's.
|
|
|
|
|
01-08-2015, 08:28 AM
|
#6
|
Rivet Master
1973 27' Overlander
Currently Looking...
Jupiter
, Florida
Join Date: Apr 2006
Posts: 2,062
|
My prejudices got up on this one, those multitools are annoyingly LOUD!! Your project appears fine, fine, fine, keep up the good work. On covering over the plasticized dark wood panels, or really anything, I suggest Stix waterborne bonding primer as base coat. This stuff bites & holds on, is nicely self-leveling AND cures quickly down to 35ºF warm.
I don't know if you have any skills at cabinetry, cutting & shaping hardwood, but on the 'still gunky mastic' - one might try using very sharp edge wedges, maybe sliced out of the hardwood you are removing, tapping them gradually in to allow time itself to do the work. Something about 3" long and 5/8-3/4" wide & tall at the blunt face and smoothed to a knife edge at the working end...
With twelve or fifteen or more wedges about the time you have the last one started it might be the right time to tension up the first ones again until the mastic has stretched/thinned and the wood flooring blocks lever up easily. If the wedges faces are too shallow to get hammer strokes connecting use a block of wood as a go-between.
There are some steel pry bars, that combined with a 3lb hand sledge to get a purchase under the flooring, are designed to use the long length to multiply leverage and lift only a small height but with great force...
__________________
The days are short and the night is long and the stars go tumbling by.. . ~Airstream~
|
|
|
|
|
01-08-2015, 12:23 PM
|
#7
|
Rivet Master
1973 27' Overlander
Portsmouth
, Virginia
Join Date: Jun 2012
Posts: 776
|
What I'm removing are 6x6 parquet tiles, and trying to pry one of them up results in pulling up lots of the surface of the subfloor. This happens even with using the vibrating tool to slice through the mastic. The cleanest way to remove seems to be this method though it is really slow and take a toll on the body.
|
|
|
|
|
01-08-2015, 01:14 PM
|
#8
|
Rivet Master
1973 27' Overlander
Currently Looking...
Jupiter
, Florida
Join Date: Apr 2006
Posts: 2,062
|
Circular saw set to parquet thickness less 1/16" and cross cut from the grain of the subfloor to get some advantage on it? Wait for a 102ºF August day when the mastic is softened? Shell-off and swap flooring plywood without bothering the glued on 6x6" tiles? Anyhow you do it it's a good thing to do, I can relate!
Paper napkins rolled up tightly for a snug fit in the ear... then add a few drops of water for the paper to soak up can be as good as diving underwater in a pool; then put the ear muffs on to lower conducted sound around the ear
__________________
The days are short and the night is long and the stars go tumbling by.. . ~Airstream~
|
|
|
|
|
01-08-2015, 01:29 PM
|
#9
|
Rivet Master
1973 27' Overlander
Portsmouth
, Virginia
Join Date: Jun 2012
Posts: 776
|
Actually I did use the c-saw to to cut all the joints as well as trying to slice the tiles mostly in two, it facillitates getting them up with the tool. While they probably would be a bit easier to get up in August (not sure I'd want to be on all 4 in the heat), I wan't to be done with this work come the end of March, knock wood. I'd like to get a full season of camping in this year so I'm trying to minimize what I take on.
Fix the windows, paint the walls, finish up the upper cabinets and replace the flooring will be the focus. I may put in a couple of fantastic fans and more LED lighting, but I have to limit the wish list to get it all done.
|
|
|
|
|
01-08-2015, 04:37 PM
|
#10
|
Rivet Master
1973 27' Overlander
Portsmouth
, Virginia
Join Date: Jun 2012
Posts: 776
|
|
|
|
|
|
01-08-2015, 10:11 PM
|
#11
|
4 Rivet Member
1976 25' Tradewind
, Florida
Join Date: Apr 2014
Posts: 353
|
You are a better man than I. I would have lost my patience, busted them off the floor, and hoped my new flooring would be able to adjust to the irregularities. Some of the engineered floorings come with foam backers.
Hats off to you, keep on trucking brother looking good.
Sent from my iPhone using Airstream Forums
76 'Airstream Tradewind
__________________
Matt
|
|
|
|
|
03-22-2015, 04:31 PM
|
#12
|
Rivet Master
1973 27' Overlander
Portsmouth
, Virginia
Join Date: Jun 2012
Posts: 776
|
Been about two months since I last posted to this thread. Made some progress, probably not as much as I would have liked to, but we all know how a big job can have it's slow times. This past winter was colder and as I get older, I'm less able and willing to tolerate the cold when working, so things just get put off a bit.
It took about a month of working an hour or two at a time to get all the parquet tiles up. I used the HF tool with the flat blade to get under all the tiles, one at a time, sometimes a half or quarter at a time till they all came up. The floor is still somewhat gummy from the old adhesive and has quite a few nice divots that came out with the old glue. So I've bought 4 sheets of 1/8" luan as an underlayment for the new floor which will most likely be a nice sheet vinyl. Final selection is dependent on what my better half likes, but I think the sheet vinyl will be less susceptible to shrinking at the edges like planks would be. I've got to do some more scraping of the goo and have some floor leveling compound to put down, but it's getting there.

While the weather was warm yesterday, I installed a new 7 pin plug on the trailer side. The old one was original and quite brittle. Of course there was some "custom" wiring mods by the PO, so I haven't used any sealant on it yet till I can test it out and make sure it all works.

The big accomplishment this weekend has been the successful removal of the wing windows in one (actually two) pieces. I've gone back and forth on this part of the job and debated on leaving them alone for now, but decided I'd rather have the trailer take a bit longer but have them done once and for all. I also have one stack window that will get the treatment on the street side and one by the door that I'm still not sure about. Interestingly enough, they are two different kinds of windows.
The street side stack uses the big "C" clip to hold the inner plastic pane in place. That clip and lots of gummy putty is all that held it in. Gummy putty is still all that his holding the outside glass in, but I'm holding off on taking that glass out for a little bit.

The curbside stack is the type that would necessitate drilling out all the rivets to take the whole frame out so it would then separate into two halves to remove the glazing. It's not in too bad shape so it will be the last to get touched, if at all.

And finally, here are some pics from pulling out the wing windows. As it turns out, the curb side window was held in with olympic rivets and came out relatively easy. The streetside window had bucked rivets and took quite a bit more persuading to get it out and away from the body. The putty on the inside also appeared much neater, as if it came from the factory like that.
Probably the hardest part of taking out ether window was the locking strip between the wing and center window frames. On both sides it was quite stiff and took quite a bit of hammering with a punch and hammer to push it down and off. Someone had riveted them through the top and on the first side I probably didn't drill out enough of the old rivets and so it dragged all the way down. I made sure on the second window to get them all the way out and used some pb blaster to help lube the bar so it slide easier.
I have a sun visor on the front and elected to leave it on for security, so it isn't obvious that two windows are missing and covered up with foil. Kinda like wearing sun glasses when you have a black eye.
Tapping out the center lock bar:


Drilling out the rivets on the curbside. Olympics are easier to drill in that if you use a pin punch on the top, it pushes down the shaft which gives you a nice start to drill out the center.
Streetside window out:

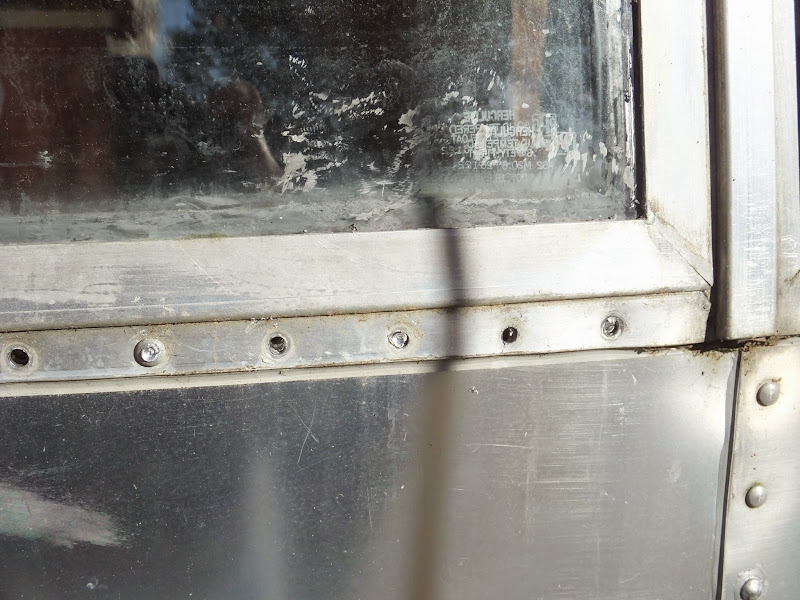
Streetside frame from the inside. Notice how neat the frame looks, nice and straight:

Curbside frame, notice how bent up the lower sheet metal is. The window was riveted to only the outside skin and not through to the frame like the other side. What I will probably do is secure the skin to the frame before I remount the window. I may have to redrill some of the holes since I doubt they will still line up.

Curbside window out:

Holes covered over with foil and foil tape.

Next step will be to open up the wing windows and see what surprises await. One I get some measurements, I'll decide whether to put both panes back in or just one. And I'll order some of the window tape that will position the glass against the frame. Hope this helps anybody else that has to fix these windows down the road.
And we ordered two Lambright recliners in Navy for the front. Should be here in about 4 weeks give or take. Hopefully the floor will be done and the interior painting done besides having the windows reinstalled. Should be a busy month.
|
|
|
|
|
03-26-2015, 12:31 PM
|
#13
|
2 Rivet Member
2016 Interstate Grand Tour Ext
Jacksonville
, Florida
Join Date: Feb 2013
Posts: 75
|
Thanks for your posts WITH pictures! We are going to begin this task with our wing windows soon. Your posts really helped.
__________________
Melaine Taylor
Life Is A Journey - Enjoy the Ride!
|
|
|
|
|
03-26-2015, 01:28 PM
|
#14
|
Rivet Master
1973 27' Overlander
Portsmouth
, Virginia
Join Date: Jun 2012
Posts: 776
|
Quote:
Originally Posted by TMT
Thanks for your posts WITH pictures! We are going to begin this task with our wing windows soon. Your posts really helped.
|
I'm still working on taking the wing windows apart. Made a bit of progress last night but I've got a screw that must have snapped in two and has a remnant holding on for dear life. I wasn't sure how the glass was held in but now I can see that it doesn't look like I had imagined it. Good thing I waited to disassemble one before ordering some butyl tape to put it back together. I'll try and post some more pics tonight if I'm able to get the thing apart. It may be harder to disassemble the windows than it was to get them out.
|
|
|
|
|
03-26-2015, 03:13 PM
|
#15
|
4 Rivet Member
1976 25' Caravanner
Salt Lake City
, Utah
Join Date: Oct 2013
Posts: 398
|
Well, thanks much for your journal and pictures. They are really helpful. I'll be doing this on my '76 in about a month!
|
|
|
|
|
03-26-2015, 05:18 PM
|
#16
|
Rivet Master
1966 17' Caravel
Newport
, North Carolina
Join Date: Jan 2013
Posts: 1,291
|
Looks like you are getting it done unlike some of us!!!! I have been busy but that is about to change I have to get something done! Keep updating it keeps me moving.
Cliff
__________________
Gotta get busy! Have a great day! Now where did I put those revits? 
|
|
|
|
|
03-26-2015, 06:10 PM
|
#17
|
Rivet Master
1973 27' Overlander
Portsmouth
, Virginia
Join Date: Jun 2012
Posts: 776
|
Not going to get to this tonight and not this weekend so I thought I post some pix of one of the windows. This is the one I have gotten the farthest on. I removed most of the screws that hold the mount flange to the inside frame. One is stripped out on the head and one snapped off inside. Probably using steel screws on aluminum so bimetallic corrosion is holding them in. I can honestly say I didnt expect to see the inner tenons or slots that hold in the glass in separate sections. No wonder it leaks, I would have thought they would bind the two panes of glass together as a sealed unit. Oh well.
The whole window:

The two buggered up screws:

See how the inner pane sits in its own "slot"

A good view of how the outer flange is also the inner frame and secures to the main frame:


I had thought about trying to reinstall both panes, but seeing how the frame is designed, I'll probably just mount the outer pane since it would be easier to seal it up. I think this window has been removed and opened up at least once before. The other window had the buck rivets holding it in and took a lot more to get it out. The screw heads have some sort of sealant over them and I have to figure out how to soften it up and clear the phillips slots before I try and get them out. Lots of fun ahead.
|
|
|
|
|
04-12-2015, 06:26 PM
|
#18
|
Rivet Master
1973 27' Overlander
Portsmouth
, Virginia
Join Date: Jun 2012
Posts: 776
|
The wing windows are back in.
The wings are back in. Yesterday I reassembled the frames and set the outer frame/glass back in using trempro to seal them with stainless screws holding the outer frame to the outer glass. It could have gone smoother, but like anything you try for the first time, you make mistakes and hopefully learn from them.
Here is the outer frame (sits on the outer skin), reassembled after cleaning.

Some things to point out. When you pull out 40 year old windows and pry them apart, they tend to get a little beat up, especially if several of the screws that hold it together strip and it takes some persuasion to get them apart. To my credit, I didn't break any of the glass and now have two spare panes in case either side gets damaged.
I also tried to upgrade the old steel screws that held the outer frame together to some stainless versions. Problem is that the original screw is specially tapered and it has to fit into a slot that is open on one side. I even went so far as to grind the threads off the end of the screw but it still would not feed in correctly. In the end I had to re-use the original screws, thankfully they did not get buggered up. On one frame, I had to move the screw from corner/side to the adjacent one since the stainless screw had opened up the slot too much. I got it to hold together, nuff said.

This is the frame with the outer glass. I chose not to disassemble it but scraped the edge and laid down a new bead of Parbond. Let me go on record by saying I HATE Parbond. It is never easy to work with, and it never looks really neat like other sealants.

The cleaned up frame with a bead of trempro sealant waiting for the glass frame to sit in it.

I used new stainless pan head screws to hold the two frames together. In the spots that the old screws had broken or stripped, I drilled new holes. I also ground down the tips of all the screws so they couldnt poke through, not being sure if the original assembly was thicker with the old sealant. I didn't take any pictures of the completed windows, it was late and I was tired. I got back to it this morning and spent a good amount of time cleaning up the outer skin to accept a new layer of trempro.
The first window took the longest amount of time to mount. No pictures of the empty holes, my hands were dirty and the camera was inside. I ran a bead of trempro on the outside and set the windows back in. It took some finagling to get it to line up properly and I went from one side to another with the olympic rivets to get the frame to snug up to the skin nicely. There was lots of squeeze out of the sealant, but that all cleaned up. Finally I tapped down the new joiner bar and the window was in. The second window went quicker, it had never been out before and the holes weren't as raggedy, but for some reason the new joiner bar took quite a bit more persuasion to go all the way down.


Olympic rivets needing to be shaved. Will do those in a day or so when the sealant dries.


|
|
|
|
|
04-12-2015, 06:47 PM
|
#19
|
Rivet Master
1973 27' Overlander
Portsmouth
, Virginia
Join Date: Jun 2012
Posts: 776
|
I also got the one stack window out and back in. It had been held in with that lovely butyl caulk. I got the glass out and spent about an hour cleaning up the frame and the glass. I would have liked to use some of the new shimmed sealing tapes but since this was the only window and I wanted to make progress I decided to reuse some rubber spacers that were already there and then lay the glass in a bed of trempro and use that to seal the glass to the frame.

Bedded in:

Window installed, waiting for the sealant to set up.

|
|
|
|
|
05-10-2015, 05:24 PM
|
#20
|
Rivet Master
1973 27' Overlander
Portsmouth
, Virginia
Join Date: Jun 2012
Posts: 776
|
Progress note update
With the warm weather I've been hitting it pretty hard, trying to get this trailer back on the road by June. Front section ceiling and walls were painted the off white and I've gotten the 1/8th inch plywood down as the underlayment for the loose lay vinyl plank flooring that is sitting in the garage waiting its turn. The wing windows are done and I've painted the trim to match everything else, a finish that looks like a metal flake aluminum.


I also picked up some new LED rv fixtures that go underneath the end cap. These came in the typical off white plastic, so in a fit of inspiration I decided to give them the silver finish along with the trim rings for the eyeball lights as well.
Before paint:

Sprayed, then clear coated.

Done.

Trim rings:

Fresh paint and the screens back in the front. Still painting the trim for the stack window, but that has been resealed.

Got the first of the homade vent fans put up in the front. I'm hoping to redo the lighting fixture but for now will reuse the old ones for now to get it back on the road. More details here: http://www.airforums.com/forums/f455...an-134139.html

The little control module from Amazon that give it variable speed and forward/reverse.

The front is coming together:

But I'm not crazy about this. I'll probably do something with the silver finish for the back but its still going to have that yellow looking front:

I've also been cleaning up the rear bedroom area. I had to reinforce the upper cabinet over the streetside bunk. I was amazed how loose it was and had to use several strategic screws to tighten up up. The ceiling and walls were cleaned and the bunk lamps and all the window stuff taken down in prep for the paint. The side wall will be done in the white and the dark wood will be painted a solid color along with the wood front of the bunks. I've also got some nickel finish hardware to replace all the discolored brass stuff already there.

I will be reusing the bunk lamps/shelves as well. If only I was so enamored of copper, but I think they will finish up nicely with the silver flake as well.

And the stars of the show came in this week, the two lambright recliners. They are a navy blue, but the picture makes them look a little brighter.

|
|
|
|
|
|
|
Currently Active Users Viewing This Thread: 1 (0 members and 1 guests)
|
|
|
 Posting Rules
|
You may not post new threads
You may not post replies
You may not post attachments
You may not edit your posts
HTML code is Off
|
|
|
|

 Recent Discussions
 |
|
|
|
|
|
|
|
|
|
|
|
|
|
|
|
|
|
|
|
|
|


 Linear Mode

