Journey with Confidence RV GPS App RV Trip Planner RV LIFE Campground Reviews RV Maintenance Take a Speed Test Free 7 Day Trial ×


Reply
 
Thread Tools Search this Thread Display Modes
 
Old 03-23-2010, 10:33 AM   #1
4 Rivet Member
 
eheffa's Avatar
 
2008 25' Safari FB SE
Victoria , BC
Join Date: Jun 2008
Posts: 340
Solar Panel Installation Report

Hi all.

After a few dry camping weekends & discovering that a few days of camping in the Spring and the Fall can seriously deplete the batteries. ( esp if there is any need for the furnace...) we decided to install a Solar charging system.

I have finally finished my Solar Panel Installation & thought I would post a few pictures & observations of what I encountered.

First of all a few facts about the install:

Airstream 25 SE FB 2008 model year.

After making inquiries & lots of web research I chose to use a Solar System from AM Solar (SunRunner 100-22 system with 3 panels total &
CB Roof-top Combiner Box see: Welcome to AM Solar - Your RV Solar Specialists since 1987

I ordered the kit with 2 panels & then decided to go for a third prior to my install. All kit items were shipped to me in Canada (Victoria, BC) by UPS. NO issues with shipping etc.

My first question was where to mount the panels.

The natural place seemed obvious. Just aft of the front Fantastic Fan looked like a natural fit but there are vents from the bathroom & shower as well as plumbing there that could be a problem.


It turns out that that the Solar Panels with their rocker feet would allow the panels to be placed over top of these vents & still allow them to function without impediment.


So ultimately I hoped they could look something like this:


The next & more problematic issue was where to run the cables through to the interior and where to place the Controller panel.

See Part II...for Wiring

(For all pictures see: Zenfolio | evan effa | Solar/Battery project )
eheffa is offline   Reply With Quote
Old 03-23-2010, 10:42 AM   #2
Rivet Master
 
mello mike's Avatar
 
1958 26' Overlander
Mesa , Arizona
Join Date: Jul 2004
Posts: 1,742
Images: 53
That looks like a good placement. Of course, you'll need to remove the panels to get to the vents when it comes time for maintenance.

As for where to run the wires, I would use either the refridgerator vent or one of the tank vents.
__________________
1958 Overlander
2011 Wolf Creek 850N TC
2011 Ford F-250 Crewcab (6.2L), 3.73RE

WBCCI #5661/AIR #5661/TAC # AZ-6
4CU 1st VP

My '58 Overlander Restoration and Travel Blog:
https://mellomikesairstreams.blogspot.com/
mello mike is offline   Reply With Quote
Old 03-23-2010, 10:56 AM   #3
4 Rivet Member
 
eheffa's Avatar
 
2008 25' Safari FB SE
Victoria , BC
Join Date: Jun 2008
Posts: 340
Solar Panel Installation Part II

The next question was where to run the wiring from the panels to the the Controller...

The factory solar wires (10 AWG) are run to the reefer compartment but AM Solar & others have recommended against using those as they feel that 8 AWG is the minimum calibre one should use to run this high current feed to the batteries. (This sounds good in theory but the connectors at the controller & again at the battery bus terminal are really quite a light gauge by comparison and may represent of the current limiting step.)

I accepted this advice & planned for using a new run of 8 AWG cable inside (supplied in the kit) & the supplied round 10 AWG roof top cable.

In the 25 FB SE, the curbside or starboard side of the interior has a lot more cabinetry & fishing wires fore & aft is much easier than coming from the reefer side of the unit (Street side).

I wanted to be able to view the controller from my dinette perch so chose the high cupboard over the pantry as the mount location. This allowed shorter overall runs & easy access to the roof but with this plan I had to reconcile myself to drilling through the roof. This was not my first choice but I was reassured by Roger at AM Solar that the Combiner box and the Dicor sealant and the extra coverage of the solar panel over top would be pretty weatherproof.

So.

First step:

Find the battery bus bars...
Here they are under the front bed platform:


The panel prior to removal. Red arrow shows planned route of solar wire.


A little more panel removal gives you this rat's nest:


The Temperature sensor wire has to get out and forward to the Battery compartment. Here is where the wire can be fished through the floor.


To come out below here:


These batteries will be replaced with 6 V Golf Cart Batteries but that's for later.

The cable sensor will be taped to the side of one of the batteries to monitor battery temperature.

See Part III - Forward fishing...

.
eheffa is offline   Reply With Quote
Old 03-23-2010, 11:03 AM   #4
Islay - 63 O.
 
dufferin's Avatar
 
1963 26' Overlander
Montreal , -
Join Date: May 2005
Posts: 581
Images: 11
Send a message via MSN to dufferin
The fridge vent is the way to go.
__________________
Canadian Atlantic Unit Past President
Protect your dream from others and first yourself...

Few rolling wheels to make our planet a house.

A 1/5th of her that I own.

TAC# : QC-1

my blog

https://rvcampreview.com
dufferin is offline   Reply With Quote
Old 03-23-2010, 11:25 AM   #5
4 Rivet Member
 
eheffa's Avatar
 
2008 25' Safari FB SE
Victoria , BC
Join Date: Jun 2008
Posts: 340
Forward Fishing

So with the Battery bus exposed one can run the 8 AWG wire forward along the curbside walls quite easily. (I forgot to take pictures of the actual wire installed along the storage compartment floor).

This was any easy fish with no drilling necessary. All exposed cable in the storage compartment was protected & loomed. It was very easy to run it under the sill of the door .


After the wire is pulled behind the bathroom sink cabinet it is easily pulled out under the sink


The 8 AWG wire fished out to the target compartment. Note marked out position for controller panel.


See: Part IV: Through the Roof:
eheffa is offline   Reply With Quote
Old 03-23-2010, 12:00 PM   #6
More than one rivet loose
 
thecatsandi's Avatar

 
Currently Looking...
Los Alamos , New Mexico
Join Date: Feb 2006
Posts: 3,756
Quote:
Originally Posted by eheffa View Post
The next question was where to run the wiring from the panels to the the Controller...

The factory solar wires (10 AWG) are run to the reefer compartment but AM Solar & others have recommended against using those as they feel that 8 AWG is the minimum calibre one should use to run this high current feed to the batteries. (This sounds good in theory but the connectors at the controller & again at the battery bus terminal are really quite a light gauge by comparison and may represent of the current limiting step.)

I accepted this advice & planned for using a new run of 8 AWG cable inside (supplied in the kit) & the supplied round 10 AWG roof top cable.

.
10AWG is plenty for any amount of current you could produce with three panels. 10GA is good for 50A at 12/14V, 8GA is good for 70-75A.
The panels at most are going to produce is 25A.
What is the rating on the controller?
__________________
Michelle TAC MT-0
Sarah, Snowball

Looking for a 1962 Flying Cloud

thecatsandi is offline   Reply With Quote
Old 03-23-2010, 12:37 PM   #7
banjobill
 
wmarsha's Avatar
 
2000 30' Limited
battle ground, , Washington
Join Date: Jun 2009
Posts: 516
voltage drop is a consideration

I vote for the larger cable. And one more hole in the roof, as long as you know where it is and how to seal it isn't a problem. Way to go! looks terrific. current isn't the problem, the "spindly" connector points although seemingly small, do not create much voltage drop.
wmarsha is offline   Reply With Quote
Old 03-23-2010, 01:09 PM   #8
4 Rivet Member
 
eheffa's Avatar
 
2008 25' Safari FB SE
Victoria , BC
Join Date: Jun 2008
Posts: 340
Part IV: Through the roof

So before going through the roof. The controller box receptacle was installed. The controller has no backing to it but I was concerned that objects & what-not in the cupboard could damage the electronics. A three gang plastic box with a bit of Dremel work would do just fine...


Another view of the profile


Then onto the irreversible deed...
Drilling through the roof.

That part was easy but I was most dismayed to feel that the insulation was quite damp! I initially thought that this might be due to condensation (this was January after all) but after looking more closely & after some discussion on this forum I concluded that it must be a leak and that the Plumbing vent was probably leaking.


This warrants a whole other discussion but on a less than 2 year old trailer, I don't think the plumbing vents should be failing. After completing the solar wiring, I replaced these vents with a different version & found that indeed the gaskets were the wrong shape & were leaking on both plumbing stacks. Once the caulking started to fail, there was nothing to stop water penetration.

The plan was to have the D-box mounted on the roof with a solar panel sitting over over top. AM Solar provides special 3M Tape that seems pretty skookum but a few screws & Dicor seemed in order.


Note the extra Dicor on the vent - temporary fix. Extra Dicor in the Dbox etc.


Final position: ready for the panels:


Back to the interior to install the Controller box:


With all wiring in place Voltage registers.


Big sigh. On to the solar panels another weekend...

See Part V - Solar Panel mounting
eheffa is offline   Reply With Quote
Old 03-23-2010, 01:10 PM   #9
4 Rivet Member
 
eheffa's Avatar
 
2008 25' Safari FB SE
Victoria , BC
Join Date: Jun 2008
Posts: 340
Thanks for the comments so far folks...

I'll respond properly once I get this all posted...

-evan
eheffa is offline   Reply With Quote
Old 03-23-2010, 01:48 PM   #10
Islay - 63 O.
 
dufferin's Avatar
 
1963 26' Overlander
Montreal , -
Join Date: May 2005
Posts: 581
Images: 11
Send a message via MSN to dufferin
Remove the vent cap... you may find a square gasket (the one used for 70'S square alum square vents) ... I bet you a beer on that...
__________________
Canadian Atlantic Unit Past President
Protect your dream from others and first yourself...

Few rolling wheels to make our planet a house.

A 1/5th of her that I own.

TAC# : QC-1

my blog

https://rvcampreview.com
dufferin is offline   Reply With Quote
Old 03-23-2010, 02:18 PM   #11
4 Rivet Member
 
eheffa's Avatar
 
2008 25' Safari FB SE
Victoria , BC
Join Date: Jun 2008
Posts: 340
Solar Panel Mounting - Part V

Relatively speaking, the Solar Panel mounting was really quite easy.

Although the 3M tape is said to be adequate to hold these Rocker feet in place, I didn't think this would be adequate so elected to also use #12 Stainless Steel screws & cover each Rocker mount base with self leveling Dicor.

The biggest hurdle was replacing the old Plumbing vents with new ones with a weather proof gasket etc. I decided to go with metal covers instead of the plastic as it was apparent that the UV was already making the old covers pretty brittle. removing the old caulk was a worry, but using the Simoniz white wall cleaner with Bleche white softened up the old caulk pretty nicely.

So here was the layout from the port (street) side:


The port side & center panels were pretty easily placed with the Shower vent cover under the port panel. Good ventilation & operation was still possible without any contact between the panel & the vent cover when open.


Only the Starboard panel remains to be put onto the roof. (All wiring connections to the panels was done at ground level.)


Another angle:


The forward vent will sit between the starboard & center panel: (More caulk to be still applied to the base of the vent cover


The rear plumbing vent cover will fit under the Solar Panel along with the Combiner box and the Bathroom vent


View with Starboard Panel in place:


AM Solar sells these optional Tilt bars to optimize the angle of the panel to the sun, but they were very useful to allow working on the wiring and installation of the rocker feet. (Screwing, caulk etc.)


Next: Caulking the feet Part VI
eheffa is offline   Reply With Quote
Old 03-23-2010, 02:24 PM   #12
4 Rivet Member
 
eheffa's Avatar
 
2008 25' Safari FB SE
Victoria , BC
Join Date: Jun 2008
Posts: 340
Part VI: Caulking feet

The feet were applied to the roof with the 3M tape which stuck quite tenaciously. After all feet placed, they were screwed using Dicor dipped #12 SS Robertson Pan head Screws (Robertson heads are a Canadian thing - once you try them you'll never willingly go back to Philips head screws...)


Note that with the Rocker feet bases oriented to point inside, they will be more sheltered from the elements.


Next Part VII - Wiring Panels
eheffa is offline   Reply With Quote
Old 03-23-2010, 02:50 PM   #13
4 Rivet Member
 
eheffa's Avatar
 
2008 25' Safari FB SE
Victoria , BC
Join Date: Jun 2008
Posts: 340
Part VII - Wiring panels and Final profiles

AM Solar supplies good connectors & fitting to give a good mechanical seal around the round UV resistant 10 AWG cable for the panel to D-box runs.

It took me a little bit of thought to plan where to run the wires to reduce contact with the roof itself and keep them as covered from the elements as possible & still allow enough 'slack' to permit raising of the panels for servicing or maximal tilt.


The final layout looks like this:


I was concerned about the aerodynamic & appearance aspects of the panels from the ground..

Here is what you see from the Street Side:
(I would have preferred to have less showing from this side but there really wasn't enough space on the roof to move the panels more towards the curb-side without issues around vents & proximity to the awning mount etc.


From straight on, there might be some increased wind drag but I don't think it is going to be that significant.


The panels are not visible at all from the Curb side at street level.


The overall profile is fairly close to the roof. The center panel can be mounted very closely but the two side panels are necessarily up a bit higher to clear the vents.


Next & final installment: Part VIII - Golf Cart Battery Modification....
eheffa is offline   Reply With Quote
Old 03-23-2010, 03:16 PM   #14
Wise Elder
 
Jammer's Avatar
 
2010 30' Classic
Vintage Kin Owner
South of the river , Minnesota
Join Date: Dec 2009
Posts: 4,169
Excellent work, and a great photo essay!

A couple of questions:
1) What is the rated wattage of the combined panels?
2) Any concerns about condensation or frost accumulating on the panels from the vents?
3) Have you thought about some sort of spoiler for the forward edge of the panels to minimize drag?
Jammer is offline   Reply With Quote
Old 03-23-2010, 03:24 PM   #15
4 Rivet Member
 
eheffa's Avatar
 
2008 25' Safari FB SE
Victoria , BC
Join Date: Jun 2008
Posts: 340
Part VIII - Golf Cart Modification

Around here, one can have pretty grey days & not a lot of sun. It makes sense to make sure that one has a big enough storage for all that 'free' solar when you can get it. I wasn't too impressed with the performance of the stock 12V deep cycle batteries. My on-line research seemed to show that 6V GC batteries were inclined to perform better in this application. I considered AGM batteries but I wasn't sure that the extra cost was justified. (A debatable point perhaps.)

A local marina had very good prices on 230 Ah Interstate Golf Cart batteries at $130 each. I bought two of them knowing that the stock battery box was too small to accommodate these...these sit about 1 3/4" taller than the stock batteries (piece of cake I thought, I'll just raise the sides of the box 2" & I'll be fine...)

I bought the batteries & then started looking for aluminum stock to raise the box. Home depot didn't have any C-channel & to use Square 1 Inch tubing was going to cost me almost $80+ just for the aluminum & bolts etc.

I was kicking myself a bit when I was prowling around looking for alternatives. I came upon some powder coated aluminum fence posts (for decking) & realized that this 4 inch square material could be ripped in half to make C-Channel & would be a lot cheaper. (~ $27-)

So here is what worked for me:

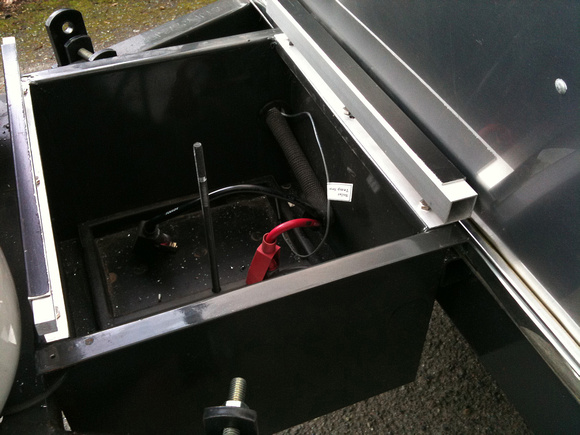
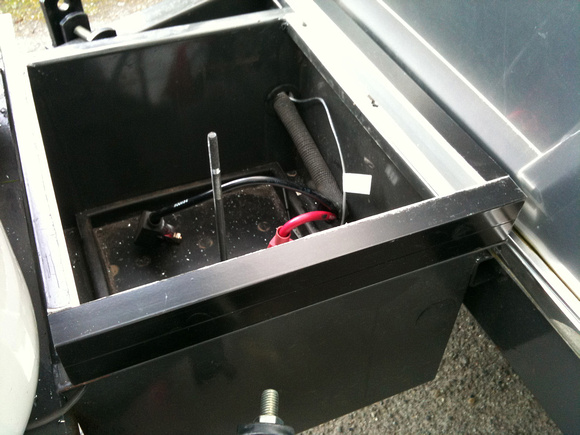
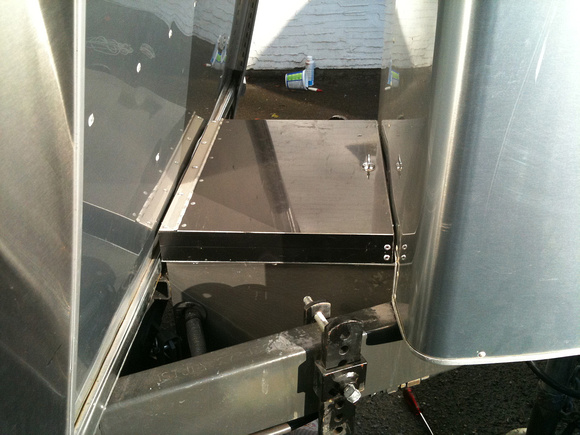
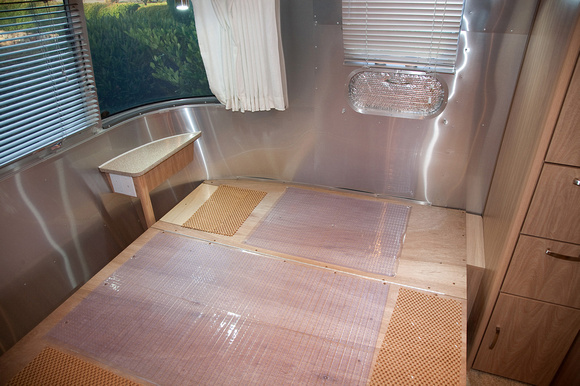
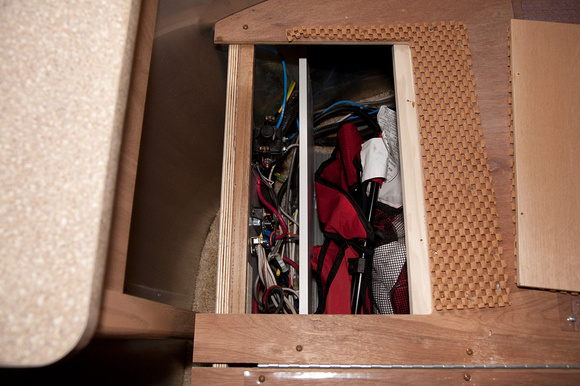
The stock Battery Compartment. (One of my sons already claimed one battery for his Delica van.)


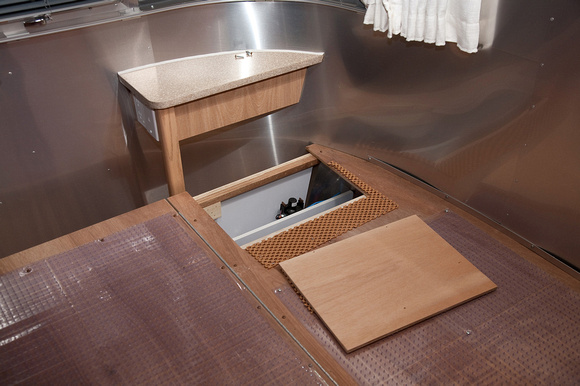
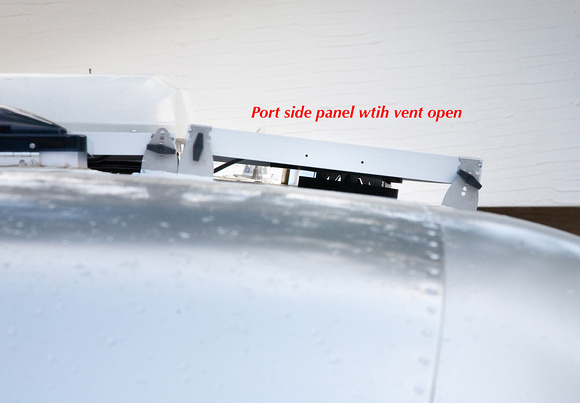
I decided to re-orient the lid to open the opposite way but I'm not sure this was a good idea in the end. There is enough space to still have the hinge forward and still clear the front wall of the unit.

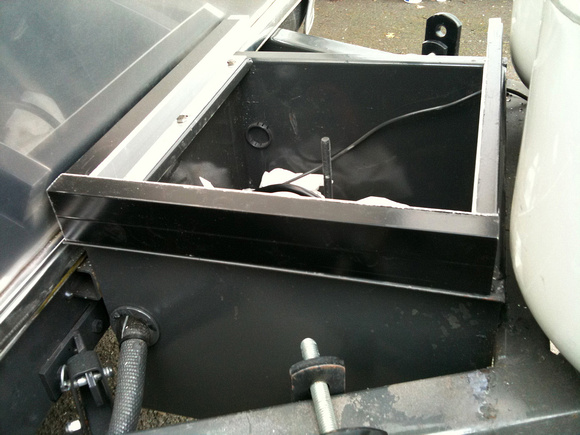
Here some homemade C-channel & 1 inch square tuning setup as base for hinge and lock edge.


Side pieces go on:


From the other side:


From Curb side (Keyed Lock not yet installed)


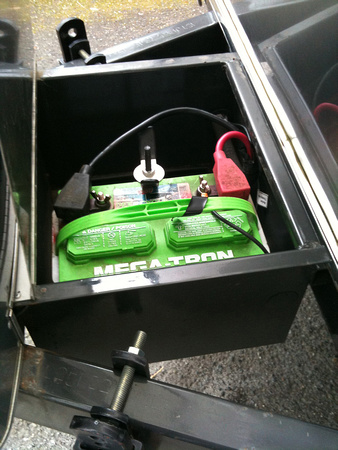
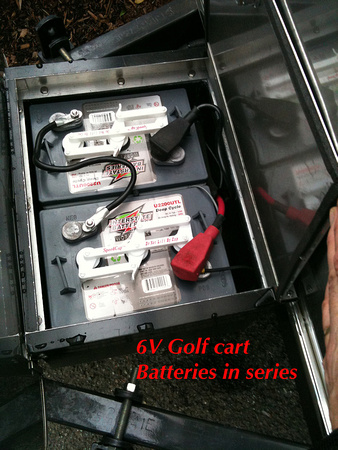
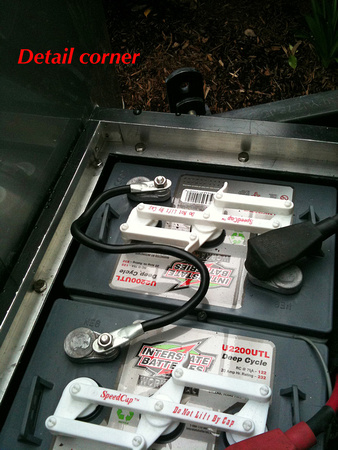
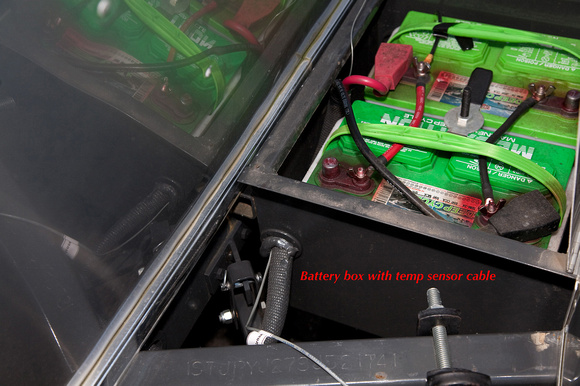
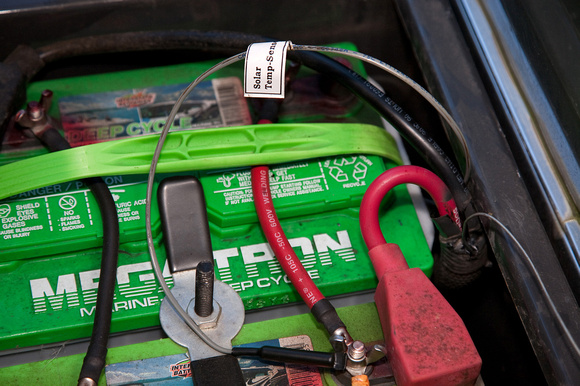
The batteries in place: ( I have since used a collar nut ground down to accommodate a washer & attach to the buried threaded rod - to hold the batteries down.) It's a snug fit & may not be necessary, but better safe than sorry.


Another view:


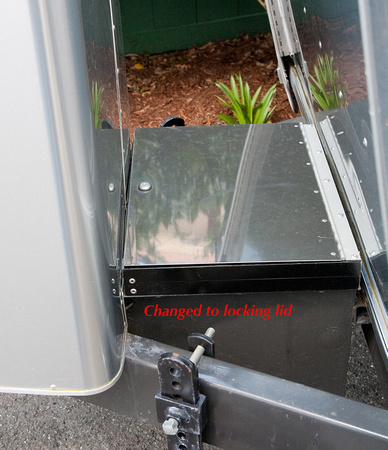
A key lock completes the install:


So after all this...does it work?

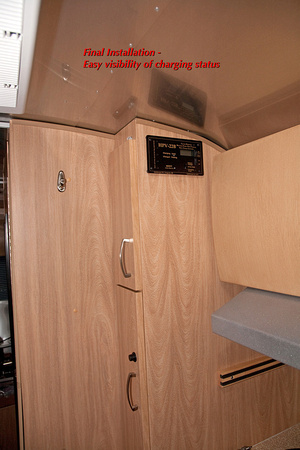
I go out to the trailer in the morning & see this:


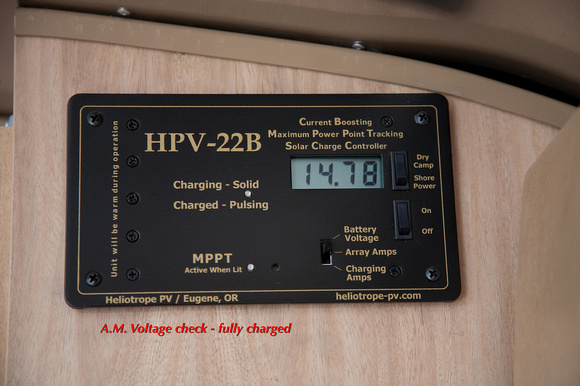
Full charge even after sitting all night.

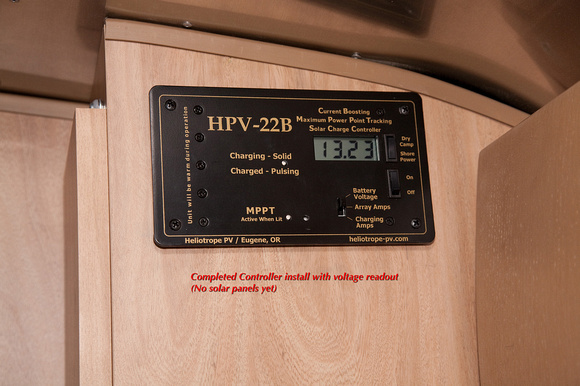
With cloudy overcast skies, I am seeing this:

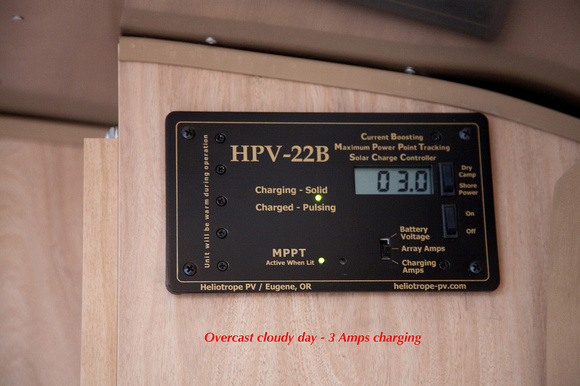
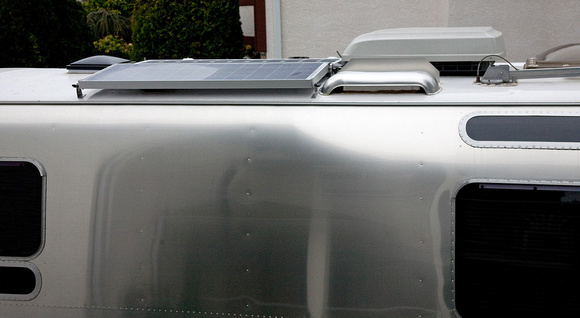
I have yet to see what the whole system can crank out under demand but have seen as much as 8 amps with partial sun coverage on the roof.

We are planning a 4 week trip in the near future & should have a good idea of what it's capable of at the end of this, but I am overall pleased with the final results.


If you've read this far, thanks for your interest. Your tenacity is commendable


Any comments or questions cheerfully entertained.


-evan
eheffa is offline   Reply With Quote
Old 03-23-2010, 03:27 PM   #16
4 Rivet Member
 
eheffa's Avatar
 
2008 25' Safari FB SE
Victoria , BC
Join Date: Jun 2008
Posts: 340
Quote:
Originally Posted by mello mike View Post
That looks like a good placement. Of course, you'll need to remove the panels to get to the vents when it comes time for maintenance.

As for where to run the wires, I would use either the refridgerator vent or one of the tank vents.
Thanks Mike,

I bought the Tilt bars, which allows one to prop up one edge of any of the panels to service the underside, wiring , cleaning etc. Even if you had no intention of using these camping, they are worth having just for maintenance.

As far as running the wire goes, the rest is self explanatory. I wanted to stay curbside with the wiring. The stock 10 AWG prewire stuff was probably adequate but I wanted the ability to add more panels if needed... the curb side definitely has advantages for fishing wires etc.

-evan


-evan
eheffa is offline   Reply With Quote
Old 03-23-2010, 03:35 PM   #17
4 Rivet Member
 
eheffa's Avatar
 
2008 25' Safari FB SE
Victoria , BC
Join Date: Jun 2008
Posts: 340
Quote:
Originally Posted by dufferin View Post
The fridge vent is the way to go.

I would have agreed with you at first thought, but AM Solar & others were pretty adamant that 10 AWG wasn't enough for 3-4 panels (100+ watts each potentially = ~ 33 - 35 amps of current at 12 V nominally)

I suspect that it would be fine but elected to run 8 AWG wire to the battery bus. To do this on the Street side via the Reefer vent represented a lot more fishing or going down through the floor & back up again. I had no appetite for that. I'm afraid.

Fortuitously, drilling through the roof allowed me to discover the sorry state of those $#@&*% plumbing vents and the leak. I'm sure my small hole in the roof is a lot better protected than those vents were by the factory.

-evan
eheffa is offline   Reply With Quote
Old 03-23-2010, 03:39 PM   #18
Islay - 63 O.
 
dufferin's Avatar
 
1963 26' Overlander
Montreal , -
Join Date: May 2005
Posts: 581
Images: 11
Send a message via MSN to dufferin
you're right... at least it helped you to spot a leak... and what about the gasket under that vent?
__________________
Canadian Atlantic Unit Past President
Protect your dream from others and first yourself...

Few rolling wheels to make our planet a house.

A 1/5th of her that I own.

TAC# : QC-1

my blog

https://rvcampreview.com
dufferin is offline   Reply With Quote
Old 03-23-2010, 03:39 PM   #19
4 Rivet Member
 
eheffa's Avatar
 
2008 25' Safari FB SE
Victoria , BC
Join Date: Jun 2008
Posts: 340
Quote:
Originally Posted by thecatsandi View Post
10AWG is plenty for any amount of current you could produce with three panels. 10GA is good for 50A at 12/14V, 8GA is good for 70-75A.
The panels at most are going to produce is 25A.
What is the rating on the controller?

You're probably right. In retrospect, I could have probably got away with using the factory pre-wire with the 3 panels (~35 amps max?) . I didn't want to compromise on all this though & went with the higher spec. Would I do it again?

I'm not sure but I suspect that knowing what I know now, I might install the panels using the stock pre-wire & if I were seeing currents in the 30 + range add the 8 AWG wire as a revision.

-evan
eheffa is offline   Reply With Quote
Old 03-23-2010, 03:43 PM   #20
4 Rivet Member
 
eheffa's Avatar
 
2008 25' Safari FB SE
Victoria , BC
Join Date: Jun 2008
Posts: 340
Quote:
Originally Posted by wmarsha View Post
I vote for the larger cable. And one more hole in the roof, as long as you know where it is and how to seal it isn't a problem. Way to go! looks terrific. current isn't the problem, the "spindly" connector points although seemingly small, do not create much voltage drop.

Thanks. AM Solar said the same thing, but the little fused connector to the battery bus seems a little underspec to my eye...


Roger at AM Solar was always happy to answer my many questions & didn't seem to mind my bugging him.


-evan
eheffa is offline   Reply With Quote
Reply


Currently Active Users Viewing This Thread: 1 (0 members and 1 guests)
 

Posting Rules
You may not post new threads
You may not post replies
You may not post attachments
You may not edit your posts

BB code is On
Smilies are On
[IMG] code is On
HTML code is Off
Trackbacks are Off
Pingbacks are Off
Refbacks are Off


Similar Threads
Thread Thread Starter Forum Replies Last Post
Solar Panel Installation 69Overlander Generators & Solar Power 28 03-03-2013 08:18 PM
AM Solar installation on a Safari hshovic Generators & Solar Power 12 04-09-2011 10:27 PM
Solar panel installation jglase Generators & Solar Power 9 11-30-2006 09:47 PM
Help on solar panel installation Les Gilliam Generators & Solar Power 3 11-27-2002 08:28 PM
Solar Installation cactushead 2000 - 2004 Safari 19 10-21-2002 05:56 PM


Featured Campgrounds

Reviews provided by

Disclaimer:

This website is not affiliated with or endorsed by the Airstream, Inc. or any of its affiliates. Airstream is a registered trademark of Airstream Inc. All rights reserved. Airstream trademark used under license to Social Knowledge LLC.


All times are GMT -6. The time now is 08:18 PM.


Powered by vBulletin® Version 3.8.8 Beta 1
Copyright ©2000 - 2024, Jelsoft Enterprises Ltd.