 |
|
 04-17-2019, 07:50 AM
|
#1
|
2 Rivet Member 
1972 23' Safari
Clarkton
, North Carolina
Join Date: Feb 2019
Posts: 57
|
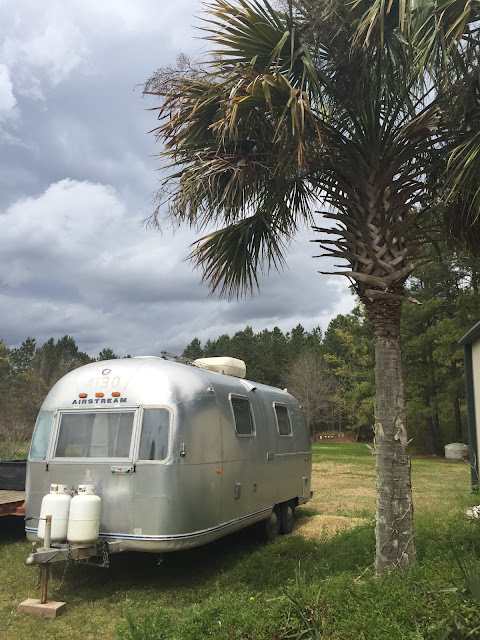
Bertha Restoration - 1972 Twin Axle Safari
Bertha is a trailer with a lot of potential . . . she also needs a lot of work.
So far we've removed the carpet and front gaucho to better access the subfloor.

Subfloor has significant issues in spots and the belly pan is full of wet insulation and yard trash, so this weekend we removed a large section of belly pan to start cleaning her up.

The very rear of the trailer frame has significant rot and will need repair (more on that later). We also plan to replace the entire subfloor. New axles are on order, as well as a carport to store Bertha under. We hope to remove some more belly pan this weekend, and I'll update this thread as time allows. I also have a blog with a few more pictures and color commentary - https://adventuresinaluminum.blogspot.com/ Any recommendations as we go along are welcome.Thanks!
Lydia
Old Yesterday, 08:10 PM
|

|

|


|
04-18-2019, 07:08 AM
|
#2
|
Rivet Master 
1972 25' Tradewind
1976 31' Excella 500
1974 31' Excella 500
1975 24' Argosy 24
Denver
, Colorado
Join Date: Jul 2015
Posts: 1,106
|
Build thee a gantry.  You will need it when you separate the frame and shell.
__________________
25' 1972 Airstream Trade Wind Land Yacht (heavily customized)
2006 Jeep Liberty CRD (diesel)
BeahmStream.com
|
|
|
|
|
04-18-2019, 09:24 AM
|
#3
|
2 Rivet Member
1972 23' Safari
Clarkton
, North Carolina
Join Date: Feb 2019
Posts: 57
|
Quote:
Originally Posted by kidjedi

Build thee a gantry. You will need it when you separate the frame and shell. |
Oh yes, gantry method for sure, but I think we have a cheat. We have two 40 foot HC shipping containers sitting 12 feet apart. It's where we park our tractor and we always meant to put a roof over it, but it's open space at the moment. A simple structure made of lifted 4x4s laid across the tops of the containers should work well for removing the shell . . . or at least that's the plan 
Thanks!
|
|
|
|
|
04-18-2019, 09:54 AM
|
#4
|
Rivet Master
1972 25' Tradewind
1976 31' Excella 500
1974 31' Excella 500
1975 24' Argosy 24
Denver
, Colorado
Join Date: Jul 2015
Posts: 1,106
|
Quote:
Originally Posted by Wildwoman69
We have two 40 foot HC shipping containers sitting 12 feet apart. It's where we park our tractor and we always meant to put a roof over it, but it's open space at the moment. A simple structure made of lifted 4x4s laid across the tops of the containers should work well for removing the shell . . . or at least that's the plan |
Perfect! If you've got any 12ft. steel I-beams laying around (sounds like you've got a "farm situation"), even better! 
You shouldn't even need a "structure" if the shipping containers are high enough (just two crossbeams laid across that you can hang chains from). Otherwise, even just some cinder blocks would likely do to lift the crossbeams higher.
Good luck! And get ready for it to take a lot longer than you expect! (but it'll be worth it!!!!)
And since you're going "full bore" on the project with a complete floor replacement and framework, I'll plant the seed of thinking about radiant heat. I used to think it was a bad idea (road vibration and hydronics not mixing), but I have changed my tune. After a lot of winter camping, I have come to believe that a warm floor that can also keep tanks from freezing is definitely something to consider! And though they are pricey, you can get a heating unit that will do hot water for sinks/shower, heated fluid for the radiant heat, and some even have a small forced air unit for occasional *quick* heat to the cabin.
__________________
25' 1972 Airstream Trade Wind Land Yacht (heavily customized)
2006 Jeep Liberty CRD (diesel)
BeahmStream.com
|
|
|
|
|
04-18-2019, 12:29 PM
|
#5
|
Rivet Master 
2007 22' International CCD
Corona
, California
Join Date: Jul 2013
Posts: 9,180
|
Bertha Restoration - 1972 Twin Axle Safari
Please dont use cinder blocks to support heavy loads. They can easily crush and drop stuff on you. They are intended only for masonry walls.
Wood blocks or cribbing is safer if you need to shim something up.
__________________
Rich, KE4GNK/AE, Overkill Engineering Dept.
'The Silver HamShack' ('07 International 22FB CCD 75th Anniversary)
Multiple Yaesu Ham Radios inside and many antennae sprouting from roof, ProPride hitch, Prodigy P2 controller.
2012 shortbed CrewMax 4x4 Toyota Tacoma TV with more antennae on it. 
|
|
|
|
|
04-18-2019, 05:56 PM
|
#6
|
2 Rivet Member
1972 23' Safari
Clarkton
, North Carolina
Join Date: Feb 2019
Posts: 57
|
Quote:
Originally Posted by kidjedi
Perfect! If you've got any 12ft. steel I-beams laying around (sounds like you've got a "farm situation"), even better!
You shouldn't even need a "structure" if the shipping containers are high enough (just two crossbeams laid across that you can hang chains from). Otherwise, even just some cinder blocks would likely do to lift the crossbeams higher.
Good luck! And get ready for it to take a lot longer than you expect! (but it'll be worth it!!!!)
And since you're going "full bore" on the project with a complete floor replacement and framework, I'll plant the seed of thinking about radiant heat. I used to think it was a bad idea (road vibration and hydronics not mixing), but I have changed my tune. After a lot of winter camping, I have come to believe that a warm floor that can also keep tanks from freezing is definitely something to consider! And though they are pricey, you can get a heating unit that will do hot water for sinks/shower, heated fluid for the radiant heat, and some even have a small forced air unit for occasional *quick* heat to the cabin. |
I'll have to look into the radiant heat option. It does sound nice and I hate being cold! Always on the lookout for an I-beam or two, but haven't found any yet. Hubby says a couple of 2x6s screwed together will have to suffice for our cross members. The containers sit on concrete blocks and max out at 10'2". The trailer appears to be 9 feet total (once the AC is gone). I'm thinking we'll need to lift the beams a bit to get good clearance, but I don't think it with be too hard to manage. Thanks for all the great suggestions folks
Lydia
|
|
|
|
|
05-24-2019, 08:24 AM
|
#7
|
2 Rivet Member
1972 23' Safari
Clarkton
, North Carolina
Join Date: Feb 2019
Posts: 57
|
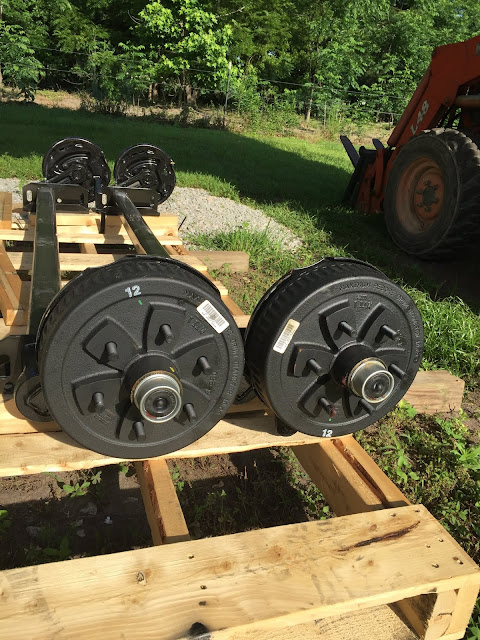
New Axles, New Tires, New Shelter
Last week our new Dexter axles for our 1972 Safari arrived (thank you Colin Hyde Restorations), so I promptly ordered new rims & tires, and somehow convinced Scott to help me install everything over the weekend. We thought it would be a one day event, but it took us a day and a half (10 hrs total labor) and left us both a little sore.
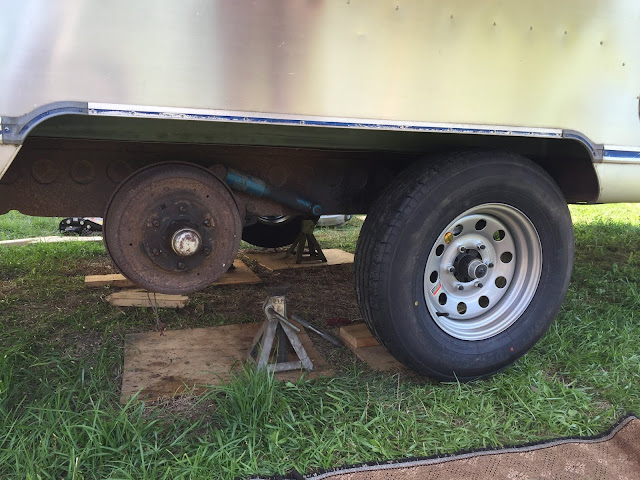
Here's what the old axles looked like. They got us home after the purchase but were in horrible shape and dangerous to use, so we made replacing them priority #1.

We also decided to go with a 3.5 inch lift kit so Bertha would better line up with Emmy Lou (our F-350 tow vehicle) and not be so inclined to bottom out.
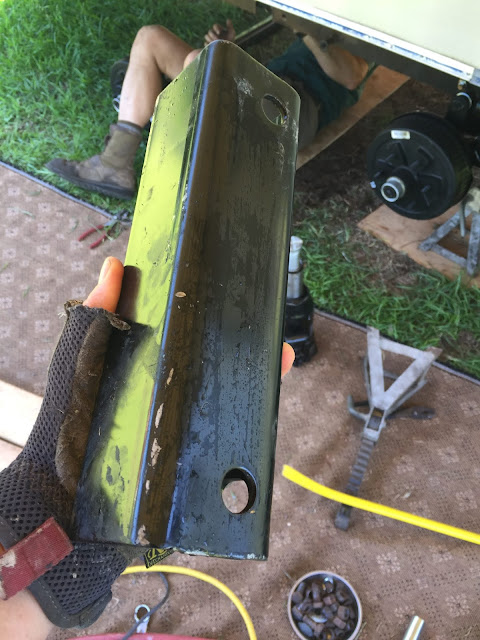
New axle #1 is pictured below installed with lift kit and new shocks. We also used Ospho to treat the rust on the frame and then painted everything black. We'll eventually treat and paint the entire frame when we repair it, but that's a project for another day. Who am I kidding, that's a multi-day project!
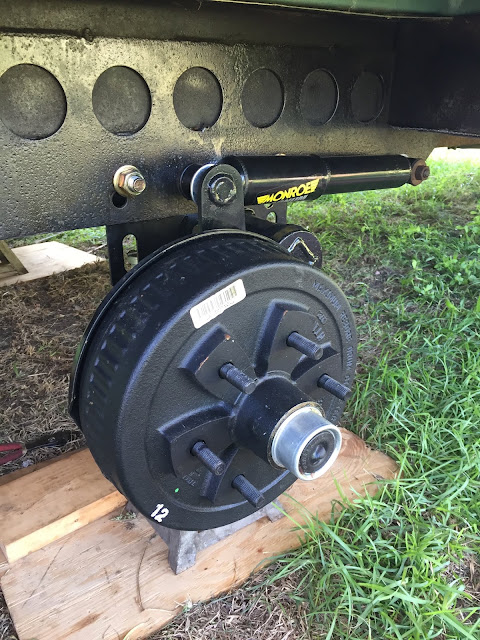
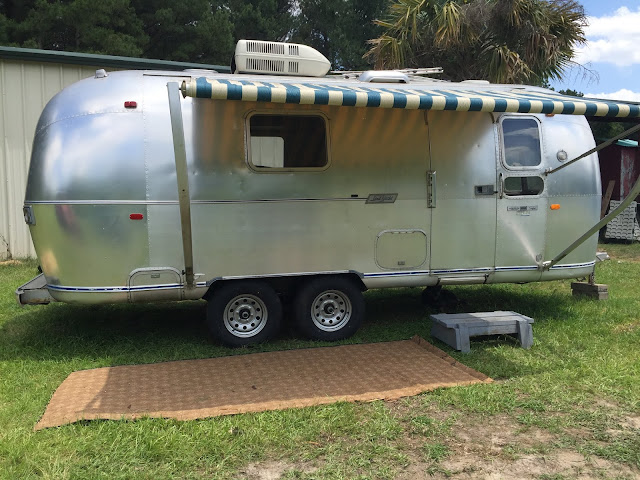
At the end of day 1, we had one new axle (plus new shocks and tires) installed, and you can really see the difference the lift kit makes. We got the tires (Contender ST225/75R15 Load Range D with Silver Mod Wheels) from eTrailer online, and they arrived 2 days after being ordered. The Dexter lift kit came from Colin Hyde Restorations.
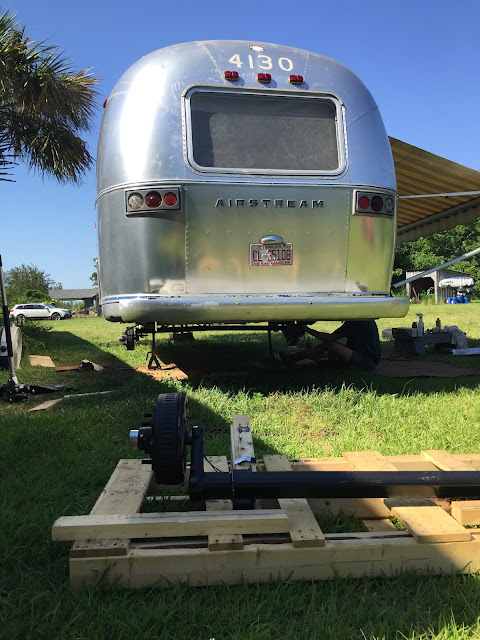
On day 2, we took the new wheels back off and jacked everything up an extra few inches to give us more work space under the trailer. Then we removed the second axle, which gave Bertha a free flying look sitting on the 3-ton jack stands. Thankfully we had two beautiful (although hot) days to work on this project, and the beat up old Carefree awning (which needs new fabric and a few other parts) provided some much appreciated shade.
As you can probably imagine, thanks to freshly acquired knowledge, axle #2 went up much easier than axle #1. Unfortunately, none of the original axle holes were in line with the new axle mounting holes (or lift kit mounting holes), so we had to drill eight fresh holes in the steel frame. That was probably the most difficult part of the installation as the drill bits wanted to wander away from their intended targets, but thankfully we have lots of nice tools. Our die grinder was probably the most valuable, as it allowed Scott to finish off all the drilled holes exactly as intended.

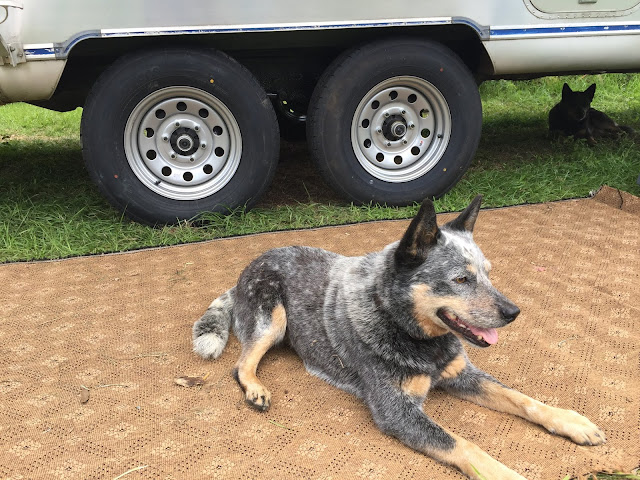
The pups like the new look and have indicated they are ready to travel anytime.
Although Bertha looks ready for the road, at minimum the running gear needs to be redone before we take her out "tent camping." We may just go straight into disassembly of the interior, but we have no firm decision on what we'll be diving into next. As always, we are mired down in too many projects and have to pick and choose our poison each weekend.
Old axles went to the dump yesterday . . .
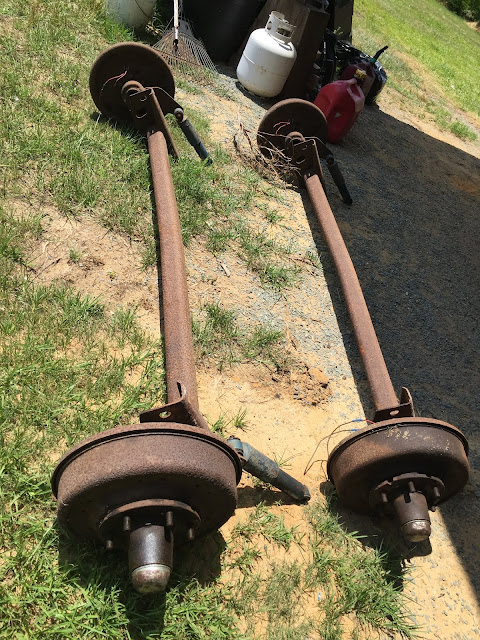
. . . but I still have the original rims, tires, and moon hub caps. The tires are trash, but if anyone is interested in the rims and moon hub caps, let me know.

Last, but not least, Bertha got a new home a couple of weeks ago, and we moved her in last weekend. She has a Kubota for a roommate, but so far they are getting along well

|
|
|
|
|
05-24-2019, 08:55 AM
|
#8
|
1 Rivet Member 
1961 16' Bambi
1975 31' Excella 500
Sanford
, North Carolina
Join Date: Sep 2010
Posts: 13
|
Congratulations, axles look great.
Ralph
|
|
|
|
|
05-24-2019, 10:38 AM
|
#9
|
2 Rivet Member
1972 23' Safari
Clarkton
, North Carolina
Join Date: Feb 2019
Posts: 57
|
Quote:
Originally Posted by 75Excella500
Congratulations, axles look great.
|
Thanks! It's a good start.
|
|
|
|
|
05-10-2020, 06:51 PM
|
#10
|
2 Rivet Member
1972 23' Safari
Clarkton
, North Carolina
Join Date: Feb 2019
Posts: 57
|
Gutted and Shell Off!
Well, we're finally back at it and, after about four weekends of work we've made some nice progress.
Gutted Bertha in February.


Removed the banana wraps, remaining belly pan and got the water tank out in April.


Any opinions on whether this tank can be reused? We know that it needs to be cleaned but everything seems to be intact. If the sensors work, is there any reason we shouldn't use it? I wouldn't mind paying for a new one, but the shipping is almost as much as the new tank.

And today we lifted the shell off the frame. Made a "gantry" on top of our shipping containers.

Made an I-bean inside for the lift.

Let my certified arborist husband do the expert rigging . . . and the heavy lifting

Yeah, we used block, tackle and rope. And yeah, it worked, but we wouldn't do it that way again and wouldn't recommend it to the uninitiated. We'll have two chain hoists for the reinstall.

Let's just say we had some interesting moments, and that we'll cherish the memories  My favorite was pushing the shell to one side to balance it while walking inside on a moving trailer as it drove out from under me.

Lowering that I-beam once the trailer was safely on the ground was an excellent feeling.

Until next time!
|
|
|
|
|
05-10-2020, 07:42 PM
|
#11
|
Rivet Master
1986 34' Limited
1975 27' Overlander
1969 21' Globetrotter
Conifer
, Colorado
Join Date: Jun 2009
Posts: 8,319
|
Greetings Wild: I'm a vintage Airstream hobbyists and stumbled on to your project thread. Thanks for using Airstream Forums to document your progress and sharing it with others. My son has a 69 Globetrotter 21', I used to have a 66 Trade Wind 24', I now have a 75 Overlander 27', and my wife has a 86 Limited 34'. They all need work even after I've done extensive renovation to them.
Currenting I'm helping a friend with their 76 Sovereign 31'. These old Airstreams have lots of needs after 40 some years out in the rain.
You folks are going to build a great Safari I can tell. You are awarded the vintage Airstream merit badge for "Full Monte" which means lifting the body off the frame and starting over again. That is one merit badge I don't yet have.
Here are a couple of photos of the 75 Overlander I thought you might enjoy. It is travel ready with everything replaced or rebuilt. It is a long slog to get it done for sure.
David
__________________
WBCCI #8607 VAC Region 11
KnowledgeBase trailer renovation threads: 69 Globetrotter, 76 Sovereign, 75 Overlander, 66 Trade Wind Such fun ! ")
|
|
|
|
|
05-11-2020, 12:47 PM
|
#12
|
Rivet Master
1972 25' Tradewind
1976 31' Excella 500
1974 31' Excella 500
1975 24' Argosy 24
Denver
, Colorado
Join Date: Jul 2015
Posts: 1,106
|
Quote:
Originally Posted by Wildwoman69
Any opinions on whether this tank can be reused? We know that it needs to be cleaned but everything seems to be intact. If the sensors work, is there any reason we shouldn't use it? I wouldn't mind paying for a new one, but the shipping is almost as much as the new tank.
|
I've got three freshwater tanks pulled from various builds that I keep going back and forth on what to do with. Knowing how plastic degrades, I don't want to use these tanks from the 70's for freshwater, but I'm not sure if I should even use them for gray water. I see plastic crack and fall apart all the time, so it seems like an unnecessary risk, especially with tanks that are 50 years old. However, I really don't want to put them in a land fill, and the recycling center won't take something of this size. 
__________________
25' 1972 Airstream Trade Wind Land Yacht (heavily customized)
2006 Jeep Liberty CRD (diesel)
BeahmStream.com
|
|
|
|
|
05-11-2020, 05:01 PM
|
#13
|
2 Rivet Member
1972 23' Safari
Clarkton
, North Carolina
Join Date: Feb 2019
Posts: 57
|
Quote:
Originally Posted by dbj216
You folks are going to build a great Safari I can tell. You are awarded the vintage Airstream merit badge for "Full Monte" which means lifting the body off the frame and starting over again. That is one merit badge I don't yet have.
David
|
Thanks for the vote of confidence David, and for the merit badge - never gotten one of those before I'm not sure if we should be awarded it until the shell is back on, however! Your trailer looks fantastic. Thanks for sharing!
|
|
|
|
|
05-11-2020, 05:06 PM
|
#14
|
2 Rivet Member
1972 23' Safari
Clarkton
, North Carolina
Join Date: Feb 2019
Posts: 57
|
Quote:
Originally Posted by kidjedi
I've got three freshwater tanks pulled from various builds that I keep going back and forth on what to do with. Knowing how plastic degrades, I don't want to use these tanks from the 70's for freshwater, but I'm not sure if I should even use them for gray water. I see plastic crack and fall apart all the time, so it seems like an unnecessary risk, especially with tanks that are 50 years old. However, I really don't want to put them in a land fill, and the recycling center won't take something of this size. |
Yeah, I hate the idea of throwing it out and thought about using it for a grey water tank as well. If we used it for a grey water, then I think we'd need to go with the fresh water tank that goes in the front of the trailer above the floor. It's not a bad idea and certainly something to consider, but I worry that it would be a space hog. I work for a plastics manufacturer so I'll ask my boss his thoughts on degradation of the old tank. I don't want anything that going to fall apart quickly as getting it out was no picnic! Thanks for sharing your thoughts.
|
|
|
|
|
05-11-2020, 07:02 PM
|
#15
|
Rivet Master
1986 34' Limited
1975 27' Overlander
1969 21' Globetrotter
Conifer
, Colorado
Join Date: Jun 2009
Posts: 8,319
|
The grey and black tanks in my 75 Overlander were cracked and broken. I replaced them and I wanted a larger grey tank capacity. I left the fresh water tank alone. The tanks in my friend's 76 Sovereign were deemed good enough for now. We cleaned them and then filled the grey tank with water and let it set for a couple of hours. No leak noted.
I too worked in a plastics factory before my retirement. We made polyethylene tanks similar to RV water tanks. The polyethylene material is known for its longevity. Our tanks are "where the sun don't shine" so UV degragation is not likely. New tanks are about $250 each and about $100 to ship them.
Your 72 likely doesn't have a grey, or "wash water" tank. My 66 didn't, and my son's 69 doesn't either. Both of those trailers had above floor fresh water tanks in the very front of the trailer under the gaucho, or under the dinette. I replaced the tank in my 66 Trade Wind, see photo.
David
__________________
WBCCI #8607 VAC Region 11
KnowledgeBase trailer renovation threads: 69 Globetrotter, 76 Sovereign, 75 Overlander, 66 Trade Wind Such fun !
|
|
|
|
|
05-12-2020, 04:38 AM
|
#16
|
2 Rivet Member
1972 23' Safari
Clarkton
, North Carolina
Join Date: Feb 2019
Posts: 57
|
That is correct David. We do not have a grey water tank so we were going to have to buy that one anyway. Good to know folks have reused these tanks with success! Our water tank doesn't leak either, but is compressed a little on one side. So much to think about.
|
|
|
|
|
05-12-2020, 09:40 AM
|
#17
|
|
CC
1972 27' Overlander
Heinsburg
, AB
Join Date: Jul 2018
Posts: 243
|
Wow, the pictures of the separation of the shell from the frame makes me feel the tension. You're right, these events make great memories and stories. I look forward to tagging along.
CC
|
|
|
|
|
05-13-2020, 12:36 PM
|
#18
|
Rivet Master
1966 24' Tradewind
1995 34' Excella
Lynchburg
, Virginia
Join Date: Jun 2006
Posts: 4,226
|
Bertha Restoration - 1972 Twin Axle Safari
Just stumbled across your project thread. You are doing a great job.
We have a 66 Tradewind that of course only has a black water tank. I found the tank in great shape with no leaks except for the hole I mistakenly drilled in it when installing the new belly pan. We installed a Curve porta potty, which works fine for us, and the black tank became our grey water tank. Details can be found in my project thread Dans 66 Tradewind Improvements.
Dan
|
|
|
|
|
05-17-2020, 05:57 PM
|
#19
|
2 Rivet Member
1972 23' Safari
Clarkton
, North Carolina
Join Date: Feb 2019
Posts: 57
|
Quote:
Originally Posted by TouringDan
Just stumbled across your project thread. You are doing a great job.
We have a 66 Tradewind that of course only has a black water tank. I found the tank in great shape with no leaks except for the hole I mistakenly drilled in it when installing the new belly pan. We installed a Curve porta potty, which works fine for us, and the black tank became our grey water tank. Details can be found in my project thread Dans 66 Tradewind Improvements.
Dan
|
I checked out the Curve Porta Potty. That's pretty nice. We're planning to go in a similar direction. Maybe a Nature's Head down the road, but a bucket with sawdust is in our immediate future.
|
|
|
|
|
05-17-2020, 06:06 PM
|
#20
|
2 Rivet Member
1972 23' Safari
Clarkton
, North Carolina
Join Date: Feb 2019
Posts: 57
|
Flipp'in Frame Time
Bertha's frame got some flipp'in attention this weekend.

On Saturday -
Old crusty floor bolts were brought to heel with a Matabo angle grinder.

Sans bolts, the floor was removed with relative ease using a variety of crow bars. The dog didn't help at all.
Wheel well covers came off with the floor! Who knew?

Nasty old insulation was removed by hand and a paint scraper. Did I mention our Matabo grinder? Fabulous tool!

Crusty bolt remains were popped out of the frame and into a bucket with a hammer and punch.
Surface rust was removed with a twisted wire cup brush on a Makita side grinder.
Bent cross member was straightened with a piece of angle iron, a cold chisel, a ball peen hammer, and a sledge hammer. My husband is soooo awesome!

At the end of the day, we identified two major areas of rot - the rear of the trailer and the front curbside frame channel. We knew the rear had rust issues and hoped we'd only have to replace the final cross member and a few outriggers. Ultimately, the back 5 feet of trailer needs to be completely replaced - side channels, two cross members and all outriggers. We also identified at least 3 additional outriggers that must be replaced.

Extensive rot in the front curbside frame channel was a surprise. Water must have gotten into that channel years ago and couldn't get out. The bottom of the channel is rusted all the way through (see the light at the bottom of the channel), and the inside wall is badly corroded as well. That space is going to demand some creative welding, but I have no doubt Scott will figure it out.

On Sunday -
Built two saw horses to hold the frame.

Removed tires and axles. So glad we have an impact wrench!
Lifted the frame with our tractor (one end at a time) and put the saw horses in place.
Flipped the frame with the tractor and some fancy rope work to further inspect it.
If you couldn't see that hole in the channel before, you can certainly see it now!

Next weekend Bertha's lower half has a date with a sandblaster and a paint gun. We'll let you know how it goes.
|
|
|
|
|
|
|
Currently Active Users Viewing This Thread: 1 (0 members and 1 guests)
|
|
|
 Posting Rules
|
You may not post new threads
You may not post replies
You may not post attachments
You may not edit your posts
HTML code is Off
|
|
|
|

 Recent Discussions
 |
|
|
|
|
|
|
|
|
|
|
|
|
|
|
|
|
|
|
|
|
|


 Linear Mode

