 |
|
 04-08-2015, 11:03 PM
|
#21
|
|
Site Team
1974 31' Sovereign
Ottawa
, ON
Join Date: May 2008
Posts: 11,219
|
Yes, if it has a 12V tag, you do need to supply it with same; that usually runs the control board. I didn't think they used 12V control boards in '72 but I could be wrong. This is making me think that the refer might well have been changed out at some time.
If you have the back open, pull out the 120V heater element (easy to get at), connect it directly to 120V and see if it gets hot. Careful, it gets REALLY hot really fast if it is working.
If it doesn't heat up you need a new one. About $40 from one of the suppliers of cooling units (the heart of the refer, what make it cool/freeze).
Get the model number and Google the Owner's/Service Manual. Might be a help, plus at least you can see what is supposed to be going on in there...
__________________
Courage is being scared to death, but saddling up anyway. ...John Wayne...........................
|

|

|


|
04-09-2015, 12:09 AM
|
#22
|
3 Rivet Member 
1972 29' Ambassador
Cupertino
, California
Join Date: Jan 2015
Posts: 116
|
Good to know on the element, if I get a chance this weekend I'll give it a try.
That being said, moving forward with the 12v wiring. I got bored waiting on my 3d printer making a bunch of noise so I went out and did some wiring. I got the four 20a fused wires and the car battery 40a fused wire installed, along with the common ground. Also replaced the circuit breakers while I was at it, the old ones had some corrosion on the back sides, and it seems like they were never mounted properly to the breaker rack in the box.
I need to figure out how to wire the ammeter and the power light. I think I saw instructions for the power light so I'll look around after posting this.
I need to pick up the fuses as well as a length of battery cable and connectors, both for replacing the corroded battery cables and to run between the converter and the fuse block. Probably stop by O'reilly's or Napa tomorrow to get those.
|
|
|
|
|
04-09-2015, 01:02 AM
|
#23
|
3 Rivet Member
1972 29' Ambassador
Cupertino
, California
Join Date: Jan 2015
Posts: 116
|
So just picking up a shunt for the ammeter sounds like the solution for that, on to the power light.
|
|
|
|
|
04-09-2015, 01:17 AM
|
#24
|
3 Rivet Member
1972 29' Ambassador
Cupertino
, California
Join Date: Jan 2015
Posts: 116
|
And the info I'm seeing for the Power On light suggests I'll have to do some thinking about how I'm going to approach that.
|
|
|
|
|
04-09-2015, 06:04 AM
|
#25
|
|
Site Team
1974 31' Sovereign
Ottawa
, ON
Join Date: May 2008
Posts: 11,219
|
There is a shunt on the front of the old Univolt. Use the search feature here and look for pictures of it and how to wire it in to your new set-up.
__________________
Courage is being scared to death, but saddling up anyway. ...John Wayne...........................
|
|
|
|
|
04-10-2015, 03:59 PM
|
#26
|
3 Rivet Member
1972 29' Ambassador
Cupertino
, California
Join Date: Jan 2015
Posts: 116
|
I've seen a few folks take the old fuse panel off and reuse that, may look into that, or possibly just the shunt. Someone I talked to said that, since the new converter is a 75amp and the Univolt was a 45amp, this may cause a problem for trying to use the old shunt. Input and insights on this are appreciated.
In the mean time, I got the converter to fuse / distribution panel red and black wires run last night, and will run a ground wire for the converter to the chassis tonight if I get home early enough. All being well I might be able to hook up the power later tonight and see what happens.
I don't have battery wires in yet as I still need to run them, I may just connect the new wiring to the original battery wires and run those together for a short-term fix, but seeing as I don't even have a battery in the system yet no rush on that.
|
|
|
|
|
04-10-2015, 10:53 PM
|
#27
|
3 Rivet Member
1972 29' Ambassador
Cupertino
, California
Join Date: Jan 2015
Posts: 116
|
Big progress and a big "issue".
Got the grounding wire put in for the new converter, and plugged in the extension cord.
Well... the new breaker is still popping on the main circuit. 
I was pretty bummed, and was about to call it quits for the night when my buddy Mike, who's visiting from out of state, suggested I run the extension cord just to the converter.
Well.... the photos tell what happened... 
The 120v circuit breaker is still popping on apparently just the 120v lines, as I tested it without the converter hooked up. First thing I'm going to do is go through all the receptacles and see what kind of condition they're in. If nothing comes of that, I'm going to have to ask around on here and elsewhere for input. Hopefully it's something simple.
From testing the 12v systems, I know the water pump sounds like it's working, the fart-fan in the bathroom goes, and the refer is trying to light up on gas since it's not getting 120v (that will be a separate test soon). The water tank lights on the control panel all come on, which is odd, but nothing comes on for the black tank (which I'm hoping is a good sign).
To say this is a relief to a major extent is an understatement... now I just need to sort out the 120v system. 
|
|
|
|
|
04-11-2015, 02:24 AM
|
#28
|
3 Rivet Member
1972 29' Ambassador
Cupertino
, California
Join Date: Jan 2015
Posts: 116
|
Oh... and don't let the photos fool you, those are all the old-school lights. They're nowhere near as bright as the images would make you think, and will definitely be getting replaced by LED's.
|
|
|
|
|
04-12-2015, 09:44 PM
|
#29
|
3 Rivet Member
1972 29' Ambassador
Cupertino
, California
Join Date: Jan 2015
Posts: 116
|
Another small step forward with the '72.
Yanked out all the old 120v receptacles (and managed to remove the power source for the old satellite tv antenna). Flipped on the main circuit breaker and it didn't pop. I will be picking up a bunch of new receptacles (and some GFCI ones for near the sinks) and hoping that my luck continues.
That of course meaning that hopefully it was a bunged up old receptacle that was causing the breaker to pop and not some hidden short in the walls. 
|
|
|
|
|
04-13-2015, 06:19 AM
|
#30
|
Rivet Master 
1973 27' Overlander
Portsmouth
, Virginia
Join Date: Jun 2012
Posts: 776
|
Dont be surprised if one of the breakers is bad as well. Over 40 years old, those things can go south.
|
|
|
|
|
04-13-2015, 09:10 AM
|
#31
|
4 Rivet Member 
1970 29' Ambassador
1959 22' Flying Cloud
1957 26' Overlander
Ashland
, Oregon
Join Date: May 2003
Posts: 254
|
Piano hinged doors
I would love to see some photos of how to install piano hinges to the outside hatch doors. I need to do this on several of my hatch doors but don't want to screw it up! Thanks!
|
|
|
|
|
04-13-2015, 11:50 AM
|
#32
|
3 Rivet Member
1972 29' Ambassador
Cupertino
, California
Join Date: Jan 2015
Posts: 116
|
Quote:
Originally Posted by aquinob

Dont be surprised if one of the breakers is bad as well. Over 40 years old, those things can go south.
|
Actually they're new ones I just put in, part of why I took the drastic action of yanking out the receptacles. Didn't want to have to buy another new one right away.
|
|
|
|
|
04-13-2015, 12:05 PM
|
#33
|
3 Rivet Member
1972 29' Ambassador
Cupertino
, California
Join Date: Jan 2015
Posts: 116
|
Quote:
Originally Posted by albert
I would love to see some photos of how to install piano hinges to the outside hatch doors. I need to do this on several of my hatch doors but don't want to screw it up! Thanks!
|
Will be sure to post up about it when I do that May be a bit til I get to that point, but it's definitely something I'll cover.
In the mean time, to quote Andy, the Inland RV rep, from another thread:
Quote:
Turn the door upside down.
Then install a piano hinge at the bottom.
That's a "forever" fix.
Andy
|
|
|
|
|
|
04-13-2015, 03:55 PM
|
#34
|
3 Rivet Member
1972 29' Ambassador
Cupertino
, California
Join Date: Jan 2015
Posts: 116
|
So I was browsing the forum at lunch, and realized that the reason my A/C unit works is more than likely because it's not the original unit. Was looking into the shroud and realized the faint outline I saw on the roof over the weekend was the original shroud's outline.
It's a smaller unit on there now and I believe I saw a "Dometic" under the silver paint that's on it. I will have to look up the model number and see about getting a manual for it.
|
|
|
|
|
04-14-2015, 10:35 AM
|
#35
|
3 Rivet Member
1972 29' Ambassador
Cupertino
, California
Join Date: Jan 2015
Posts: 116
|
Copying this from my other thread to get more eyes on it.
Quote:
OK, definitely need some help with this. Started replacing all the receptacles in sequence and I've hit a snag.
The circuit foes bathroom, pass side access panel, converter & driver side bedroom wall, passenger side bedroom wall.... And then the circuit pops.
So the converter proved that Airstream splits the line somewhere out sight, and that's disconcerting. That means that potentially from the passenger side bedroom wall, it splits at some unseen point and that could be what's causing the pop.
I'd really appreciate some input on this if anyone has any ideas.
|
|
|
|
|
|
04-15-2015, 12:49 AM
|
#36
|
3 Rivet Member
1972 29' Ambassador
Cupertino
, California
Join Date: Jan 2015
Posts: 116
|
Follow up from my other thread:
Quote:
OK, status update~
Bypassed the in-wall wiring between the passenger side bedroom wall and the kitchen with a length of Romex, got that length of the circuit to not pop the breaker. Continuing forward had to bypass the section between the fridge receptacle and the "tv stand" receptacle, as that was popping the breaker. After that was resolved, the last one between the "tv stand" and the front of the trailer worked just fine, and was end of line.
Now I've got two lengths of in-wall wiring to replace. The fridge-tv one shouldn't be too much of a hassle, but I'm not quite sure what the heck I'm going to do about the bedroom-kitchen one. That appears to go up and over to clear the kitchen window, and tugging on it didn't produce any noticeable results. I may have to make a few small "access holes" beneath the kitchen counter and try to string a new length of wire that way, unless someone has some trick up their sleeve for this kind of thing?
I was not able to locate the "primary warning light" labeled as #2 in Tom's diagram, so that's left me a bit mystified.
Next up will be to sort out replacing those wires, and then on to looking into some other items
|
The "other items" are as follows: - Airstream Heater - possible to test fan even if LP isn't hooked up?
- Airstream Heater - appears to have two different controllers in two different locations, one above the passenger hallway bed, the other above the fridge. Is this normal?
- Airstream fridge - based upon the manual stating that I should have a Dometic RM-75, I appear to have a 'newer' fridge, a Dometic RM-2812. I will need to acquire a manual for this, as it appears to not be cooling when hooked up to electric-only power.
- Airstream A/C - seems I have a 'newer' model, a Dometic "Duo-Therm" "Penguin". It appears to have both A/C and heat options, but does not appear to be putting out warm air. I will need to acquire a manual for this.
There's plenty of other items to address, but these are ones I'd like to start looking into before I move on to the gas and water systems.
I also tested the vent fan for the stove, seems to work pretty good, will likely have to clean out the filter.
|
|
|
|
|
04-20-2015, 12:12 AM
|
#37
|
3 Rivet Member
1972 29' Ambassador
Cupertino
, California
Join Date: Jan 2015
Posts: 116
|
Today snowballed into a lot of moving forward on things.
It started with last night, after attempting to get a feed across two of the pins to get the exterior lights on, and thrice finding differing information on which way to do it, I looked and discovered that the wiring going to the backside of the 7-pin connector was a rat's nest of a mess, and I wasn't going to mess with it with the power on (for interior lights and such).
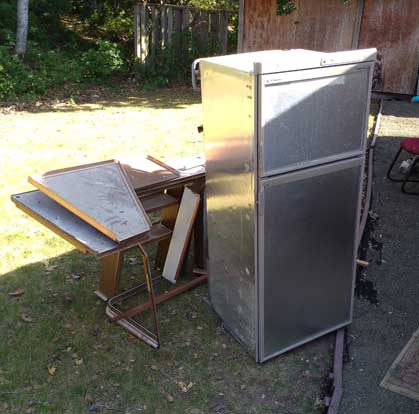
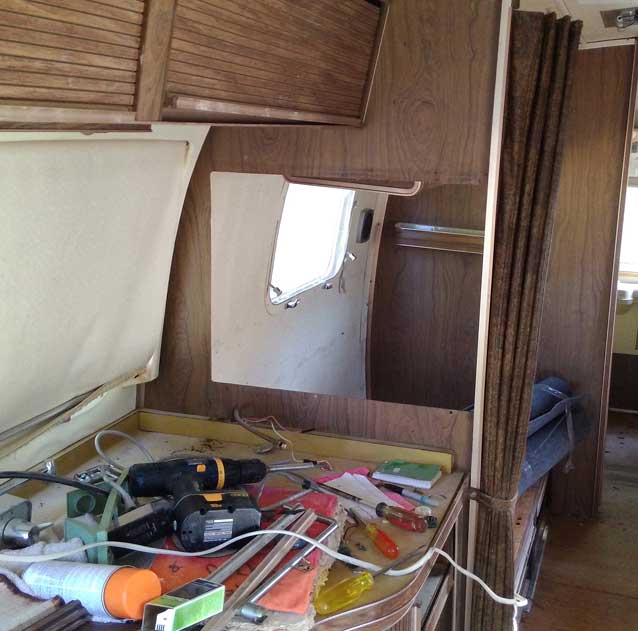
Looking at it this morning, I come to find out that the 'random' wiring I'd noticed along the wall was actually a jerry-rigged setup to get 12v power to the 'new' fridge someone had installed. Well, the fridge didn't work, and I was already of the opinion to replace it with a 'mini' fridge/freezer setup that was 110v-only, so I snipped that and started on removing the fridge.

Come to find out that the jokers who installed the fridge jerry-rigged the whole dang install, with blocks of wood shoved into spaces to hold the shelf above it up, and screws going all the way into the side of the fridge to hold it in place. Once that baloney was all yanked out, I hefted the fridge outside and will be calling to get it hauled off. I'd originally considered putting it up for sale, but I wouldn't feel good about selling this thing to anyone. (If anyone wants parts, chime in now).
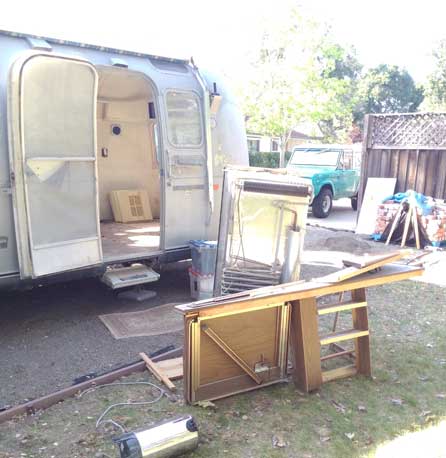
Moving along, my father and I chatted some, and decided that the counter opposite the entry door and the old pull-out bed should come out and be replaced with a "J"-bench / bed and table setup that I'll build. The counter was already Swiss cheese from so many other things being mounted to it, and the bed frame, while serviceable, was utterly filthy from all the Burning Man playa dust.
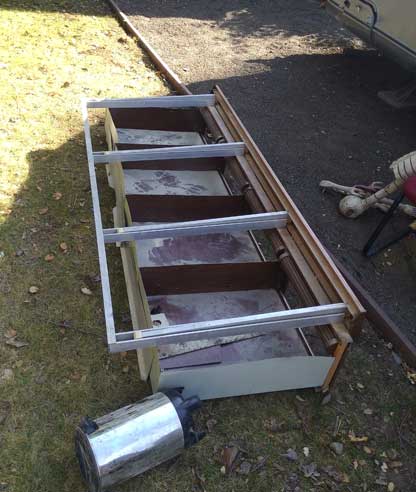
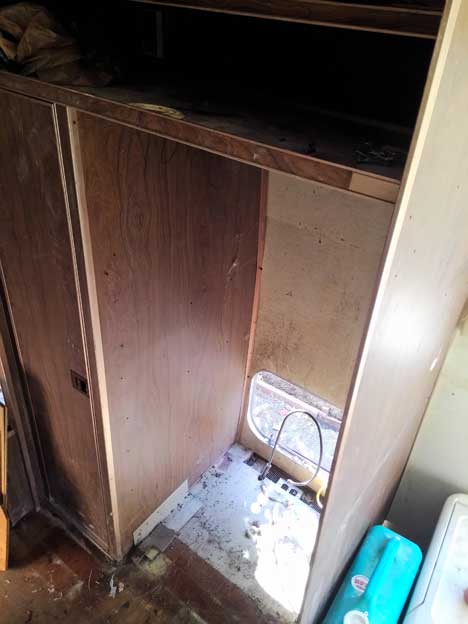
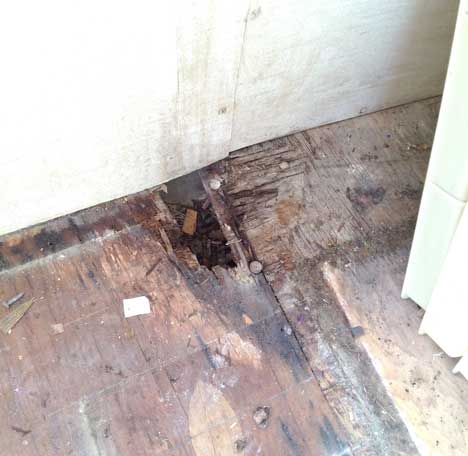
Pulling the counter and bed frame out revealed some wood rot in an odd location - roughly where the counter and bed corners would meet. I will be taking a closer look at this to see how I can remedy it for the time being, as the rest of the wood looks to be in good shape and I'm trying to avoid pulling the floorboards up if I can.
While I was on a roll, I went ahead and pulled out the oven and its enclosure. That will be replaced with a microwave, likely placed over by where the fridge will go. I may actually end up pulling up the whole kitchen counter top and redoing it for the sake of cleanliness (playa dust everywhere) and to handle the rewiring of the 110v section between the beds and the kitchen. Will likely put the oven up for sale soon.

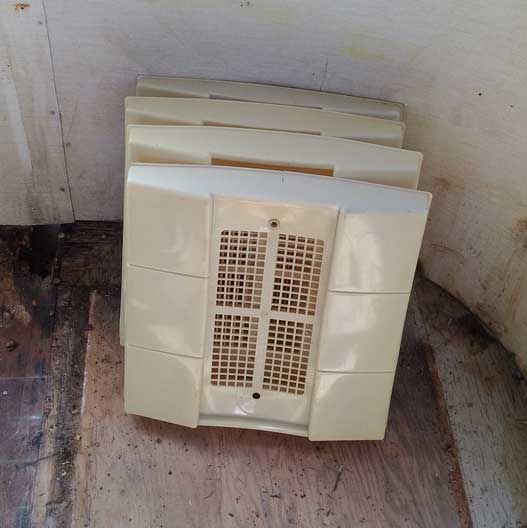
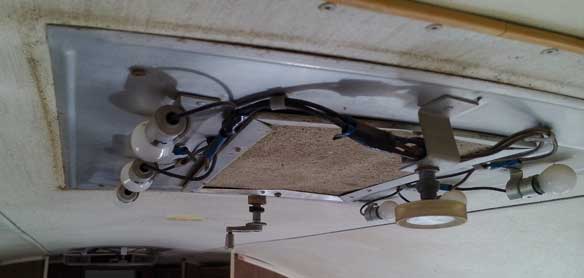
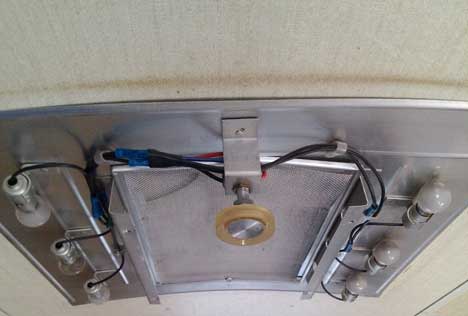
I went along and removed the utterly disgustingly grungy light fixtures covers (filled with bugs and debris), and will be deciding what I will be doing with the light fixture / vent frames soon. I will likely be removing them as I plan on replacing the bulbs with enclosed LED bars for interior lighting. Oddly, one of them didn't have a ceiling vent hole in it. Don't know if this was factory or not, seemed rather strange.
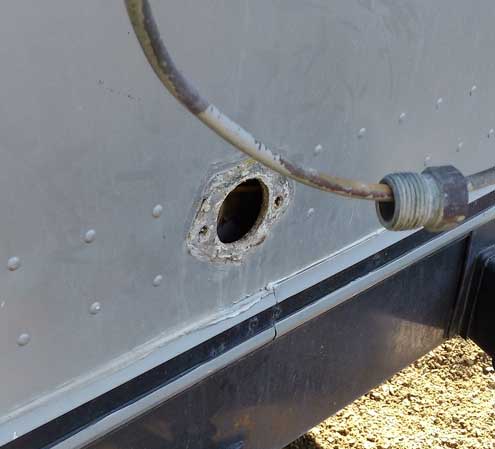
All in all, a lot of tearing things out and prep / planning work for the cleanup / upgrades to come. Will have to source a new tow-vehicle connector socket setup, as the cheap one that a previous owner installed had more caulking in it than all three bathrooms in our house, and the pin layout didn't seem to match anything I'd seen online.
|
|
|
|
|
04-27-2015, 03:34 AM
|
#38
|
3 Rivet Member
1972 29' Ambassador
Cupertino
, California
Join Date: Jan 2015
Posts: 116
|
Just looked on my phone and realized I didn't take photos of everything (or much of anything) I did today, but here's the recap:
- pulled out the entire kitchen countertop, all that's left there now is the furnace
- removed the light / ceiling vent fixtures, will be ordering LED light bars soon
- looking into my options for testing / replacing the furnace; I have no idea whether it works or not, but may end up replacing it with something smaller and more efficient as I don't see myself needing such a large gas-powered unit.
I've got a pretty good idea of what I'll be doing for the sink / stove top and fridge / microwave areas, need to do some clean-up work around there and some wiring elsewhere before I can move forward on that, though.
|
|
|
|
|
04-29-2015, 06:13 AM
|
#39
|
Rivet Master
1981 31' Excella II
New Market
, Alabama
Join Date: Sep 2011
Posts: 6,145
|
If the Fridge works it is worth keeping. It may be that is was just rigged so bad it did not work. These things are about $1200 new and it increases the value of the trailer to some who would want to boondock with propane and battery power only. It looks like a fairly new model. I would take it, if I was not on the other side of the country.
Perry
|
|
|
|
|
05-02-2015, 10:24 PM
|
#40
|
3 Rivet Member
1972 29' Ambassador
Cupertino
, California
Join Date: Jan 2015
Posts: 116
|
Good bit of working today. Got the wiring re-run in the walls (which resulted in putting some new interior rivets in, kinda neat to do that), and did a quick-wiring of the replacing hitch plug. Going to have to re-check that tomorrow when I have daylight since some of the wire colors don't match up to manual or forum descriptions.
Took out more of the kitchen / front area interior. It's going to clean up pretty well when I start putting things back together. The plan is to put in a "j lounge" similar to outofcontrol's setup.
I got screwed out of a killer deal on a one-year old 2-way replacement refer. One of the local AS owners had it up on ebay and mentioned it in the local facebook group. In the last five seconds someone clearly used sniping software to beat me. I was cursing enough to make a sailor's ears curl about that one. Looks like I'll be sticking with the electric-only plan for the time being. Not a fate worse than death, but it was a real pisser to miss out on a 2-way refer, especially since the final bid was about $100 less than I was willing to go (mistyped $30 instead of $300 in the last seconds). Made sure the seller was aware of what happened. If someone posts up in the FB group that they got it, I plan on messaging them and asking them if they used sniping software, because there's no way someone could have outbid me that fast with that little time left.
Pictures and such likely to come tomorrow, as it's dark out and I'm beat.
|
|
|
|
|
|
|
Currently Active Users Viewing This Thread: 1 (0 members and 1 guests)
|
|
|
 Posting Rules
|
You may not post new threads
You may not post replies
You may not post attachments
You may not edit your posts
HTML code is Off
|
|
|
|

 Recent Discussions
 |
|
|
|
|
|
|
|
|
|
|
|
|
|
|
|
|
|
|
|
|
|


 Linear Mode

