 |
|
 01-22-2017, 12:18 PM
|
#21
|
2 Rivet Member 
1984 31' Excella
Lenexa
, Kansas
Join Date: Jan 2017
Posts: 56
|
Just realized I mistyped the name of the caulk we used, we purchased TremPro 635, not "Tempro".
|

|

|


|
01-29-2017, 08:12 AM
|
#22
|
2 Rivet Member
1984 31' Excella
Lenexa
, Kansas
Join Date: Jan 2017
Posts: 56
|
Subfloor Install
Wow, what turned out to be something I hoped would take a few days has really stretched out. First the leaks, then delays because of deciding on layout, and then dealing with new tank sensors and plumbing put a wrench in our plans. However we still pushed on, start with first addressing the lack of center supports in the front of the trailer:

We once again enlisted the help of our neighbor to grind and weld on new supports:

Next up, using the old floor pieces as much as possible as a template:

By the way, in the end the old floor was so damaged we ended up not being able to rely on it. We ended up using cardboard as a template and that worked well.
Then on to installing it. I didnt take many photos of this process, but let me say that if I were to restart this project, I would strongly consider a frame-off restoration. Dealing with getting the plywood jammed into the c-channel was a chore to say the least. Of course by the time the last pieces were installed it was down to a science, but boy it was slow-going at first:


But we got it done (with help from my kids and father-in-law):


I also had a college buddy who is an electrician come down to setup and test our new Boondocker Power Center. He had it rigged up in no time and we confirmed working shore power and battery power:

While my father and law and I were finishing up the floors, my better-half was diligently working away on scraping away the final bits of caulk on the exterior so we can put on new:

I will say, there were some moments this last week where I was ready to completely throw in the towel (or light this thing on fire) - one specific moment that stands out was when I had cut out (for a third time) a new curved plywood piece for the the endcap, installed it (whacking with a 2x4/sledgehammer) and then realized I needed to pull it back out because it was pushed the frames close to falling off the outriggers. However, getting the floors installed and having a solid surface to walk on was a huge win, and we are more motivated than ever to get this finished out.
|
|
|
|
|
01-29-2017, 09:30 AM
|
#23
|
|
New Member
1981 31' Excella II
Katy
, Texas
Join Date: Aug 2016
Posts: 3
|
This thread is great! Thank you! We just bought a 1981 and have to completely redo it as well. How many working days did it take between bringing yours home and getting the new subfloor in?
|
|
|
|
|
01-29-2017, 09:39 AM
|
#24
|
2 Rivet Member
1984 31' Excella
Lenexa
, Kansas
Join Date: Jan 2017
Posts: 56
|
Quote:
Originally Posted by carnoldnyc3

This thread is great! Thank you! We just bought a 1981 and have to completely redo it as well. How many working days did it take between bringing yours home and getting the new subfloor in?
|
Around 2-3 weeks, including tear out, caulking, new metal welding, and other miscellaneous. We're making it a pretty big priority so at least one of us it working on it 5-6 hours or more every day, with a few days off as we were out of town. We have also been spending an inordinate amount of hours after putting the kids to bed on the research and planning part of the project (what electrical/plumbing/et cetera stuff to buy). The "little" stuff like old caulk removal, frame prep, and getting the c-channel prepped takes a lot of time. Feel free to message me on this thread if you have any questions or get stuck, as it's all very fresh on my mind right now  .
|
|
|
|
|
01-29-2017, 11:31 AM
|
#25
|
4 Rivet Member 
1979 31' Excella 500
Charlevoix
, Michigan
Join Date: Aug 2014
Posts: 350
|
Just wondering, did you put down insulation before you put the floors back in?
|
|
|
|
|
01-29-2017, 11:34 AM
|
#26
|
4 Rivet Member
1979 31' Excella 500
Charlevoix
, Michigan
Join Date: Aug 2014
Posts: 350
|
Also, a tip from someone who is on the otherwise of an Excella installation... since have the interior walls off I highly recommend you seal all seams and rivets holes from the inside. I didn't, and had a persistent leak that it took me almost 12 months to find from out the outside. Every time it rained water would come in and I'd have to switch out wet towels two or three times a night. Wish I would have just sealed everything from the inside so leaks were never a worry.
|
|
|
|
|
01-29-2017, 11:36 AM
|
#27
|
2 Rivet Member
1984 31' Excella
Lenexa
, Kansas
Join Date: Jan 2017
Posts: 56
|
Quote:
Originally Posted by trekerboy
Just wondering, did you put down insulation before you put the floors back in?
|
Yes, we put down reflectix, which comes in 4' by 50' rolls from Home Depot/Lowes/et cetera which as we understand is what airstream uses as floor insulation in their new units. I figure if it proves to be insufficient we can add a more robust option down the road when we eventually replace the belly pan.
|
|
|
|
|
01-29-2017, 11:41 AM
|
#28
|
2 Rivet Member
1984 31' Excella
Lenexa
, Kansas
Join Date: Jan 2017
Posts: 56
|
Quote:
Originally Posted by trekerboy
Also, a tip from someone who is on the otherwise of an Excella installation... since have the interior walls off I highly recommend you seal all seams and rivets holes from the inside. I didn't, and had a persistent leak that it took me almost 12 months to find from out the outside. Every time it rained water would come in and I'd have to switch out wet towels two or three times a night. Wish I would have just sealed everything from the inside so leaks were never a worry.
|
Absolutely - we have already gone through 15 tubes of trempro just on the inside of the unit .
|
|
|
|
|
02-05-2017, 07:47 PM
|
#29
|
2 Rivet Member
1984 31' Excella
Lenexa
, Kansas
Join Date: Jan 2017
Posts: 56
|
Despite being gone for most of the week, we got a lot accomplished! Where was I this week? Breckenridge!
 Exterior Caulking Continued
We have been caulking a LOT. And by we I mean mostly my wife while I was gone having fun with my brothers on the ski trip. She is a rock star, meticulously hitting every single window, seam, nook and cranny:

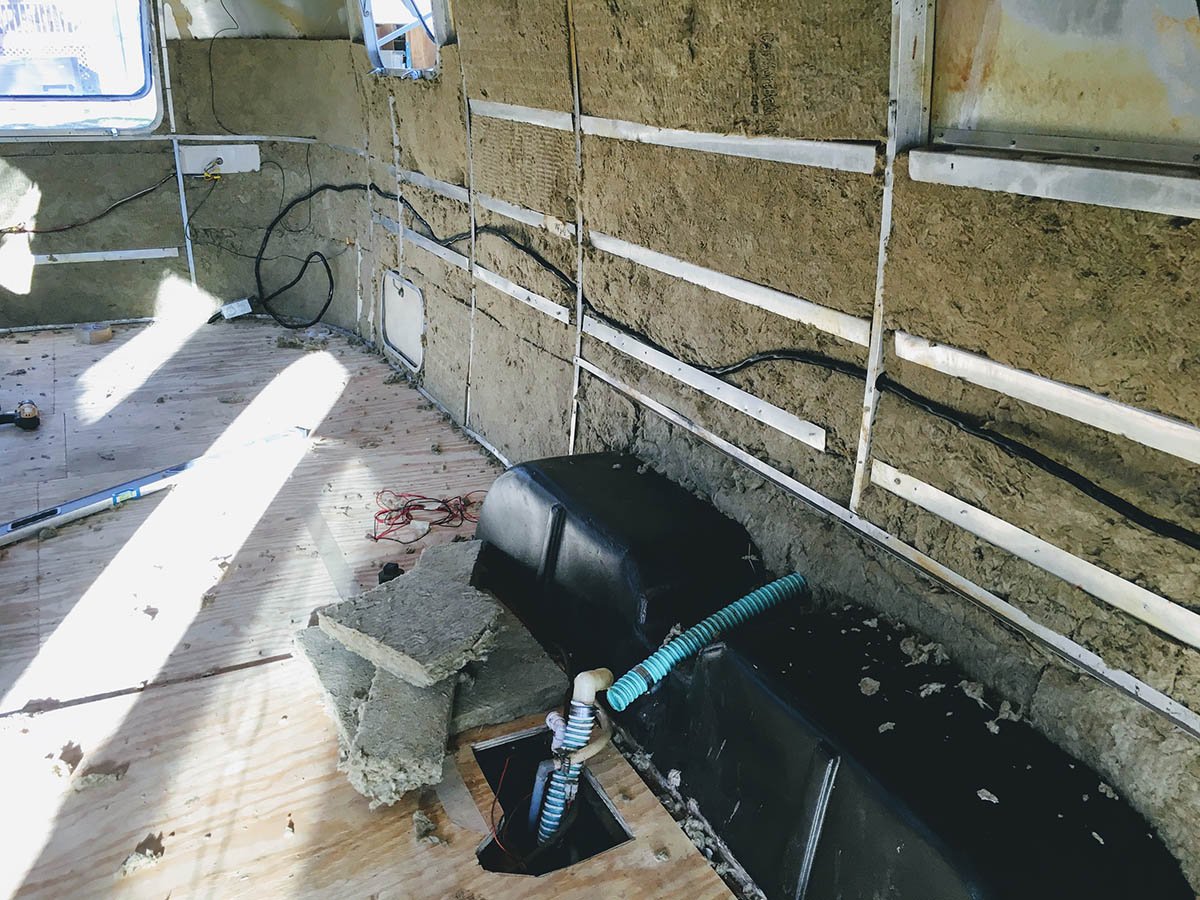
 Battery Boxes Re-Installed
We got the battery boxes reinstalled and caulked up:


 Electrical
I changed my mind on the electrical setup. Originally I opted for a 30 amp service and had purchased the Boondocker BPC-4 power center to support that setup, but after consideration I decided that a 50 amp setup makes way more sense. I figure we can always use a 30 amp hookup with our 50 amp setup but will have the bonus option of running at the higher amperage if available and desired, so why not?
Unfortunately, because I had already installed the Boondocker (purchased from bestconverter.com), I was unable to return it - so if anyone needs this power center and wants a sweet deal, message me . Luckily, another forum member had the exact power center I had planned on upgrading to (the Progressive Dynamics PD 4560), so I managed to salvage the situation somewhat by snagging a discounted price on that.
In preparation for the arrival of the new power center, I purchased and ran a 50 6-3 (50 amp supportable) wire from the rear of the trailer through the street side wall to the front, drilling new 1 holes and installing rubber grommets (purchased from vintagetrailersupply.com) along the way:

Additionally, I ordered a new shore power exterior cable and 50-to-30 amp adapter from Amazon, and got that all connected up (this picture shows the 50 amp shore cable going to a 50-to-30 amp adapter which in turn has a 30 amp to 110v adapter plugged into an extension cord running to my house ):

The original hole in the trunk where the 30 amp cable ran was not large enough and I didnt have the appropriate tool to ream it out to make it larger, so as a quick fix I drilled a new hole next to the original hole and will fill/patch the original hole later:

After that I connected everything up inside the trailer (in the rear, where it will eventually live permanently under the bed):

I also tracked down where the ground wire near the front-end of the trailer was hooked up to ensure everything was on the up and up, and Im glad I did, because (not-so-) hilariously it was not hooked up to anything and simply free-hanging near the frame. The bolt must have snapped off at some point in the past. I went ahead and re-secured it to the frame:
 4 Main/Primary Bolt Re-Installation
In addition to the bolts that were installed on each outrigger, there were four larger 3/8 hex bolts on each of the four corners of the unit, with a 1/4 piece of steel bar under the nut serving as a heavy duty washer. These are obviously important, so I spent a good chunk of time prepping the holes and getting these ready for re-install. All of the bolts were rusted badly, to the point where I had to angle grind the rear ones from the top during the sub-floor removal. I purchased 2.5 length, 3/8 diameter galvanized hex bolts, lock washers, and nuts. I also misplaced 3 of the 4 steel bar washers, so I purchased a new steel bar at Ace Hardware and they even cut it to size for me. My awesome neighbor used his drill press to drill out the new holes for these washers, which was super helpful.
For the rear bolts I had to drill new holes because of having to angle grind off the old ones (they were not removable at this point). For those rear bolts I was able to get to them via two large holes in the frame, accessible in the trunk:

With help from the Mrs (she was outside pushing up the bolt and I was inside receiving and attaching the washer and nut), we got it done:

The front two bolts unfortunately were not accessible without dropping the belly pan, something I wanted to wait on doing until later. However, this ended up being super easy and involved drilling out just a couple dozen rivets near the front. I also took the opportunity to patch a rotted area of the belly pan near the front:

This is a temporary fix as I plan on replacing this belly pan at some point in the relatively near future. To reattach the belly pan I opted for 3/16 diameter, 3/4 length Tek self-tapping screws, coupled with a fender washer, which worked both quickly and amazingly well:

I had to remove the front two stabilizer jacks to get the belly pan removed, and on both of them two of the bolts snapped off because they were so rusted. I think I will try to sandblast these first before replacing them (luckily I have the best neighbor in the world who not only has a sandblasting machine but has volunteered to help me with the process):
 Window Latches
I have long worried that we would have to replace all of our window latches because virtually all of them were very stiff and difficult to operate/fully close. Before fully committing to that end, I decided to see about repairing and adjusting them first, and I am glad I did - in the end a couple squirts of WD 40 combined with minor nut adjustments fixed all of them, and now they work as smooth as silk:
 Bathroom Fan Installation
Our old bathroom fan was barely functional and very loud. I took the easy road here and purchased a brand new drop-in replacement from vintagetrailersupply.com. It was super easy to remove the old and drop in the new:

I used butyl tape to act as a barrier between the fan and the exterior of the airstream, and then we caulked it all up with Trempro 635 (which we have been using for virtually everything). The cover for the fan was black, so we decided to use some aluminum-colored rustoleum spray paint on it before installing:
 Roof Work
In our effort to make the airstream as water-tight as possible, we took on the task of removing the 3 fantastic fans to reseal them properly - and Im glad we did as they did not have a good seal at all. About a hundred pounds of clear, cracking silicone caulking covered them, which was a real treat to scrape off:

My lovely lady did most of the work, and here she is prepping the aluminum for reinstallation:

A little butyl tape and a lot of caulk later, all three vents were back in place:

She also scraped and resealed the other roof items (satellite dish mounting brackets, refrigerator roof vent, seams, et cetera). Did I mention yet that she is amazing and the real workhorse of this operation?
Appliances
We plan on getting a new fridge, furnace, and water heater. I tracked down a local company here in Kansas City that carries everything we want, so we plan on making a visit soon to get all of that squared away. I still have not decided on what specific water heater to get (tankless vs 10 gallon propane/electric), so if anyone has any thoughts feel free to let me know.
Shower
As I mentioned in an earlier post, I (foolishly) threw away our shower pan, and thus have the fun job of finding a way to rebuild it. At last post my plan had been to fabricate a fiberglass shower pan, but after some further research I think I will try what the good folks at Hoffman (in California) do with there bathrooms, which seems to be a combination of marine-grade plywood with a sealant, taped seams and a rubber membrane type product covering all of that, followed by a flexible thinset and resin/lightweight mosaic tile. Not only does that look fantastic (and better than what we could do with fiberglass given our zero experience with such material), but all is in the wheelhouse of what my wife and I are comfortable doing on our own.
Next Steps
All in all it was a very productive week. We are 99.9% ready for a water test to check for any remaining leaks - with as much caulk as weve gone through, Im crossing my fingers that there wont be many to address. The new power center will be here Tuesday, so I plan on getting that setup and tested to ensure there arent any kinks on that front. Hopefully all goes smoothly and we can get the insulation and electrical ran this week. If not, well switch gears and get some of the fresh water plumbing tackled so we can screw down the last piece of subfloor.
More updates to come soon!
|
|
|
|
|
02-15-2017, 08:22 AM
|
#30
|
|
Unclebumble
Currently Looking...
Morehead City
, North Carolina
Join Date: Feb 2017
Posts: 3
|
Full Renovation Stella 1984 Excella
Hi all... I am new to Air Forums and new to blogs like this. So, If I don't do it right, give me some feedback. I am interested in AirStream for lots of reasons. At this point in my life, I am retired, but have a 15 high school student living with us. At some point, we want to travel and RV seems like the best way. So, I am researching the best way to go. I joined the forum to learn as much as I can about AS... WOW... I am a little blown away by articles showing major overhauls. That is NOT what I want to do. I get the idea that buying an older AS will eventually lead to this kind of overhaul. If it already has a leak ( or develops some)( or many leaks) from various places...seams, rivits, gaskets that have dried up. etc... A Floor replacement seems to be looming. And then, there is no point in doing that unless you stop the leak(s). So, at this point, I see adds everywhere for these nice looking AS.. many as nice as this one...some nicer looking and then they start talking about an overhaul. BIG red flag!! I just want to buy one and travel in it. Minor repairs I can deal with... even major appliance, furnace repair kinda stuff doesn't bother me....but this structural stuff is not what I want to do...not that I can't... I CAN, but I don't want to...
Short version of those comments are...I am very intimidated. Is it even possible to buy one that has already had all this done....that doesn't cost a ridiculous amount of $$... I could probably swing $20K... Can I get a little comfort from you guys? Maybe you can point me to others posts that have already addressed this idea?
Having said all that, I do still want to know about the process and learn as much about AS as I can...So,
Help me understand...in this post, the AS was "gutted" and the floor was cut out...all the way to the edges...leaving about 3=4 inches...and then replacement wood was put in. I get the idea that the "C" channel sits on the edge of the frame and the outter shell sits on the top of that channel. The wood floor is installed so that edge of it is inserted just under the top lip of the "C" channel ( and the outter shell)... That would require seperating the outter shell from the top of the "C" channel by removing the bolts that hold it all together and then carefully pulling out the remaining wood...and inserting the new wood AND then bolting it all back together. That being the case, it seems it would be less difficult to just remove the shell and do a complete rework of the frame and the floor. I realize that off the frame is a huge deal...so Could someone give me clearer thoughts on why you would choose to do that as opposed to leaving the frame on?
|
|
|
|
|
02-15-2017, 08:40 AM
|
#31
|
2 Rivet Member
1984 31' Excella
Lenexa
, Kansas
Join Date: Jan 2017
Posts: 56
|
Quote:
Originally Posted by unclebumble
Hi all... I am new to Air Forums and new to blogs like this. So, If I don't do it right, give me some feedback. I am interested in AirStream for lots of reasons. At this point in my life, I am retired, but have a 15 high school student living with us. At some point, we want to travel and RV seems like the best way. So, I am researching the best way to go. I joined the forum to learn as much as I can about AS... WOW... I am a little blown away by articles showing major overhauls. That is NOT what I want to do. I get the idea that buying an older AS will eventually lead to this kind of overhaul. If it already has a leak ( or develops some)( or many leaks) from various places...seams, rivits, gaskets that have dried up. etc... A Floor replacement seems to be looming. And then, there is no point in doing that unless you stop the leak(s). So, at this point, I see adds everywhere for these nice looking AS.. many as nice as this one...some nicer looking and then they start talking about an overhaul. BIG red flag!! I just want to buy one and travel in it. Minor repairs I can deal with... even major appliance, furnace repair kinda stuff doesn't bother me....but this structural stuff is not what I want to do...not that I can't... I CAN, but I don't want to...
Short version of those comments are...I am very intimidated. Is it even possible to buy one that has already had all this done....that doesn't cost a ridiculous amount of $$... I could probably swing $20K... Can I get a little comfort from you guys? Maybe you can point me to others posts that have already addressed this idea?
Having said all that, I do still want to know about the process and learn as much about AS as I can...So,
Help me understand...in this post, the AS was "gutted" and the floor was cut out...all the way to the edges...leaving about 3=4 inches...and then replacement wood was put in. I get the idea that the "C" channel sits on the edge of the frame and the outter shell sits on the top of that channel. The wood floor is installed so that edge of it is inserted just under the top lip of the "C" channel ( and the outter shell)... That would require seperating the outter shell from the top of the "C" channel by removing the bolts that hold it all together and then carefully pulling out the remaining wood...and inserting the new wood AND then bolting it all back together. That being the case, it seems it would be less difficult to just remove the shell and do a complete rework of the frame and the floor. I realize that off the frame is a huge deal...so Could someone give me clearer thoughts on why you would choose to do that as opposed to leaving the frame on?
|
Hi there, and welcome to the forums. I'm pretty new too . Yes, it's definitely a ton of work. And little things that you think will be fast end up taking one or multiple days (my wife has been stripping/removing the old gasket, glue, and residue from the entry door for about 2 days now and isn't done yet, for example).
If life had an undo button, I would use it and go back and take the shell off simply for how much easier it would have been to get the subfloor back in. In our case (as shown in photos on this post), we cut out the subfloor leaving small strip in the c-channel to act as a shim to keep everything from sinking/falling off the outriggers. Then we went section by section, removing those "shims" and replacing with new subfloor, pushing into the c-channel and re-bolting/re-screwing down to the frame/outriggers. This was not easy with the frame on, but got easier as we went along and figured out how to get it going. The reason I didn't want to take the shell off originally was that it felt like too much of a task, having to remove all of the roof vents, belly pan, and building gantries and the like, but in the end we ended up having to remove all those vents anyways because they weren't installed properly by the previous owner and were leaking, and I had to remove the belly pan to access the main bolts and outriggers.
In my opinion I think you'd be hard-pressed to find a fully restored airstream for $20k. There is so much time and money put into these things that one would have to be very hard up for cash to sell it for so low of a price.
As to our current progress, we have 99.9% completed the water/leak testing phase and have everything pretty well sealed other than the door gasket, which as mentioned above we are in the process of replacing. That should be done today, and after one more water test we will be putting in the insulation, electrical wiring, and interior skins. I'll try to get an update posted this coming weekend with pictures.
|
|
|
|
|
02-15-2017, 09:45 AM
|
#32
|
|
Unclebumble
Currently Looking...
Morehead City
, North Carolina
Join Date: Feb 2017
Posts: 3
|
Full Renovation to Stella 1984 Ecella
Thank you for the quick reply. My name is John. I go by UncleBumble ( there's a story behind that nickname). I really like the AS and all the features they seem to have so that is why I am trying to get my head around what it would take to own and maintain one. I felt like $20K was really low and I am beginning to realize I may be out of my price range. I hate that! But I as I said, I am still interested in learning how they are put together and the issues the AS have. I get the idea any vender has their own set of problems, so this may still be something I may be able to attempt at some point. You just never know and I do like to be prepared. The engineer in me is just curious too.  It may be that I decide that it IS worth getting the best example (with a careful, knowledgable purchase) that I can and then working with that...even to the extent you are to get what I want....and spread the cost over a larger span of time. Soooo, I would think that taking the shell off would have it's own set of issues as you mentioned... all the rigging you mentioned for one. Actually having the PLACE that you could do all that would be one many people have. My neighbors would have a duck fit. It also seems that it would be hard to keep the thing from warping also. I have seen ( on this blog and other links it took me to) where people use a long ladder and a scaffold with chains though what looked like vent holes in the roof. In that case, what would you use to transfer the pressure evenly from the ladder to the shell? Seems it would take something soft and large to distribute that pressure? I never saw a clear picture or illustration in my "travels". Are there illustrated parts blow up drawings available to show a person how these things go together? John
|
|
|
|
|
02-16-2017, 07:52 AM
|
#33
|
Rivet Master  
1972 31' Sovereign
Lexington
, Minnesota
Join Date: Feb 2009
Posts: 3,989
|
Carb cleaner works very well to soften and help remove sealers and glues. Of all the things we tried when reno-ing our trailer, that worked the best.
Yes, it IS a ton of work, but there are trailers out there that don't need immediate gutting in order to use, John. Keep searching! You might find something in your price range, and then can update and use it at the same time.
Kay
|
|
|
|
|
02-17-2017, 04:06 AM
|
#34
|
|
Unclebumble
Currently Looking...
Morehead City
, North Carolina
Join Date: Feb 2017
Posts: 3
|
Full Renovation
Thank you, Kay for your encouraging words. I think what you have suggested is wise. Meanwhile, I plan to hang around here and learn as much as I can so that I know a good one when I see it and know what things need to be done and how to do them and how long and how much money and effort it will take. Thank all of you for being here to give in site to all of that. :^) John
|
|
|
|
|
03-26-2017, 01:27 PM
|
#35
|
2 Rivet Member
1984 31' Excella
Lenexa
, Kansas
Join Date: Jan 2017
Posts: 56
|
I've Been Slacking
Sorry, we've been working our tails off on this airstream and I have been lax in my posts. The below photos are skipping way ahead from where we left off, but it will give you a general idea of our progress - we've completed insulation, wiring, and a whole lot more since last time:


These are obviously not the final cushions, and the drawer fronts are not yet installed, but it's getting closer. The flooring shown in the photo above is vinyl before I trimmed it back (which we are putting under all of the "storage" type areas to keep weight down) - we'll be doing floating wood floor everywhere else.
I will post more deets about progress between then and now as soon as I have some time.
|
|
|
|
|
04-15-2017, 07:17 AM
|
#36
|
2 Rivet Member
1984 31' Excella
Lenexa
, Kansas
Join Date: Jan 2017
Posts: 56
|
Retroactive Post - 02-15-2017
Note: This is the first of several posts that will be coming retroactively; we have been extremely busy working away on this project and have made huge progress - yesterday we installed our new bamboo flooring! But before we get to that, I will put up details of our progress to get to that point.
February 15th - 2017
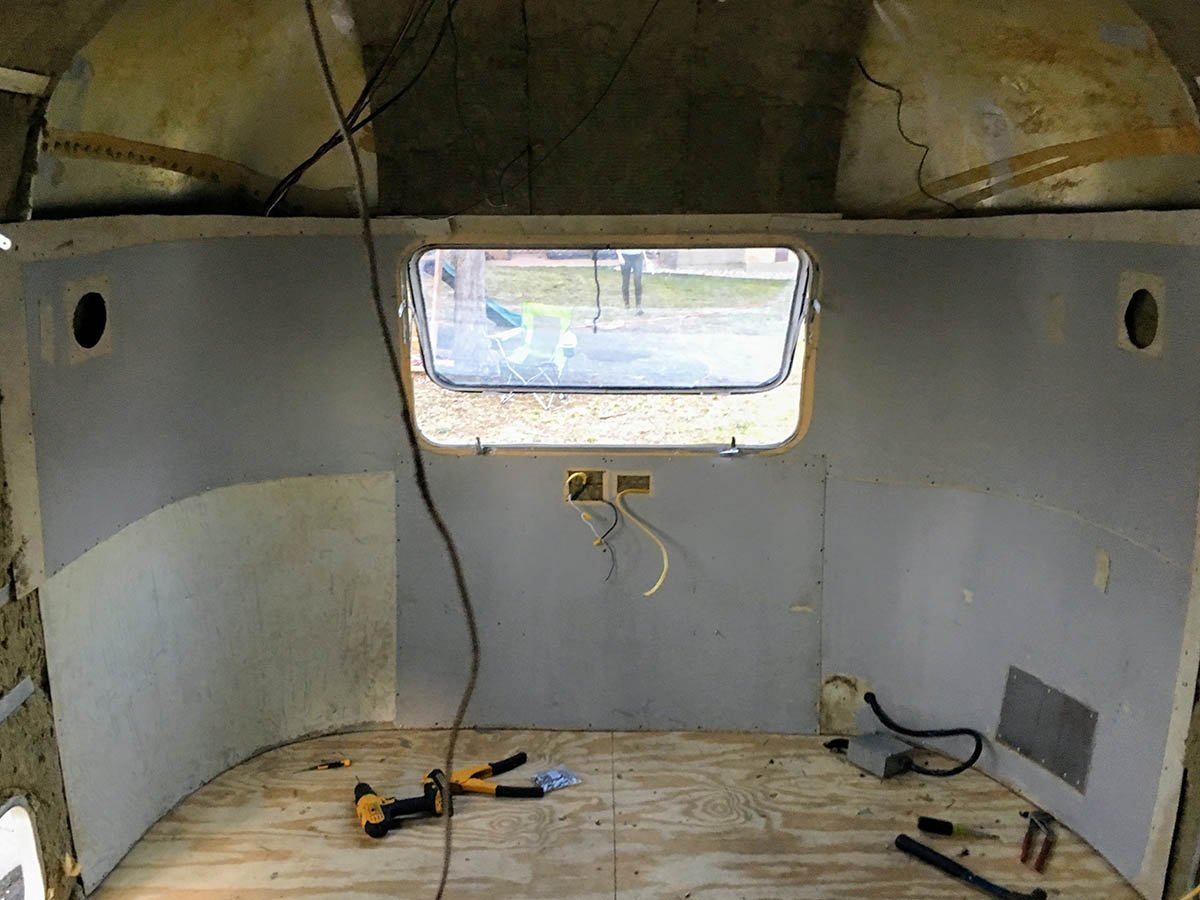
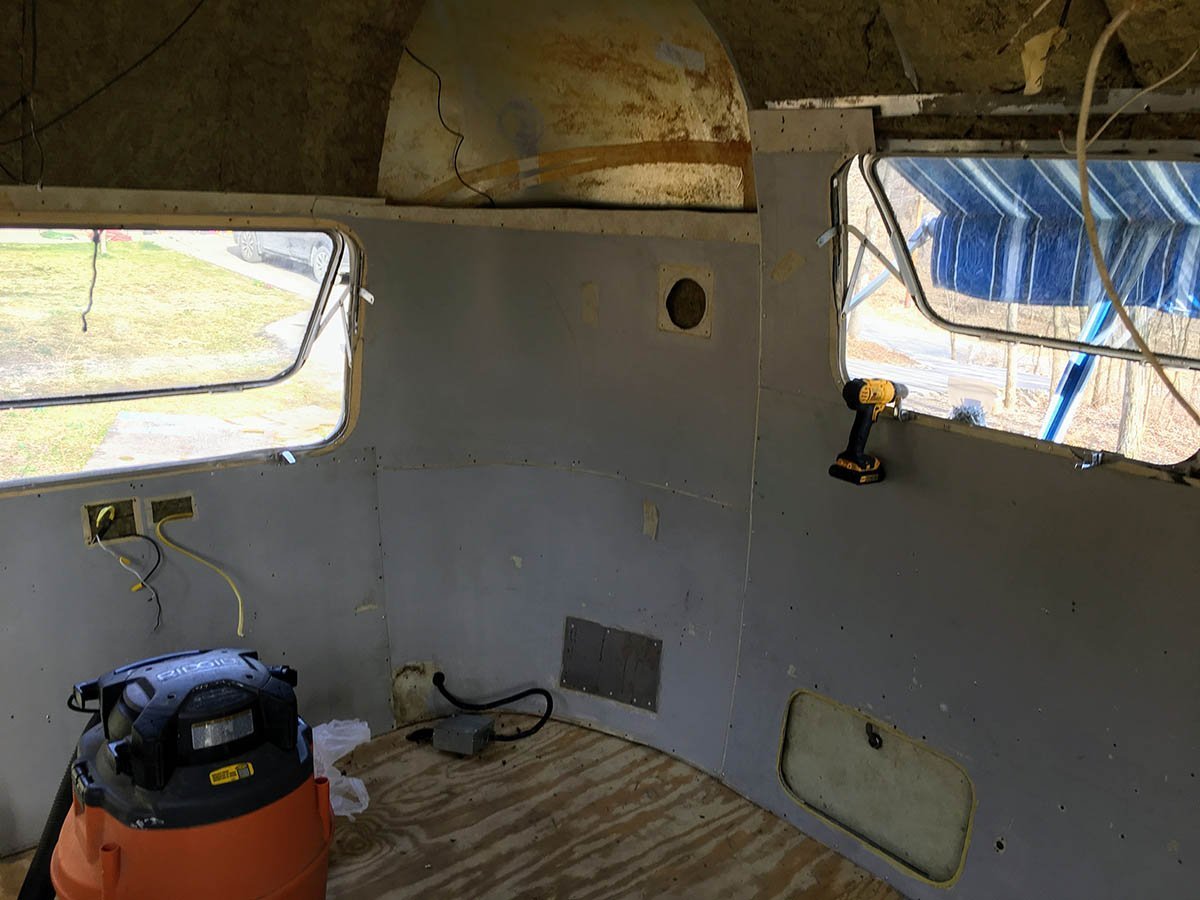
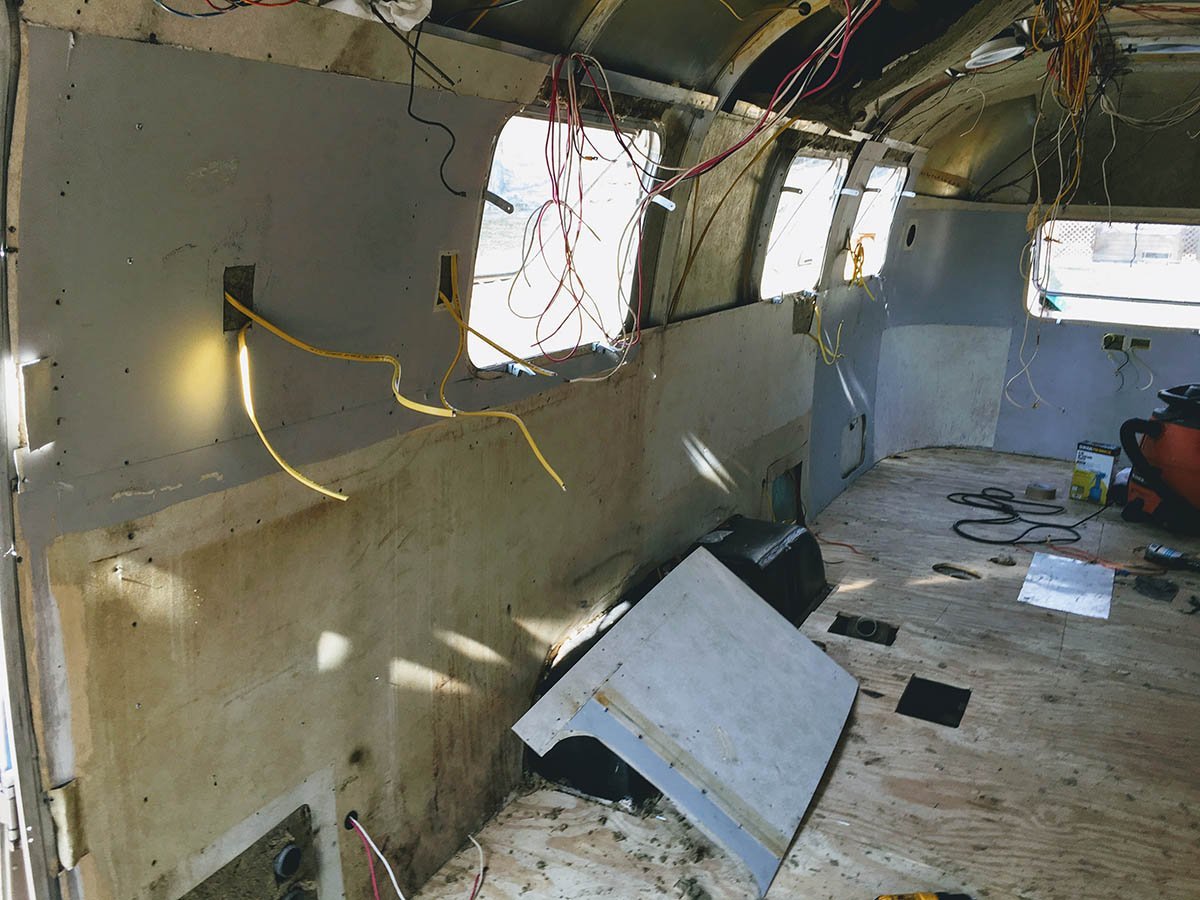
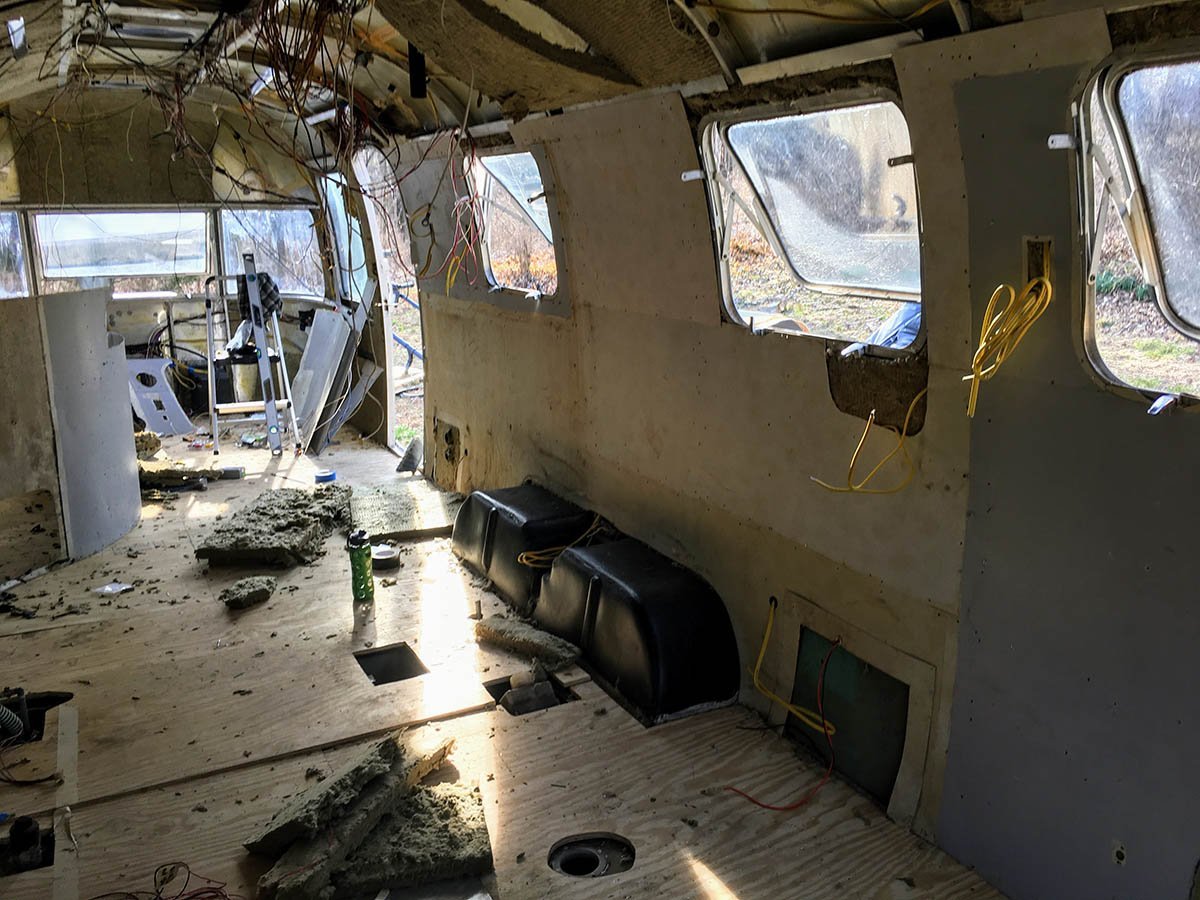
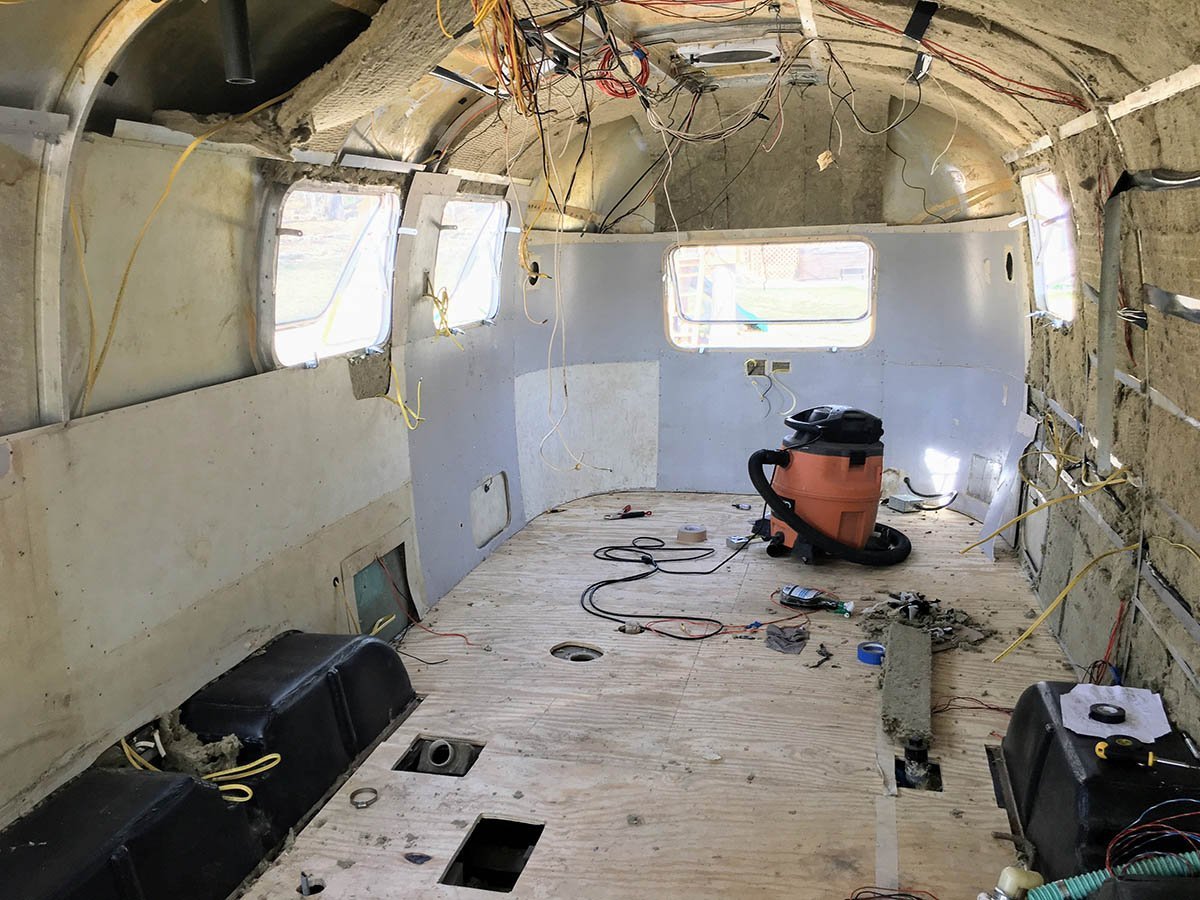
Today we wrapped up some remaining floor prep by adding a few more self-tapping screws for the subfloor:

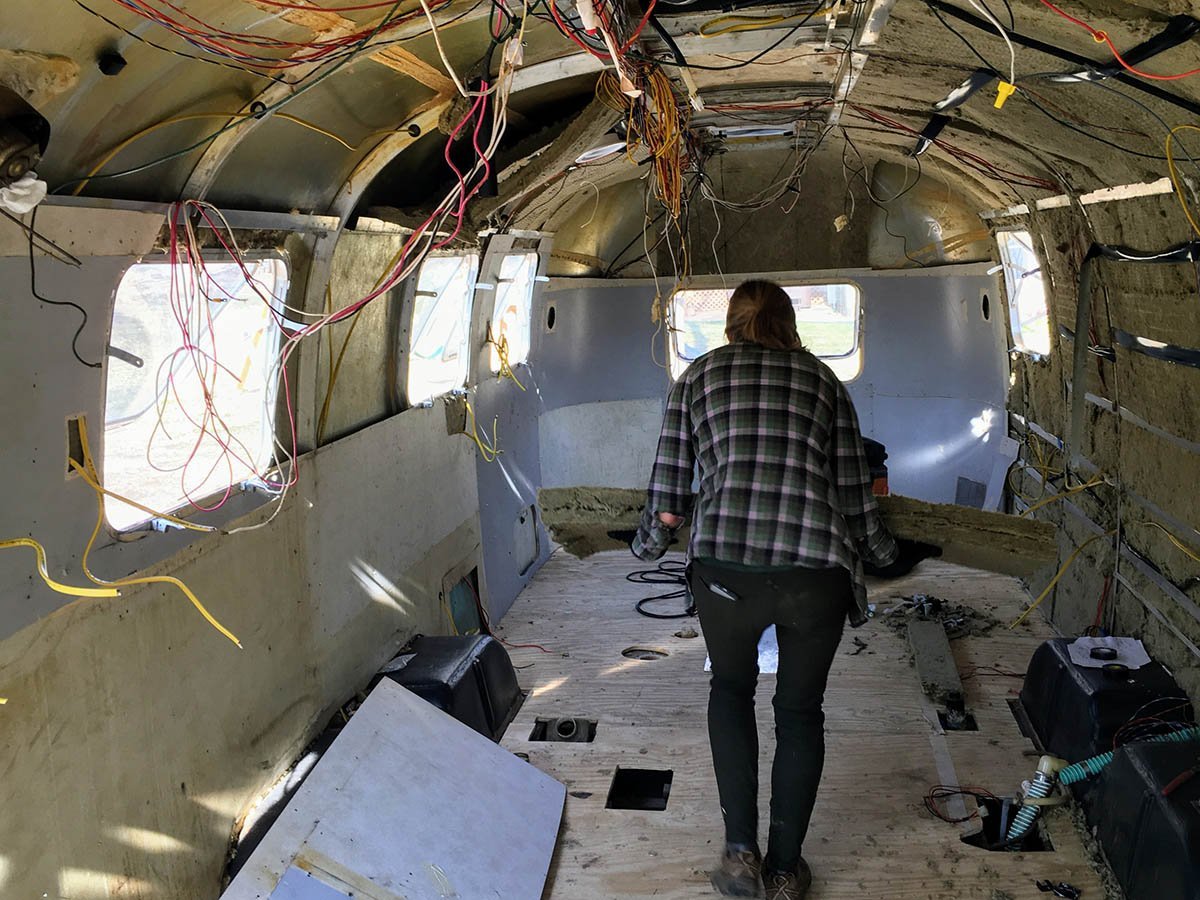
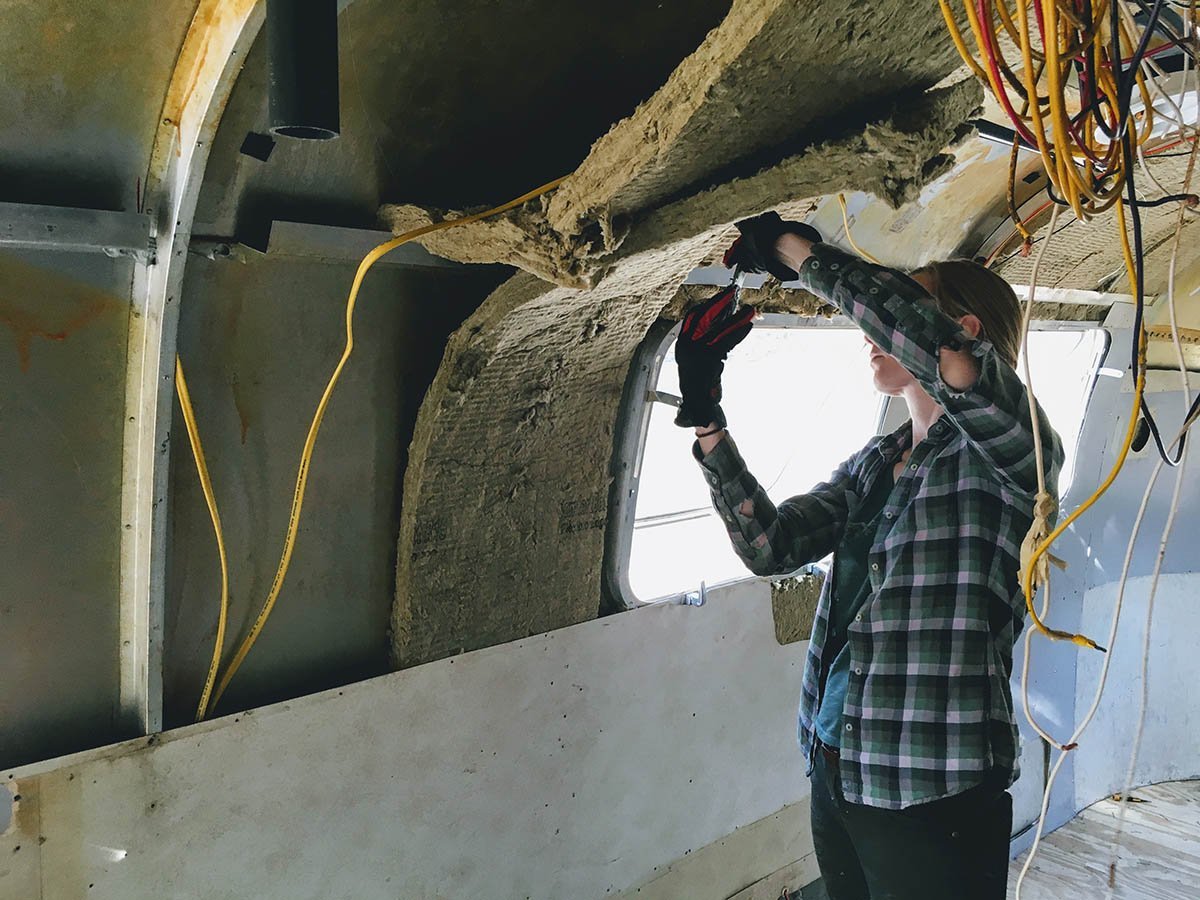
Next up is working on installing the insulation. We decided to go with Roxul. This stuff is apparently made from stool and spun into a fibrous wool sheet. Its supposedly mold resistant and less likely for rodents to build nests in, but time will tell.
It's pretty stiff, which makes it nice to cut but somewhat hard to hang, especially when one has a curved sloping wall to content with. The other issue is to buy it local we had to get the 3" thick variety, when our wall thickness is 1.5".*We ended up using a 20" Gerber machete I purchased from Cabela's to cut the sheets in half thickness-wise, and it worked great. Even though it's not fiberglass and is less-itchy than the pink stuff, it still causes some skin irritation so we gloved up and put on long-sleeve shirts:
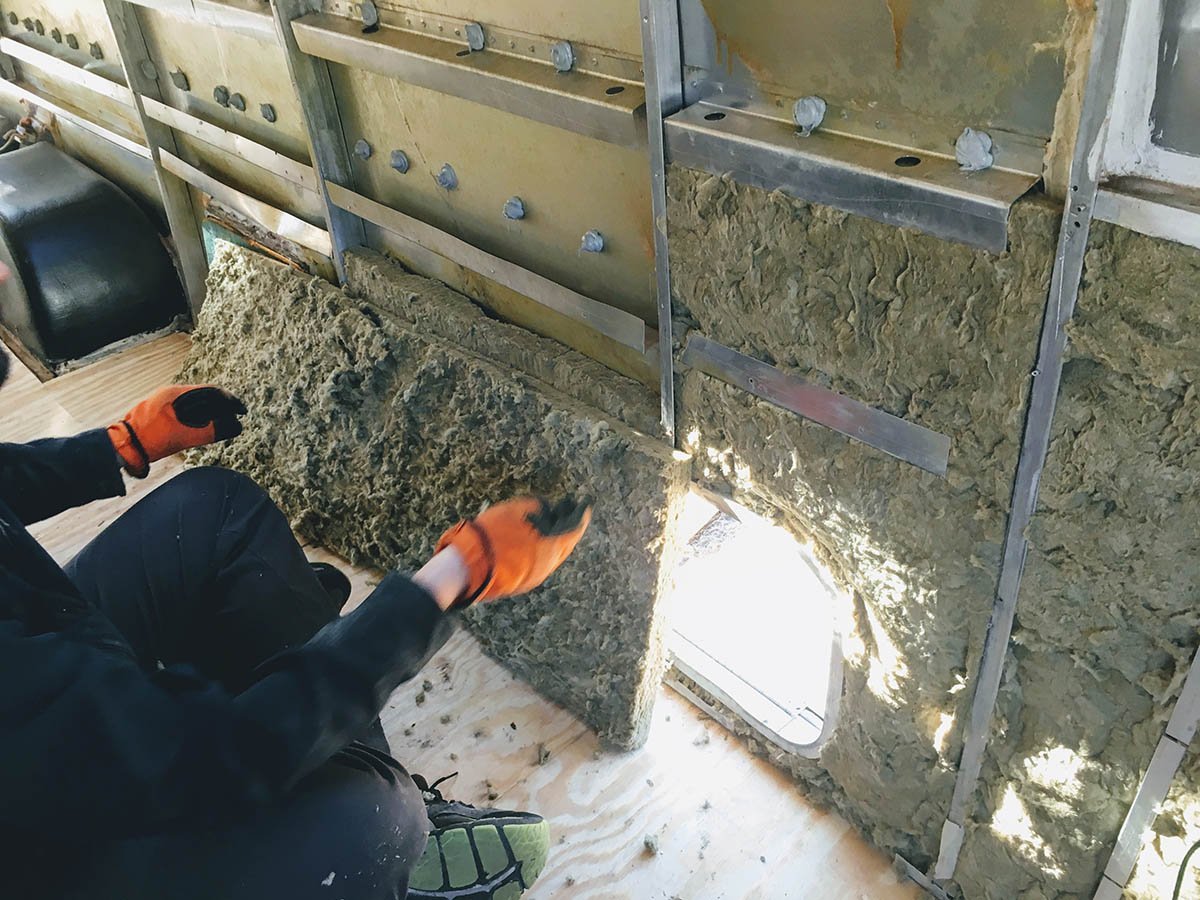
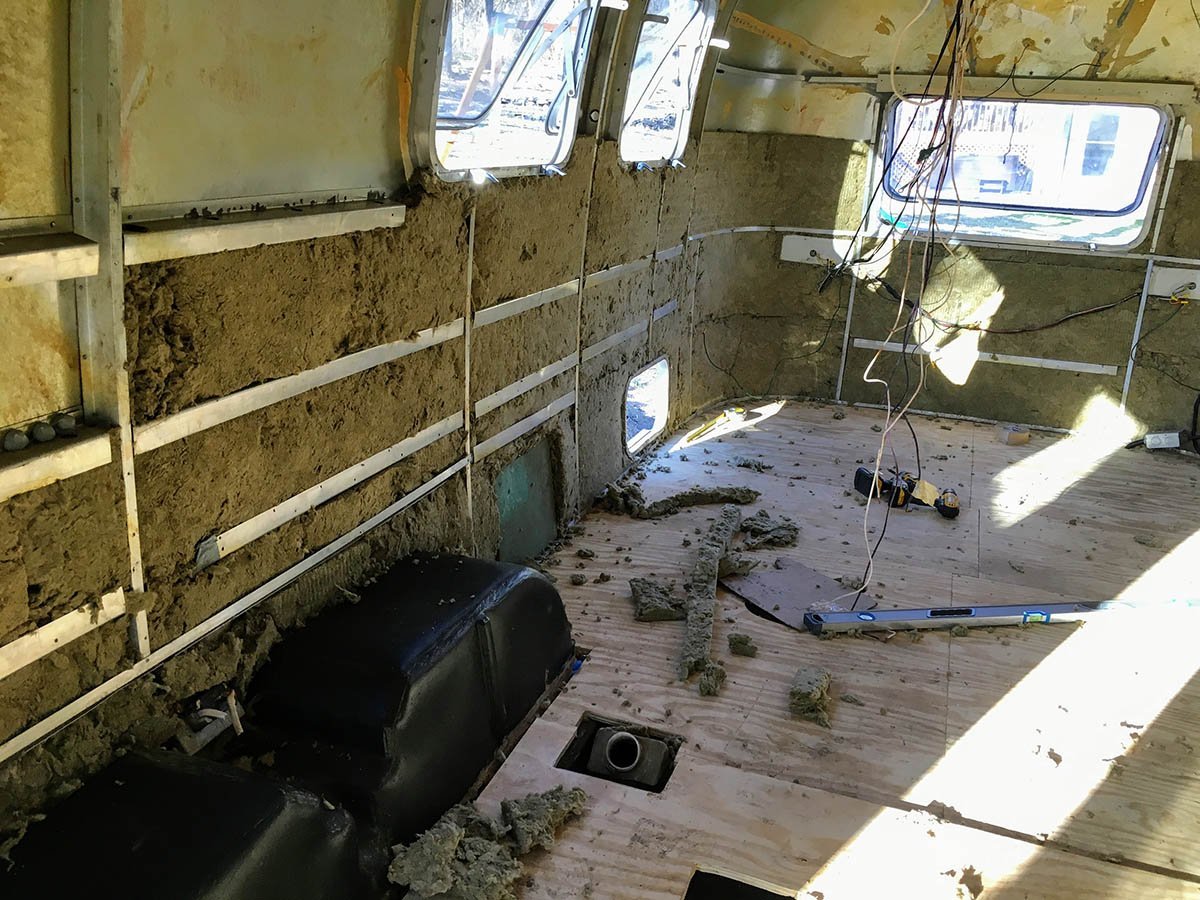
The lower areas went very quickly, leaving us with only the more difficult vertical sections to content with:
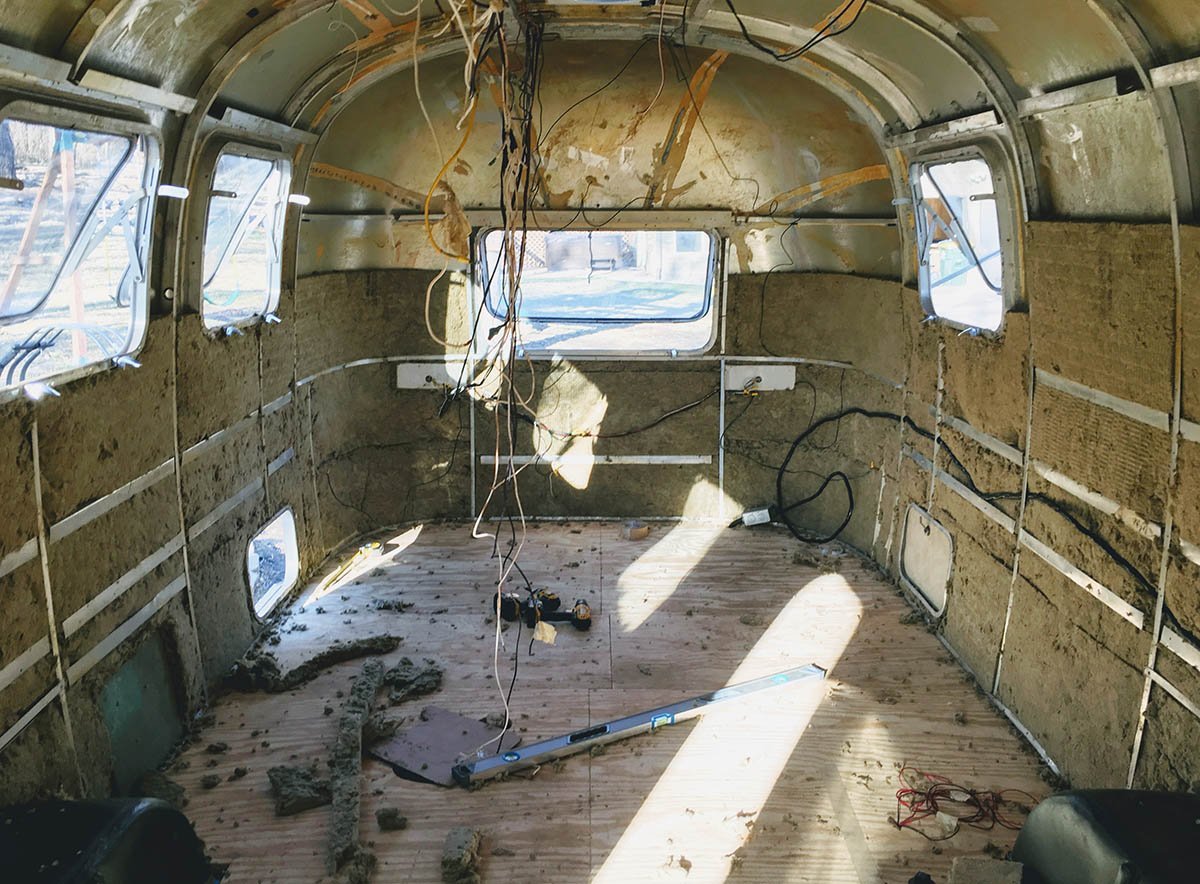
The Roxul is a bit too stiff to go on the wheelwells and have the covers fit, so we'll use Reflectex*for those when the time comes:
Next step, the upper sections!
|
|
|
|
|
04-15-2017, 07:18 AM
|
#37
|
2 Rivet Member
1984 31' Excella
Lenexa
, Kansas
Join Date: Jan 2017
Posts: 56
|
Retroactive Post - 02-19-2017
February 19th, 2017
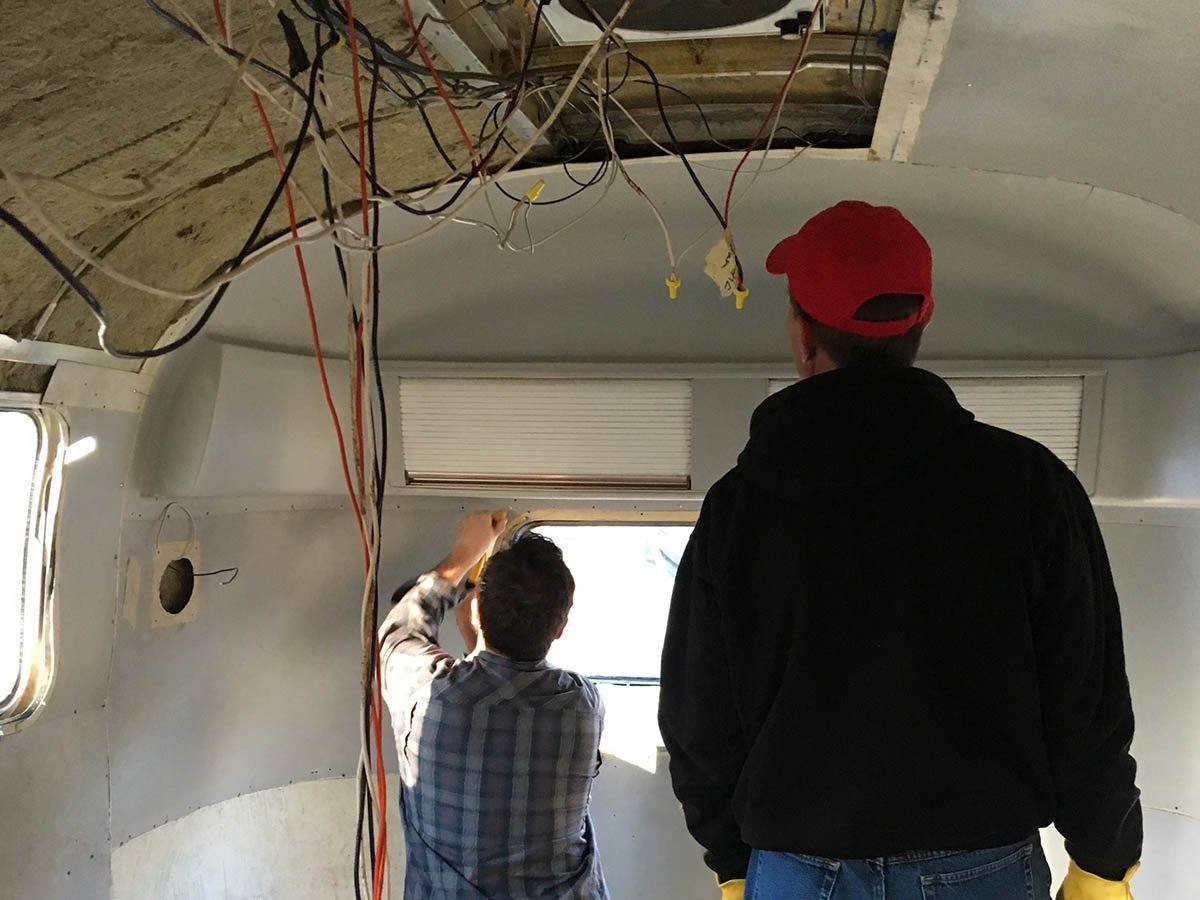
Today we decided to take a short break from hanging insulation so we could start putting up the interior aluminum skin. We started hanging*some of the ceiling panels but they were not cooperating/staying up very well on their own, even with black tape, so we figured having the skin in place a section below might help with the process. I was a bit nervous about this process, but it went suprisingly smoothly:
Although I had purchased a pneumatic riveter from Harbor Freight, I was a bit nervous to use it in the beginning so I ended up using my hand riveter for these panels. What a great forearm workout! Takes about three squeezes per rivet. I also didn't have any clecos, so I basically tacked in the corners of each sheet initially to make sure all was lining up correctly.
The process involved a bit of riveting, drilling out the rivet, adjusting, and re-riveting. Luckily Air Parts Inc. is a 20 minute drive from me and a bag of rivets is pretty cheap.
Next up was working down each side of the airstream getting the side panels back in place. We decided to scrub and clean them* after*we hang them because doing so outside was problematic due to weather and space reasons.
Now that we have the sides going we can go back to installing some insulation (hooray!):
Having*the extra lip from the lower skins made the process of installing the upper insulation slightly easier, but only barely. Still, we were happy with our progress:
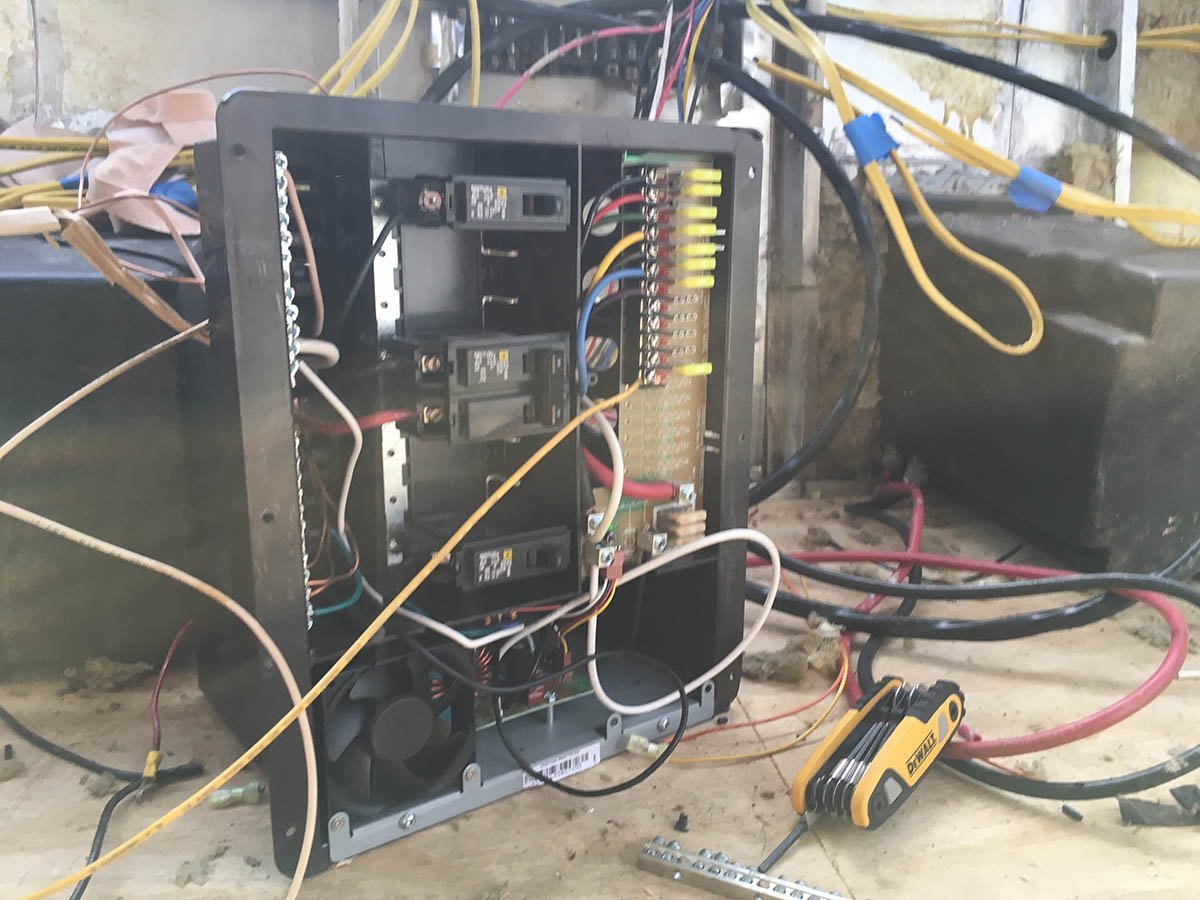
I also went ahead and hooked up and did some initial testing of our PD4560 power center. Looking pretty professional at the moment, haha:
|
|
|
|
|
04-15-2017, 07:19 AM
|
#38
|
2 Rivet Member
1984 31' Excella
Lenexa
, Kansas
Join Date: Jan 2017
Posts: 56
|
Retroactive Post - 02-25-2017
February 25th, 2017
We've been making some serious headway! With some help from my father-in-law to help hold things up, we got the endcaps installed:
It's definitely starting to look like an airstream again:
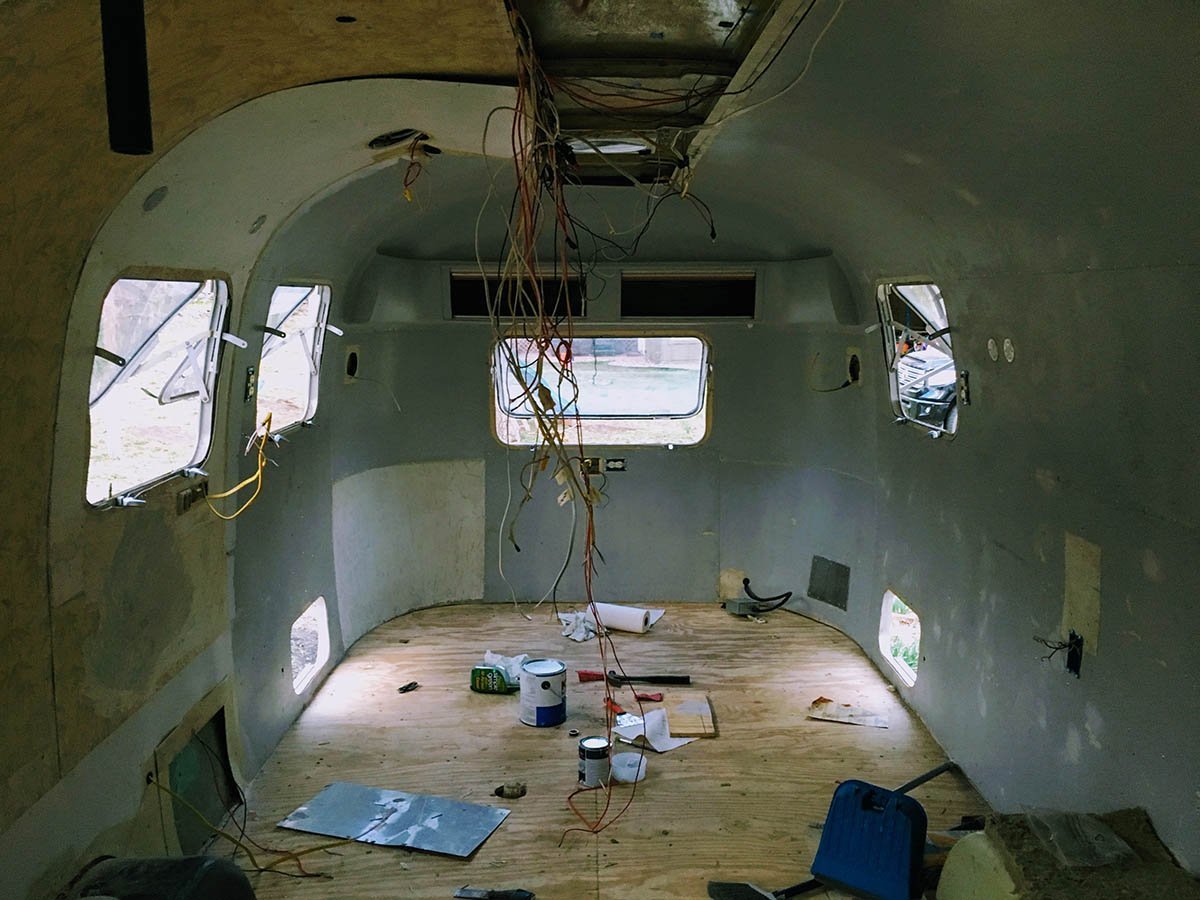
Earlier in the week I finished routing all of the tank sensor wires. We plan on putting the Sea Level Tank Monitor (709-4PH)*mounted to the side of the overhead bin to make checking levels convenient; here's to hoping I ran everything correctly:
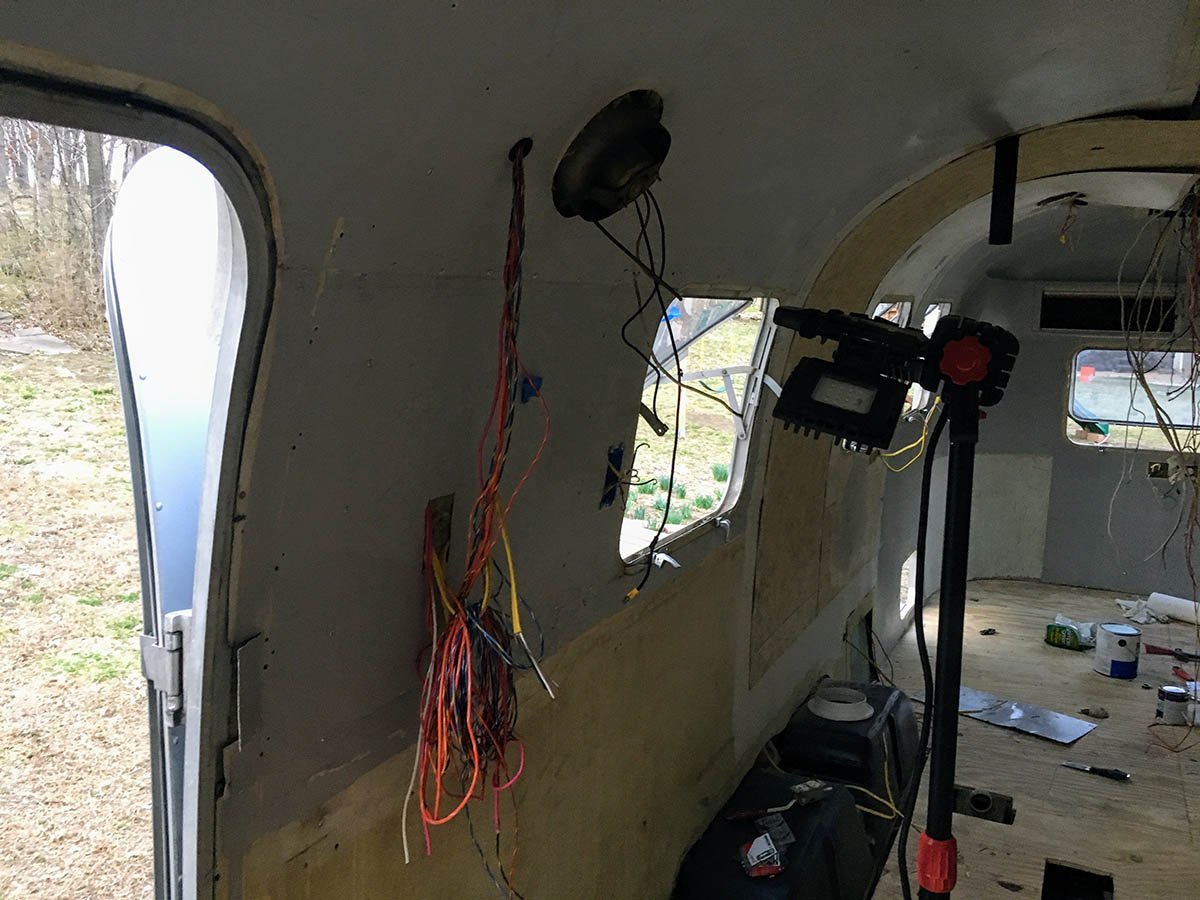
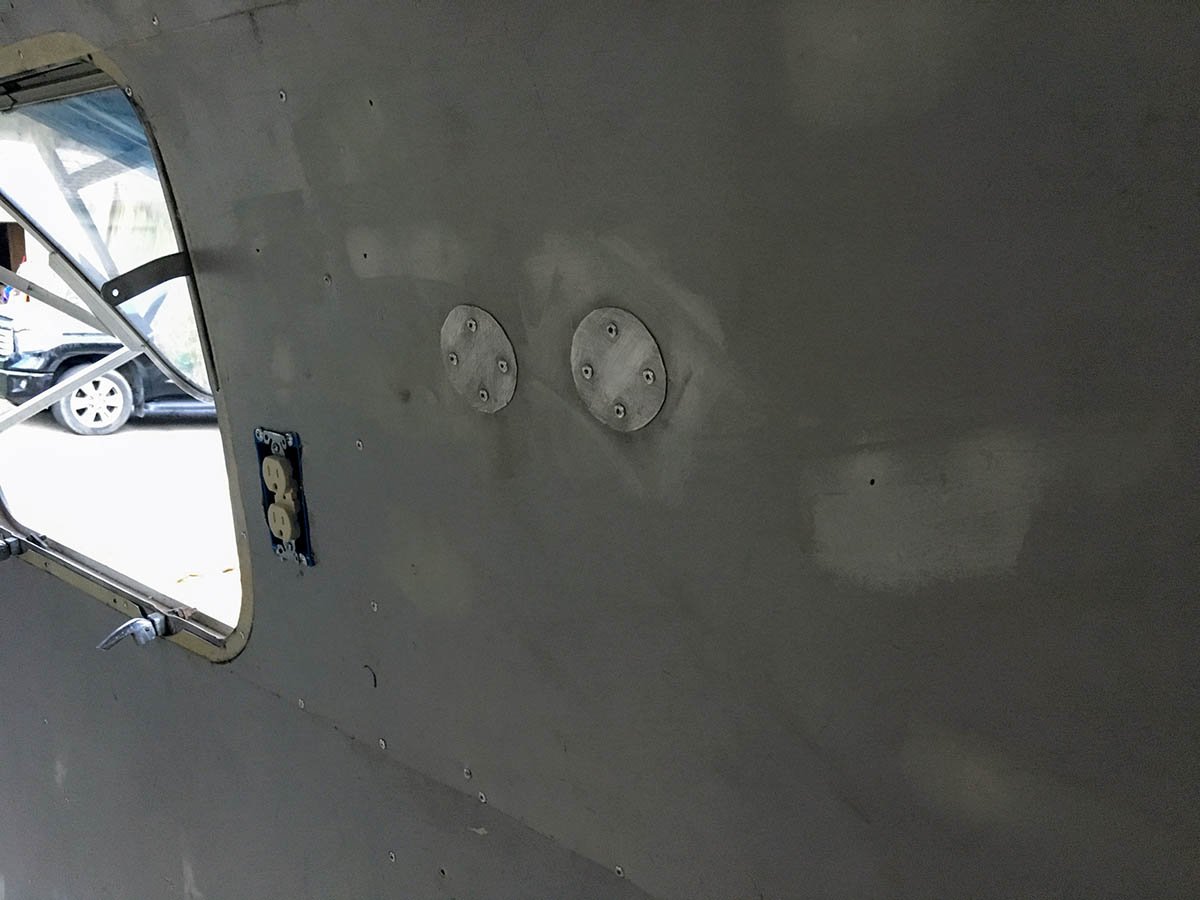
We had a lot of old holes from where the old lights were, so I made a bunch of patches and got them installed. Pretty simple process, use a cup as a template and use a sharpie to mark the circle, cut out with tin snips, then mount with rivets:
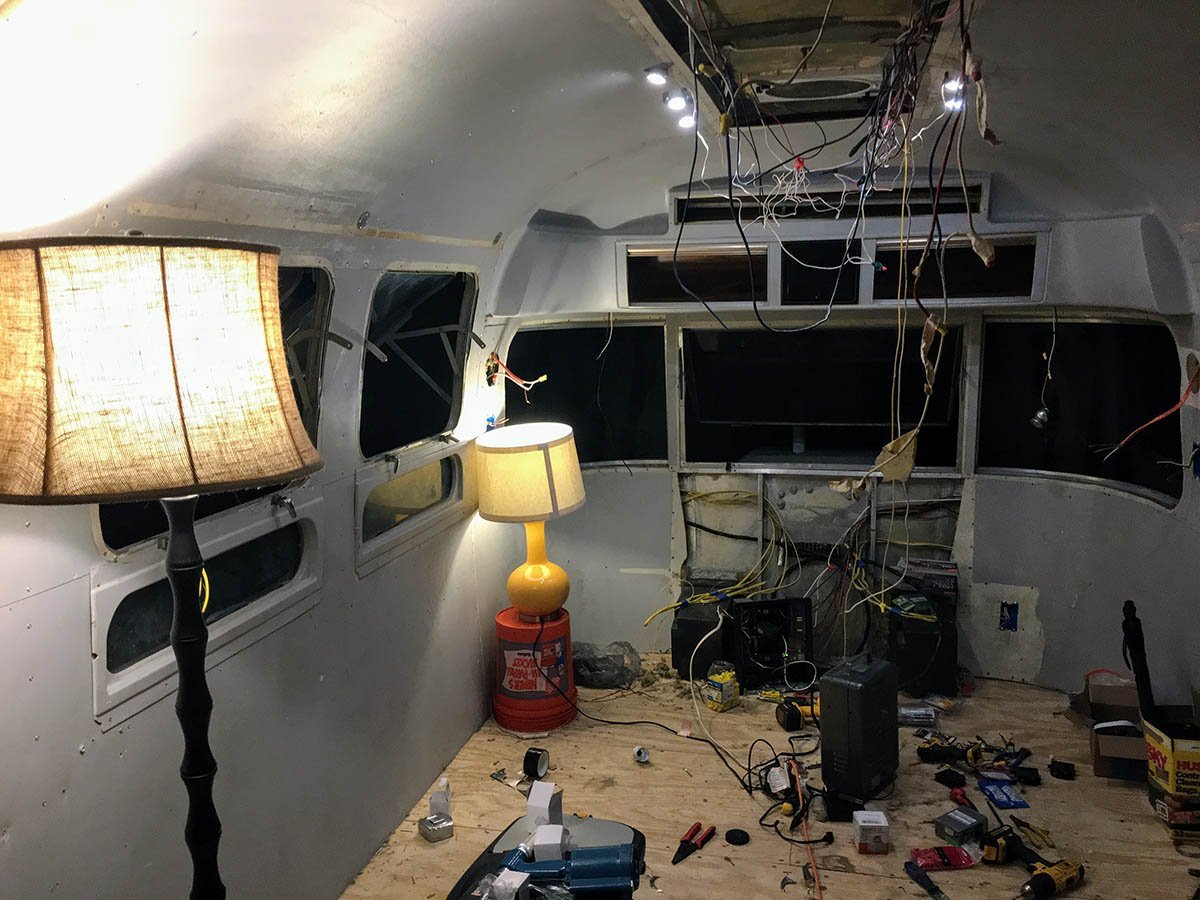
This electrical area is quickly becoming a mess but until we get a dinette built out it's sort of stuck in this limbo state. Now that we have the aluminum skins up, we marked all of the 110 wiring so it was obvious which run went where:

We are trying to figure out what lighting to go with. We ordered a bunch of led puck lights from SuperBrightLeds.com.*We taped them to the ceiling to test out spacing/brightness, and are digging the look. We also really like the "mood" of lamps, at least while testing, so maybe we will get wall sconces that are lampshades or something.
|
|
|
|
|
04-15-2017, 09:31 AM
|
#39
|
Rivet Master
1972 31' Sovereign
Lexington
, Minnesota
Join Date: Feb 2009
Posts: 3,989
|
Now that your insulation is all up, this is too little too late but maybe it'll help someone else: we used spray adhesive to adhere our insulation to the walls and ceiling until we could get the panels in over it. That way we weren't battling the falling insulation as we worked. Looks good, and you are making a ton of progress!
Kay
|
|
|
|
|
04-15-2017, 11:40 AM
|
#40
|
Rivet Master
1977 31' Sovereign
Vintage Kin Owner
Vintage Kin Owner
Sunset Valley
, Texas
Join Date: Jul 2016
Posts: 744
|
Thank you for taking the time to post your progress, I'll share this with my wife for inspiration...
I have a question about your choice of insulation though...
"Next up is working on installing the insulation. We decided to go with Roxul. This stuff is apparently made from stool and spun into a fibrous wool sheet. Its supposedly mold resistant and less likely for rodents to build nests in, but time will tell."
I have the sense of humor of a seventh grader...
|
|
|
|
|
|
|
Currently Active Users Viewing This Thread: 1 (0 members and 1 guests)
|
|
|
 Posting Rules
|
You may not post new threads
You may not post replies
You may not post attachments
You may not edit your posts
HTML code is Off
|
|
|
|

 Recent Discussions
 |
|
|
|
|
|
|
|
|
|
|
|
|
|
|
|
|
|
|
|
|
|


 Linear Mode

