Journey with Confidence RV GPS App RV Trip Planner RV LIFE Campground Reviews RV Maintenance Take a Speed Test Free 7 Day Trial ×
 

Go Back   Airstream Forums > Airstream Knowledgebase > Airstream Motorhome Forums > Mechanics Corner - Engines, Transmission & More...
Click Here to Login
Register Vendors FAQ Community Calendar Today's Posts Search Log in

Reply
 
Thread Tools Search this Thread Display Modes
 
Old 08-04-2015, 10:09 AM   #21
Rivet Master
 
92landyacht's Avatar
 
1992 36' Land Yacht
Grayson , Georgia
Join Date: Nov 2011
Posts: 1,724
New receiver/drier is on the way and a huge package of O-rings that are R134/R12 compatible. Should have all the parts needed to start on her by Thursday. The only part that I haven't been able to source out is the Expansion valve. Hoping that it's still in good shape.

Found an adaptor right at the R/D outlet. I think it's a quick connect valve but not sure. Inside is a plunger/spring assembly that looks like a check valve. Anyone have an idea as to what it is? If it was a quick connect valve, then I think I can just gut it install it without the insides.
92landyacht is offline   Reply With Quote
Old 08-05-2015, 12:51 PM   #22
Rivet Master
 
Keyair's Avatar
 
1984 34.5' Airstream 345
Foothill Ranch , California
Join Date: Mar 2010
Posts: 4,695
Images: 1
All good solid advice!

I have worked on my own and my son's vehicles over the last 15 years, and virtually all of them are or were R12 systems. We did out AC license too!

My son has actually back converted his 1987 Mercedes 300TE from 134a to R12, and used the later E320 larger condenser/twin fans to boost his AC system for use in Az... He says it works far better than the original and the 134a conversion now.

My 0.02c...

1/ If you are looking for info on your basic system, look no further than the relevant model years of GM C or K trucks.

2/ All the system I have done so far, the issue was the 99.9% the original O rings leaking... of course, that meant a new dryer, and maybe orifice valve for surety.

4/ I have always started with pulling a Vacuum on the empty system... its free, and sometimes tells you a lot for nothing! Hear the leak... awesome... after that, I have also used my compressor to pressurize to find other leaks with a length of tubing to my ear.

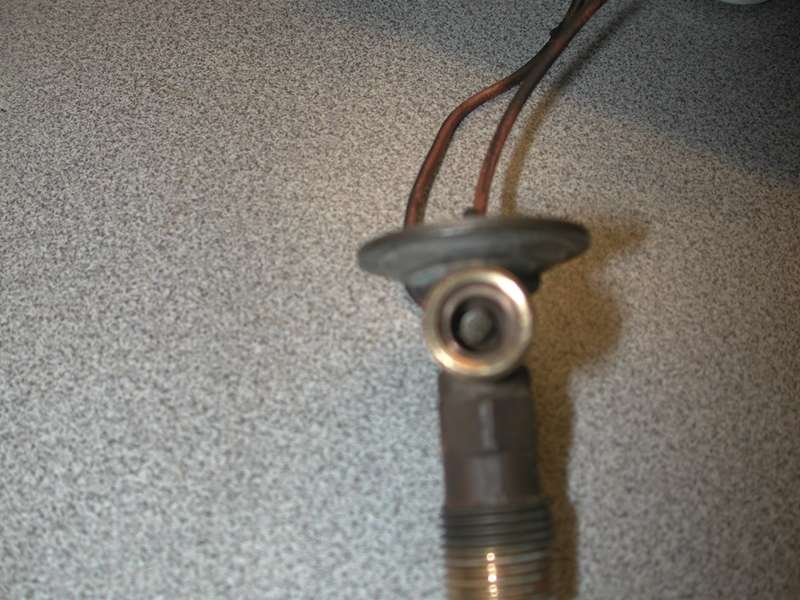
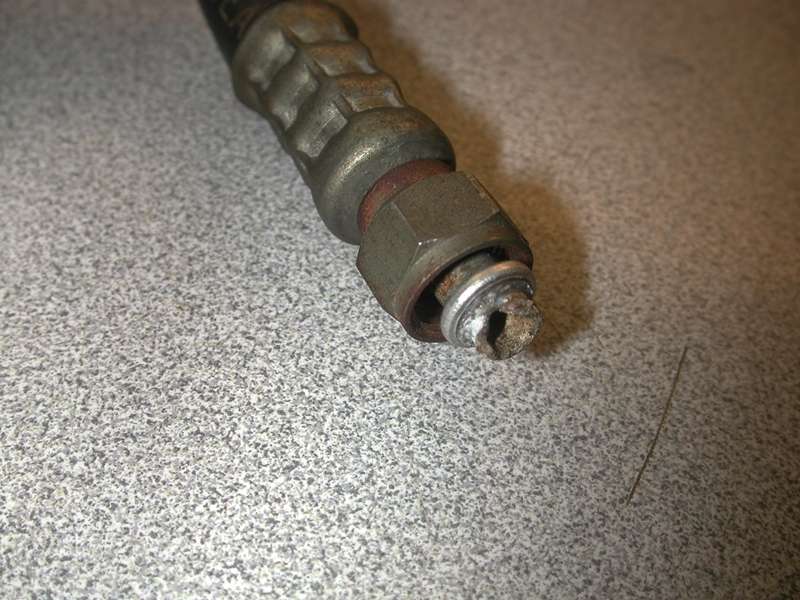
5/ Replace EVERY O ring in the system joints... with HNBR units. I bought a Metric and Imperial kits and it has covered EVERTHING in my garage!
Cheap too.. Example.
http://www.amazon.com/Performance-To.../dp/B0002KO1XK

6/ Once the new components and rings are installed pull the max vacuum you can do with your pump and see if it holds for 24hrs...

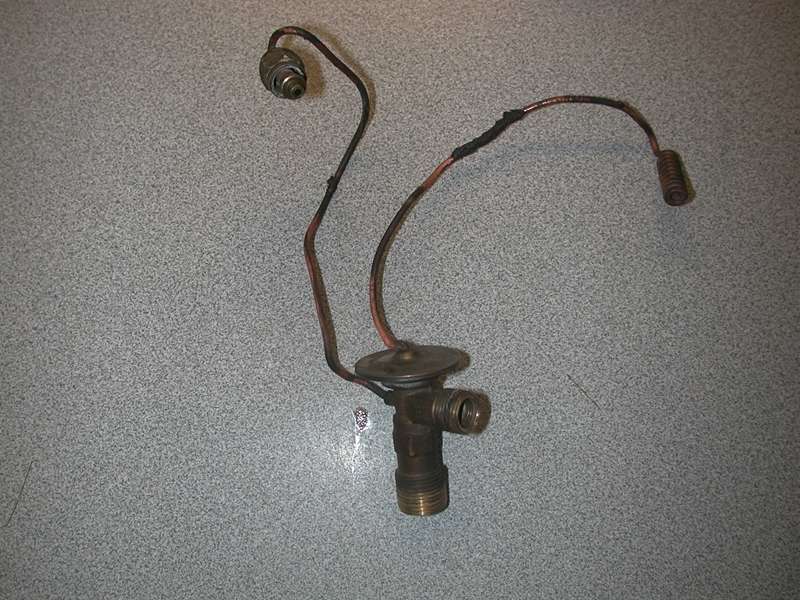
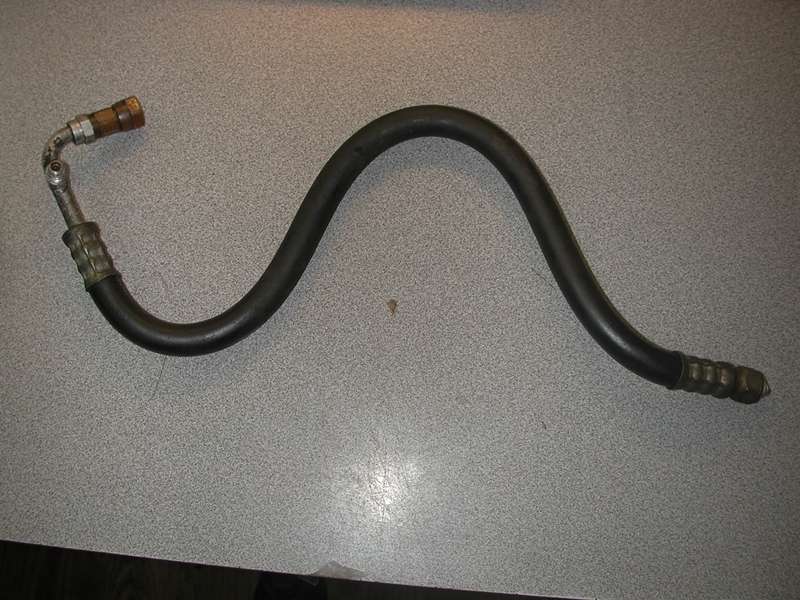
Here is a couple of pics of the revamp I did on my now sold 1991 Mercedes 190E...
Compressor reseal with HNBR green rings visible...


After recharging with R12, it would output 35f air at 2000rpm with ambient air at 90f!


For years later, the new owner says its still ice cold!

I was lucky to find this on Craigs List for $200, so now, I am completely setup!

Keyair is offline   Reply With Quote
Old 08-06-2015, 11:59 AM   #23
Rivet Master
 
92landyacht's Avatar
 
1992 36' Land Yacht
Grayson , Georgia
Join Date: Nov 2011
Posts: 1,724
Well, it looks like I found the primary source of my AC problems. While I was in the process of changing out all the O-rings I could get to, I found that my expansion valve inlet was completely clogged with desiccant from a ruptured receiver/drier. The line leading to the expansion valve must have gotten real hot since the piping going into the expansion valve had actually melted and caused the loss of Freon. I was able to clear the debris from the expansion valve inlet using brake cleaner. There was an inlet filter screen on that side of the valve. The other side seemed to be clean with no signs of debris. I may replace it anyway. That's assuming that I can find a replacement unit that matches. Not easy since I don't have any part numbers or what they came off of. Removing the expansion valve was actually pretty easy since all the components were under the hood and not under the dash. Here are some pictures:

Expansion valve after I cleared the inlet screen:


Melted hose end that went into the expansion valve:


Now I need to find a replacement hose or have the fitting replaced:


Where the pressure switch connects to:


That brass fitting on the end of the hose is the quick connect/check valve.

If anyone knows where I can find these parts or what they came off of, it would be greatly appreciated.
92landyacht is offline   Reply With Quote
Old 08-06-2015, 12:18 PM   #24
Rivet Master
 
bkahler's Avatar

 
1974 20' Argosy 20
Richmond , Kentucky
Join Date: Jan 2003
Posts: 9,116
This is the Expansion valve I bought for my Argosy. I've never seen an expansion valve with an electrical connector like the one shown in your picture so this one may not work.

You can also look here for more expansion valves.

Brad
__________________
Air forums # 1674
1974 20' Argosy Motor Home
1975 24' Argosy Motor Home
1974 31' Excella trailer (parting out, as of 4/1/2015 I have wheels & windows left to sell)
bkahler is offline   Reply With Quote
Old 08-06-2015, 01:27 PM   #25
Rivet Master
 
92landyacht's Avatar
 
1992 36' Land Yacht
Grayson , Georgia
Join Date: Nov 2011
Posts: 1,724
No electrical connection on mine either. The thing that looks like an electrical wire is actually a temperature sensor and the other is a pressure sensor. Both control the diaphragm. I think I was able to locate a match for the expansion valve on ebay:
Universal motorhome RV A C Expansion Valve with Female Oring Fitting | eBay


Now I only need to get the damaged hose repaired or replaced.
92landyacht is offline   Reply With Quote
Old 08-06-2015, 02:32 PM   #26
Rivet Master
 
Keyair's Avatar
 
1984 34.5' Airstream 345
Foothill Ranch , California
Join Date: Mar 2010
Posts: 4,695
Images: 1
Great pics and info Guys!
Keyair is offline   Reply With Quote
Old 08-06-2015, 02:34 PM   #27
Rivet Master
 
Keyair's Avatar
 
1984 34.5' Airstream 345
Foothill Ranch , California
Join Date: Mar 2010
Posts: 4,695
Images: 1
Look at these peeps.
Cold Hose - AC Hoses, Hose Kits and Fittings
Keyair is offline   Reply With Quote
Old 08-09-2015, 10:13 AM   #28
Rivet Master
 
92landyacht's Avatar
 
1992 36' Land Yacht
Grayson , Georgia
Join Date: Nov 2011
Posts: 1,724
Had a local CARQUEST auto parts store make up the new replacement hose. They reused one of the custom fittings that had the switch port in it. The rest of the hose is all new and only cost me $36 for them to make it up.

Now I'm just waiting on the expansion valve to arrive in order to button up the system. Fist thing after that is to vacuum it down and verify there are no leaks. If all goes well I'll be charging the system soon after that.

One question though... I know I've lost some of the oil charge when I disconnected the receiver dryer and found there was still some pressure in the system. I've purchased a 4oz bottle of R12 Freon with oil charge and was planning on just putting that in first after I vacuum the system down. Figure I'll loose some more of the oil charge during that process as well. Any ideas on this?

The high and low ports are directly on the back side of the compressor. I'm assuming that I need to only add vaporized Freon/oil charge to that port. I don't want to risk hydro locking the compressor with fluid. I could also add the oil charge at the switch port between the receiver/drier and the expansion valve since that switch port is a standard R12 high side port and is accessible from the front grill area. That area normally has fluid in it if I understand the system correctly. My plan is to add the oil charge without the compressor running as the first thing and then add the rest of the Freon as vapor on the low pressure suction port on the compressor.

92landyacht is offline   Reply With Quote
Old 08-27-2015, 07:14 AM   #29
Rivet Master
 
92landyacht's Avatar
 
1992 36' Land Yacht
Grayson , Georgia
Join Date: Nov 2011
Posts: 1,724
VICTORY!!! Finally got a chance to pull a vacuum on it and fill the system. Pressures now sitting at 30psi low side and 205 on the high side. Front electric fan came on as expected. Put in two 14oz cans of Freon 12 with dye, one partial can without dye and one can of oil charge. She's blowing cold air out the dash for the first time since I've own her. Very sweet to have dash air again. Total cost for the repair was $185. Replaced the Expansion valve, receiver/drier and one hose.
92landyacht is offline   Reply With Quote
Old 08-27-2015, 04:47 PM   #30
Rivet Master
 
bobmiller1's Avatar

 
2005 34' Classic S/O
2006 39' Land Yacht 396 XL
north blenheim , New York
Join Date: Sep 2012
Posts: 2,847
Good job !
bobmiller1 is offline   Reply With Quote
Reply


Currently Active Users Viewing This Thread: 1 (0 members and 1 guests)
 

Posting Rules
You may not post new threads
You may not post replies
You may not post attachments
You may not edit your posts

BB code is On
Smilies are On
[IMG] code is On
HTML code is Off
Trackbacks are Off
Pingbacks are Off
Refbacks are Off


Similar Threads
Thread Thread Starter Forum Replies Last Post
R-12 Dash AC Recharge Help dadstoy Mechanics Corner - Engines, Transmission & More... 30 05-20-2021 11:46 PM
120 Volt outlets w/USB ports PA BAMBI II Electrical - Systems, Generators, Batteries & Solar 3 06-30-2014 05:52 AM
Audio ports HDMI cords jkinglet Sprinter and B-van Forum 7 05-22-2014 08:10 AM
What US ports ship trailers to UK Edinburgh Shipping & Export/Import 15 09-21-2012 03:07 AM
Recharge Time henw Batteries, Univolts, Converters & Inverters 37 01-28-2010 02:41 PM


Featured Campgrounds

Reviews provided by

Disclaimer:

This website is not affiliated with or endorsed by the Airstream, Inc. or any of its affiliates. Airstream is a registered trademark of Airstream Inc. All rights reserved. Airstream trademark used under license to Social Knowledge LLC.


All times are GMT -6. The time now is 05:53 PM.


Powered by vBulletin® Version 3.8.8 Beta 1
Copyright ©2000 - 2024, Jelsoft Enterprises Ltd.